First drive features, Trunk lid release switch, Nissan intelligent key – NISSAN 2014 Sentra - Quick Reference Guide User Manual
Page 8: System (if so equipped)
6
To view detailed instructional videos regarding these and other features,
please go to www.nissanownersinfo.mobi.
02
TRUNK LID RELEASE SWITCH
Use one of the following methods to unlatch
the trunk lid, then raise the lid to open
the trunk:
Push the trunk opener request switch
01
, located in the center under the trunk handle,
for more than 1 second. The doors must be
unlocked or the NISSAN Intelligent Key
®
must be
with you (that is, in your pocket or purse).
Press the trunk release button
HOLD
02
on the key
fob for more than 1 second.
Push the trunk lid release
03
down. The release is
located to the left of the steering wheel.
For more information, refer to the “Pre-driving checks and adjustments
(section 3)” of your Owner’s Manual.
03
02
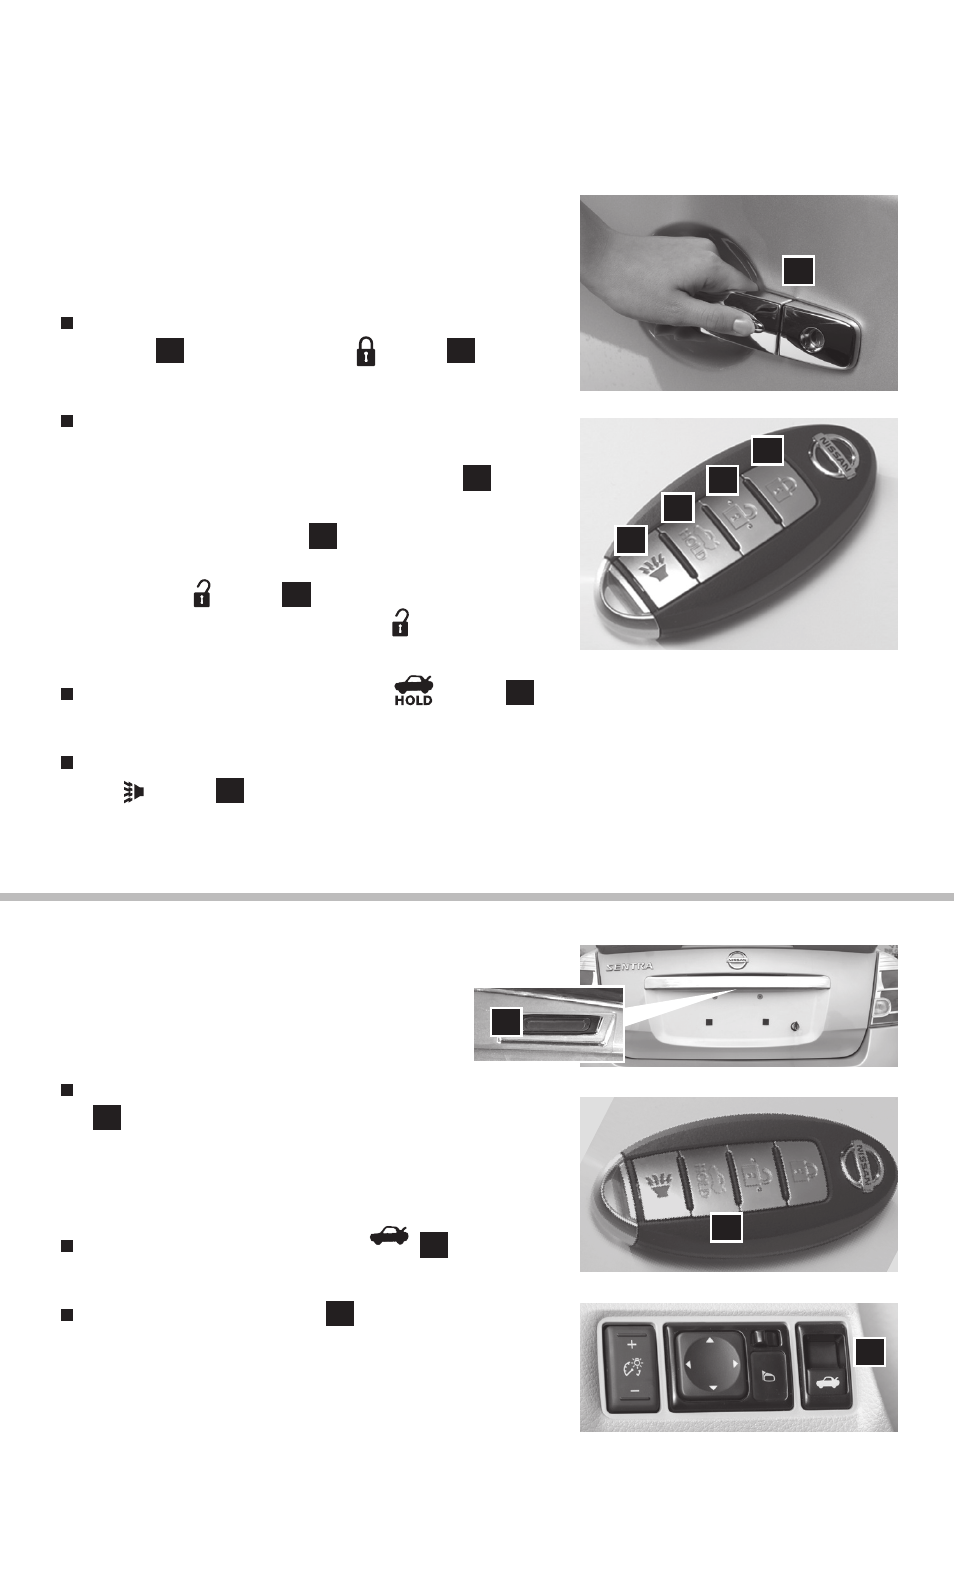
NISSAN INTELLIGENT KEY
®
SYSTEM (if so equipped)
The NISSAN Intelligent Key
®
system allows you to lock
or unlock the vehicle, open the trunk and start the engine.
It is important to make sure the Intelligent Key is with you
(that is, in your pocket or purse).
To lock the vehicle, push either door handle request
switch
01
once or press the button
02
on
the key fob.
To unlock the vehicle, perform one of the
following procedures:
• Push either door handle request switch
01
once;
the corresponding door will unlock. Push the door
handle request switch
01
again within
60 seconds; all other doors will unlock, or
• Press the button
03
on the key fob to unlock
the driver’s side door. Press the button again;
all other doors will unlock.
To release the trunk lid, press the
button
04
for more than 1 second. Lift the trunk lid
to access the trunk.
The Intelligent Key can also be used to activate the panic alarm by pressing and holding
the button
05
for more than 0.5 seconds. Once activated, the panic alarm and
headlights will stay on for a period of time.
For more information, refer to the “Pre-driving checks and adjustments (section 3)” of your Owner’s Manual.
01
02
03
04
05
01
FIRST DRIVE FEATURES