Craftsman LAWNSWEEPER 486.242211 User Manual
Page 9
9
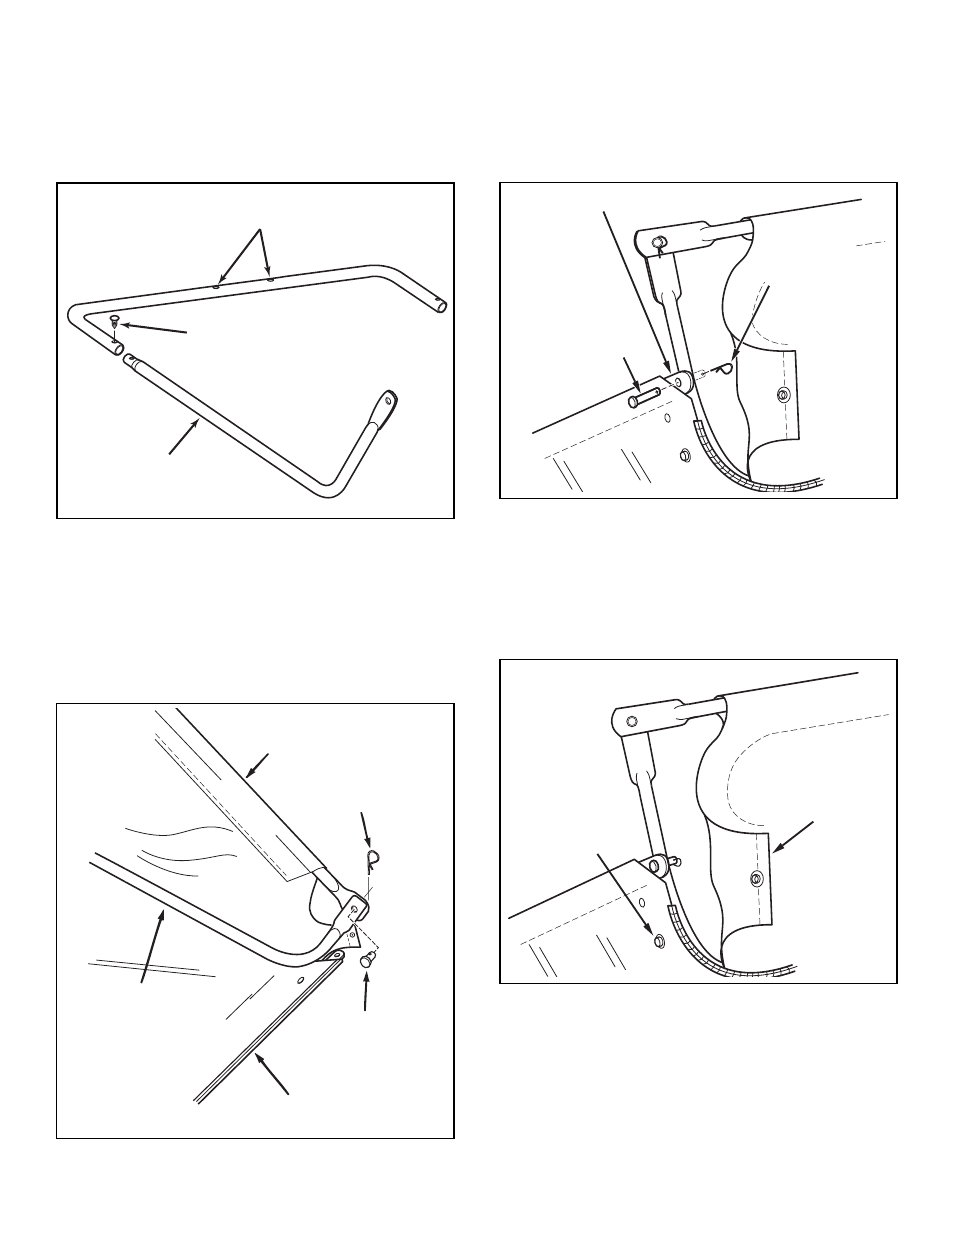
STEP 11: (SEE FIGURE 13 AND 14)
• Turn the second rear hopper tube so that the brace
holes in the middle of the tube
face up. Assemble
the ends of the rear hopper tube onto the ends of the
lower hopper side tubes. Fasten together using plastic
plugs (Z).
STEP 12: (SEE FIGURE 15 AND 16)
• Insert the bag frame strap into the stitched sleeve
along the front edge of the bag bottom.
• Assemble the bag frame strap to the lower hopper
side tubes using two 1/4" x 1-1/8" clevis pins (P) and
3/32" hair cotter pins (N).
LOWER
HOPPER
SIDE TUBE
PLASTIC PLUG (Z)
REAR HOPPER TUBE
(brace holes on top)
• Place the assembled lower hopper tubes into the
bottom of the hopper bag
• Attach the ends of the lower hopper side tubes to the
inside of the upper hopper side tubes using two 3/8"
x 1/2" clevis pins (O) inserted from the inside, and two
3/32" hair cotter pins (N).
LOWER HOPPER
SIDE TUBE
HOPPER BAG
BOTTOM
UPPER HOPPER
SIDE TUBE
3/8" x 1/2"
CLEVIS PIN (O)
3/32" HAIR
COTTER PIN (N)
1/4" x 1-1/8"
CLEVIS PIN (P)
3/32" HAIR
COTTER PIN (N)
BAG FRAME STRAP
• Secure the bag corners around the lower hopper side
tubes by snapping the bag flaps to the bag bottom on
both sides.
SNAP
FLAP
FIGURE 13
FIGURE 14
FIGURE 15
FIGURE 16