Cooper Instruments & Systems DCI 120 Bridge/Strain Gauge Data Loggers User Manual
Page 2
CF 179
2
Rev A 2008.07.08
Installation Guide
Installing the Interface cable
- IFC200, IFC202 or IFC300; Refer to the “Quick Start Guide” included in the package.
- IFC110, IFC102 or IFC103; Plug the serial cable into the port and verify it is secure.
- USB-1 or USB-101; Install the USB drivers from the CD provided in the kit, than plug the USB cable into the
computer and the serial cable into the serial port.
Installing the software
Insert the Software CD in the CD-ROM Drive. If the autorun does not appear, locate the drive on the computer
and double click on Autorun.exe. Follow the instructions provided in the Wizard.
Connecting the data logger
- Once the software is installed and running, plug the interface cable into the data logger.
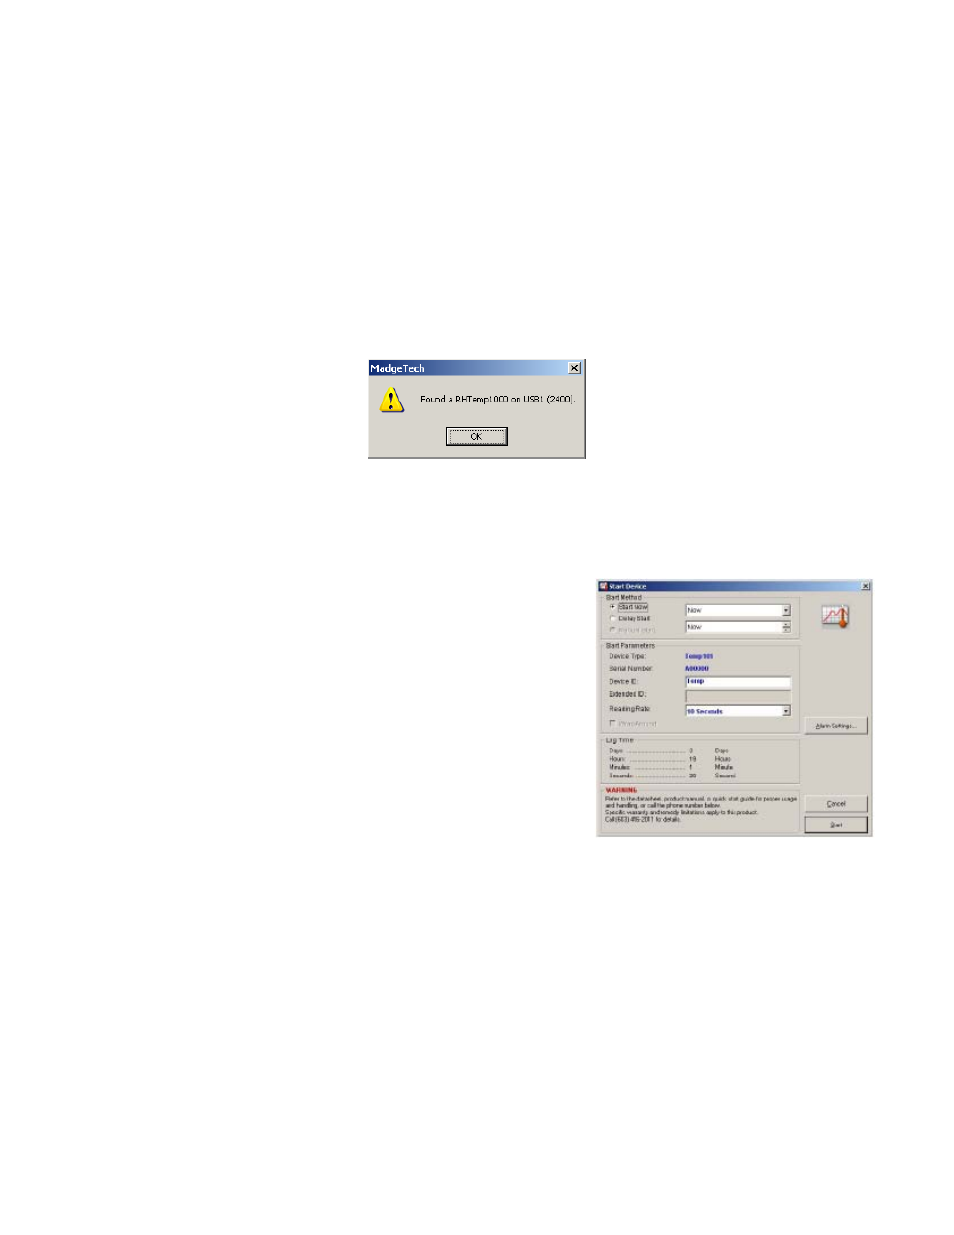
- Click the Communication Menu, then Auto Configure Port.
- After a moment, a box similar to the following will appear;
- Click OK. The Device Status box will appear. Click OK.
- At this point, communications have been configured for your logger. These settings can be found under the
Communication Menu
.
Note: For additional installation instructions refer to your “
Data Logger & Software Operating Manual”.
Device Operation
Starting the data logger
- Click Device Menu then Start Device.
- Choose the desired start method.
- Choose the start parameters by selecting a Reading Rate suitable
for your application.
- Enter in any other desired parameters and click Start.
- A box will appear stating the data logger has been started. Click OK.
- Disconnect the data logger from the interface cable and place it in the
environment to measure.
Note: The device will stop recording data when the end of
memory is reached or the device is stopped. At this point the
device cannot be restarted until it has been re-armed by the
computer.
Downloading data from a data logger
- Connect the data logger to the interface cable.
- Click the Device Menu then Read Device Data. This will offload all recorded data onto the PC.
Device Maintenance
Battery Replacement
Materials:
Small Phillips Head Screwdriver
Replacement Battery (LTC-7PN)
- Puncture the center of the back label with the screw driver and unscrew the enclosure.
- Remove the battery by pulling it perpendicular to the circuit board.
- Insert the new battery into the terminals and verify it is secure.
- Screw the enclosure back together securely.
Note: Be sure not to over tighten the screws or strip the threads.
WARNING: FIRE, EXPLOSION, AND SEVERE BURN HAZARD. DO NOT SHORT CIRCUIT, CHARGE,
FORCE OVER DISCHARGE, DISASSEMBLE, CRUSH, PENETRATE OR INCINERATE. BATTERY MAY
LEAK OR EXPLODE IF HEATED ABOVE 80°C (176°F).