English, Remote control, Cleaning and maintenance warning – Camlink Professional photo studio CL-STUDIO30 User Manual
Page 7: Warranty, Disposal
7
English
Remote control
12
ON
1 2
ON
2
3
8
7
10
5
4
9
11
1
6
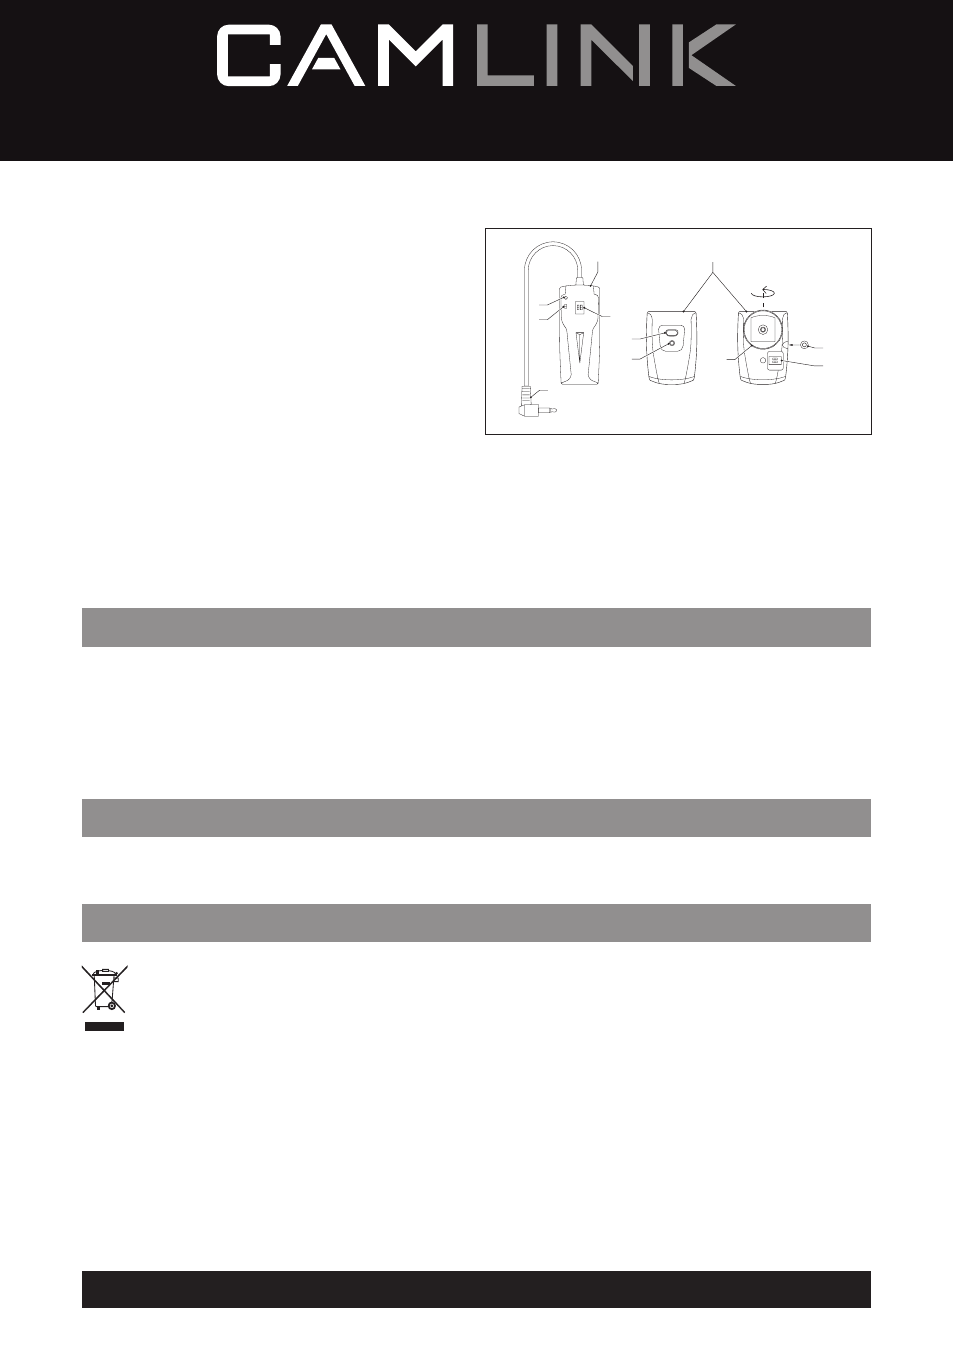
1. Receiver
2. Receiver indicator
3. On/off switch
4. Channel code switch
5. Sync plug
6. Transmitter
7. Transmitter indicator
8. Test button
9. Channel code switch
10. Camera hot shoe mount
11. PC cable connection
• Insert the sync plug (5) into the sync plug connection of the flash light.
• Set the on/off switch (3) to the on position.
• Set the same channel code for the receiver (1) and the transmitter (6) using the channel code switches (4/9).
• Press the test button (8). The receiver indicator (2) and the transmitter indicator (7) come on.
• Attach the camera hot shoe mount (10) to the camera hot shoe. If the camera does not have a hot shoe, use the
supplied PC cable to connect the transmitter and the camera.
• Press the camera shutter.
Cleaning and maintenance
Warning!
• Do not use cleaning solvents or abrasives.
• Do not clean the inside of the device.
• Do not attempt to repair the device. If the device does not operate correctly, replace it with a new device.
• Clean the outside of the device using a soft, damp cloth.
Warranty
Any changes and/or modifications to the product will void the warranty. We cannot accept any liability for damage
caused by incorrect use of the product.
Disposal
• The product is designated for separate collection at an appropriate collection point. Do not dispose of the product
with household waste.
• For more information, contact the retailer or the local authority responsible for waste management.