Basement Watchdog Emergency User Manual
Page 15
5. Clean the battery posts with a battery
terminal cleaner or a wire brush.
6. Clean any corrosion off of the ring connectors
on the ends of the battery wires. Use a stiff
brush or sandpaper. DO NOT apply corrosion
resisting sprays or pads to the terminal rings
or posts after you have cleaned them, since
this could prevent the battery from charging
properly.
7. Replace the fluid sensor in the top of the
battery. Replace the battery cables, WHITE to
the NEGATIVE (-) post and BLACK to the
POSITIVE (+) post. Tighten the wing nuts.
8. Plug the charger back into the wall outlet.
(You should provide additional protection for
the control unit by using a surge protector.)
9. If any of the alarms are sounding, press the
WHITE button on the front of the control
panel for one (1) second.
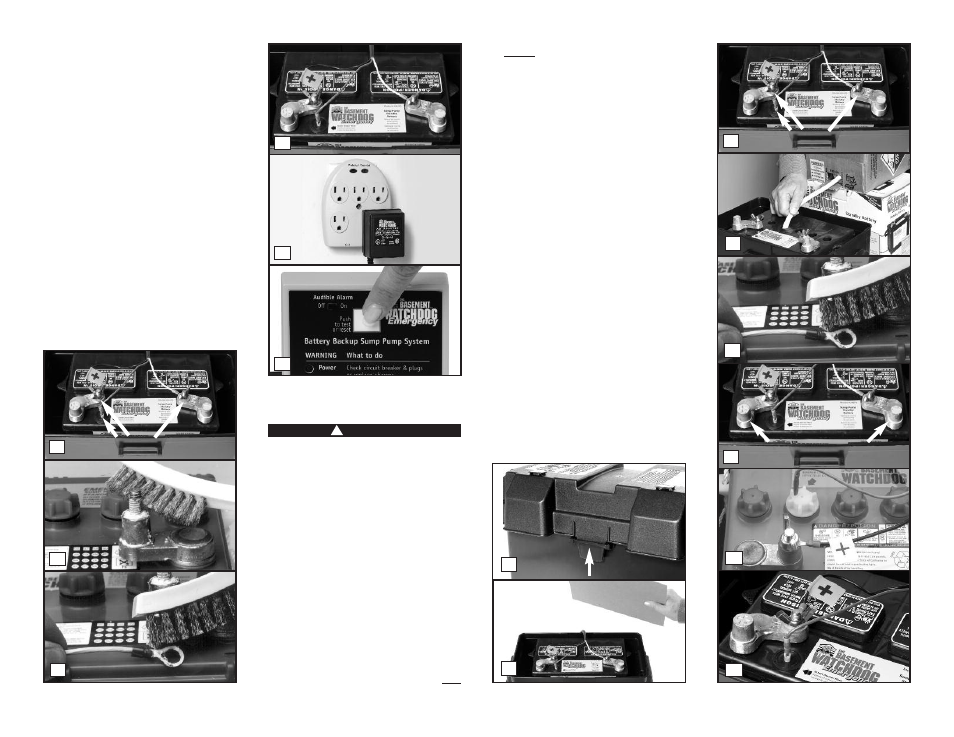
REPLACING THE BATTERY
Risk of electrical shock or battery explosion,
which can cause serious injury or death. Wear
eye protection. Work in a well-ventilated
area. Do not smoke or allow a spark or flame
in the vicinity of the battery. Avoid dropping
metal tools on the battery. If battery acid
contacts eyes, flush with water for 15
minutes and get prompt medical attention.
Review the safety instructions on page 1.
REFER TO THE PHOTOS AT RIGHT
1. Unplug the charger from the wall outlet.
2. Remove the cover of the battery box by
pushing in the tabs on the front and back,
then lifting up.
3. Fan the area around the top of the battery
with a piece of cardboard (or another non-
metallic material) to remove any hydrogen or
oxygen gas that may have been emitted from
the battery.
4. Remove the fluid sensor from the top of the
battery. Unscrew the wing nuts and remove
the battery cables.
5. Remove the old battery from the battery box
and place the new battery in the box. Fill the
battery following the instructions on page 8.
6. Clean any corrosion off of the ring connectors on
the ends of the battery wires. Use a stiff brush
or sandpaper. DO NOT apply corrosion resisting
sprays or pads to the terminal rings or posts
after you have cleaned them, since this could
prevent the battery from charging properly.
7. Replace the battery cables, WHITE to the
NEGATIVE (-) post and BLACK to the POSITIVE
(+) post. Tighten the wing nuts.
8. (a) If your battery has six (6) caps on the top,
rinse and dry the cap with the extra hole from
the old battery to remove any residue.
Replace the battery cap in the cell that is 2nd
from the POSITIVE post with the cap from the
old battery. Insert the fluid sensor in the cap.
(b) If your battery has two caps, each
covering three (3) battery cells, simply insert
the fluid sensor in the top of the battery next
to the arrow.
Page 14
5
6
5
6
8a
4
Remove
9
8
7
!
DANGER
2
3
7
POSITIVE
POST
NEGATIVE
POST
4
Remove
8b