Retro-fit instructions – Amico Chemetron Retro-fit Gas Control Panel User Manual
Page 3
www.amico.com
3
P a g e : 3
C h e m e t r o n G a s C o n t r o l P a n e l R e t r o - F i t
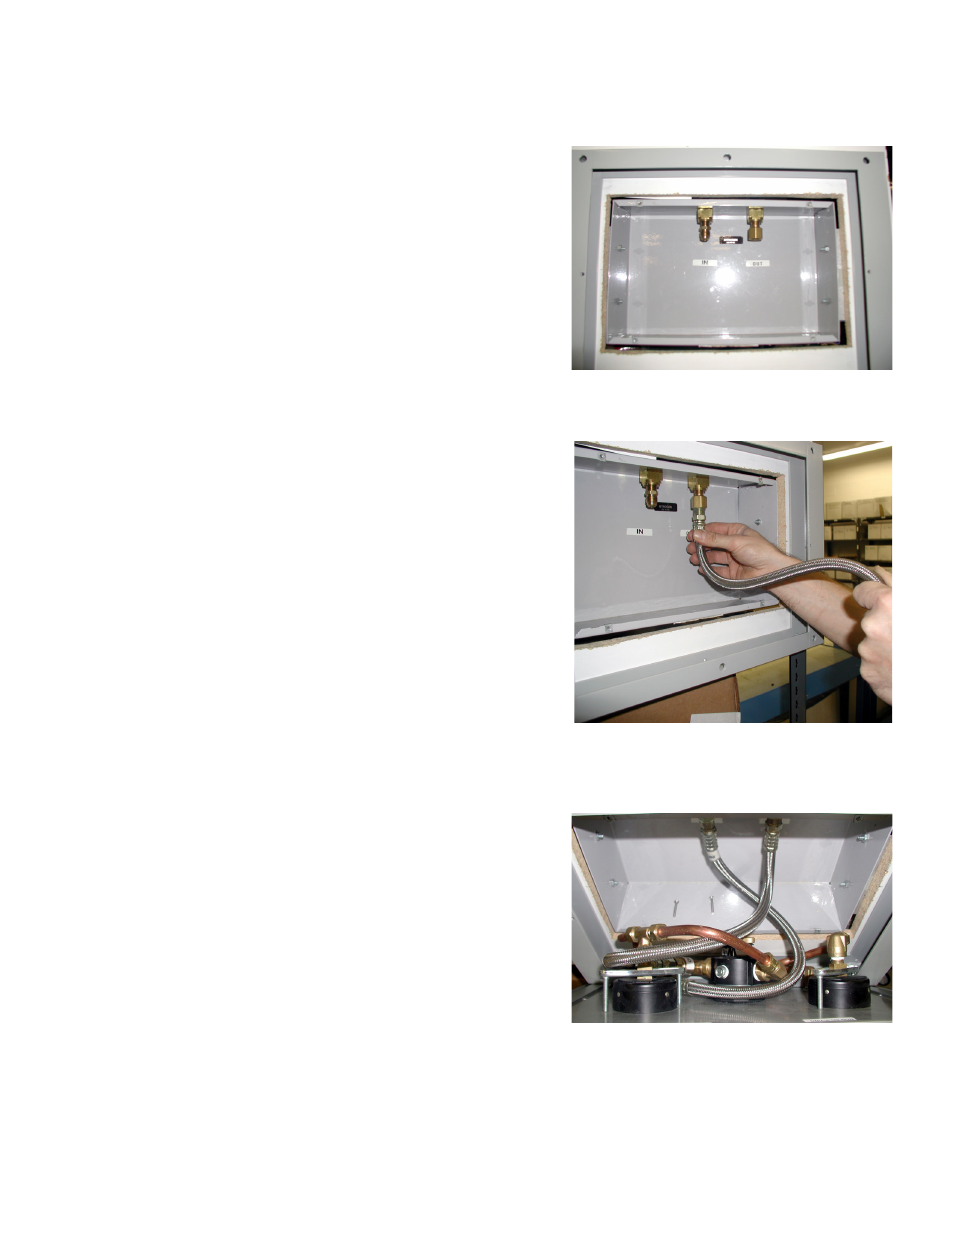
The pigtail adapter and the reducer
bushing provided separately with the
retrofit kit should be secured to the
input and output in the back box as
shown beside.
The pigtail that is supplied separately
in the retrofit kit is for the output.
Secure the male end to the reducer
bushing on the output side in the
back box.
Secure the male end of the output
pigtail to the output on the back of the
control panel. Secure the input pigtail,
coming from the back of the control
panel, to the input in the back box.
Push the whole assembly gently into
the back box and secure the panel to
the filler frame using the #8 stainless
steel machine screws provided with
the kit. Please note the position of the
pigtails. Make sure you position them
this way or you may have trouble
fitting the panel onto the frame.
The pigtail adapter and the reducer bushing, provided with
the retrofit kit, should be secured to the input and output in
the back box as shown.
The pigtail that is supplied in the retrofit kit is for the
output. Secure the male end to the reducer bushing on the
output side in the back box.
Secure the male end of the output pigtail to the output
on the back of the control panel. Secure the input pigtail,
coming from the back of the control panel, to the input in
the back box. Push the whole assembly gently into the back
box and secure the panel to the filler frame using the #8
stainless steel machine screws provided with the kit. Please
note the position of the pigtails. Make sure you position
them this way or you may have trouble fitting the panel
onto the frame.
Retro-Fit Instructions