Preparation and setup, Prestart checklist, Hitching tractor to drill – Great Plains 2020P Operator Manual User Manual
Page 17
4/23/2010
118-740M
15
Preparation and Setup
Preparation and Setup
This section will help you prepare your tractor and
drill for use. Before using the drill in the field, you
must hitch the drill to a suitable tractor (see “Trac-
tor Requirements,” page 44) and level the drill.
Prestart Checklist
1.
Read and understand “Important Safety Infor-
mation,” page 1.
2.
Check that all working parts are moving freely,
bolts are tight, and cotter pins are spread.
3.
Check that all grease fittings are in place and
lubricated. Refer to “Lubrication,” page 61.
4.
Check that all safety decals and reflectors are
correctly located and legible. Replace if dam-
aged. See “Safety Decals,” page 7.
5.
Inflate tires to pressure recommended and
tighten wheel bolts as specified. See “Appen-
dix,” page 129.
Hitching Tractor to Drill
You may be severely injured or killed by being crushed
between the tractor and drill. Do not stand or place any
part of your body between drill and moving tractor.
Stop tractor engine and set park brake before installing
the hitch pin.
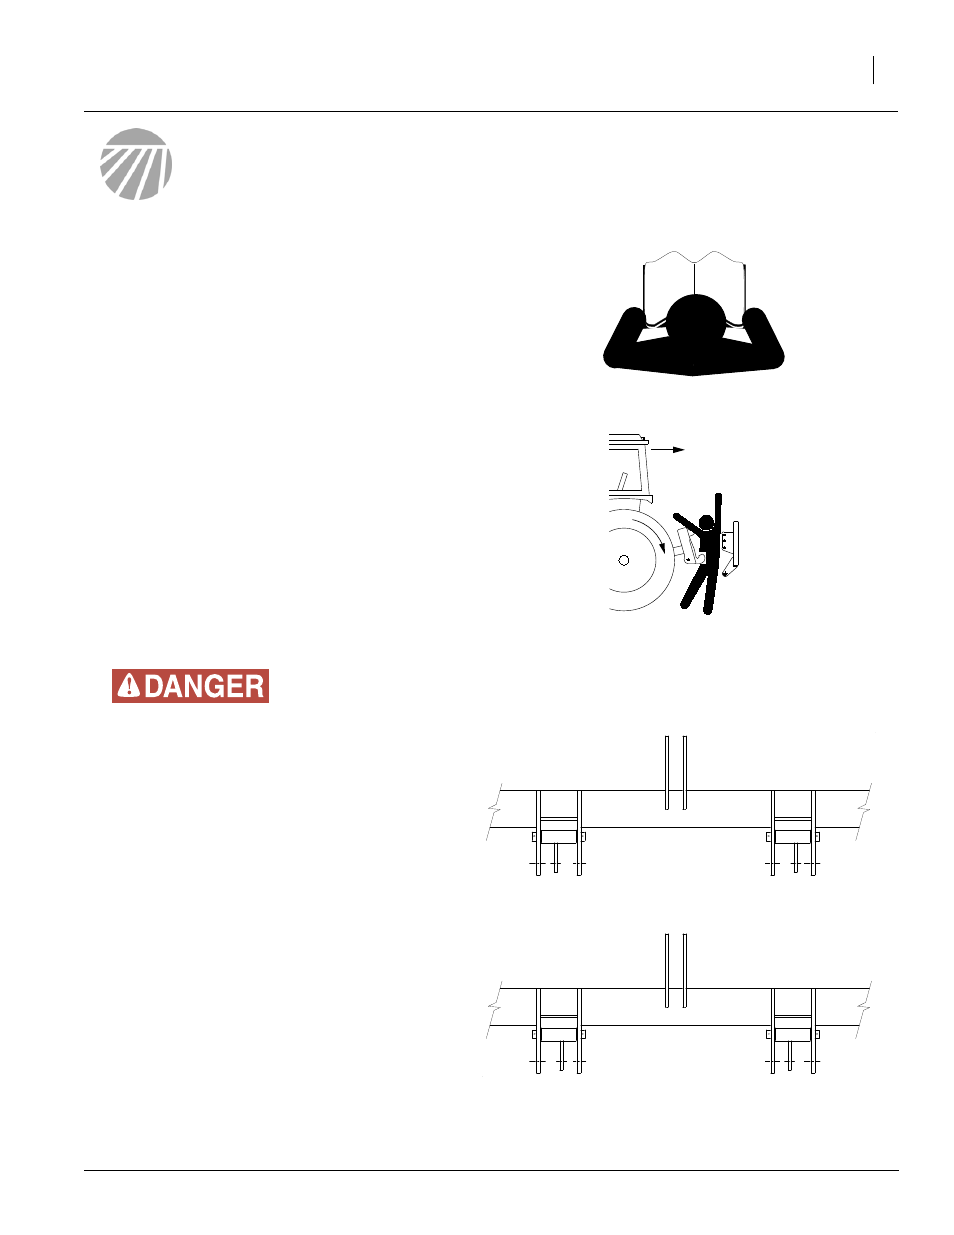
1.
Great Plains 3-point Drills are engineered to
be used with Category II or III tractors. 15’ and
20’ 3-Point Drills are factory set for Category II
tractors. To change to Category III, exchange
the left hand pin support with the right hand as
shown.
2.
In addition, the following bushings (not sup-
plied by Great Plains) may be needed to fit
your quick hitch or tractor’s 3-point arms:
• Upper Link 1” ID X 1 1/4 OD
• Lower Links 1 1/8” ID X 1 7/16” OD
3.
Some Category III Quick Hitches interfer with
Great Plains pin supports. Remove pin sup-
ports and use 20P Category III Hitch Pin Kit
(117-087A).
Category II Hitch
Category III Hitch
19322