Assembly instructions – Great Plains 2N-3020 Assembly Instructions User Manual
Page 3
3
4/9/04
24- and 30-Foot, No-Till Flat Fold Marker Option 113-502M
Great Plains Mfg., Inc.
Assembly Instructions
■
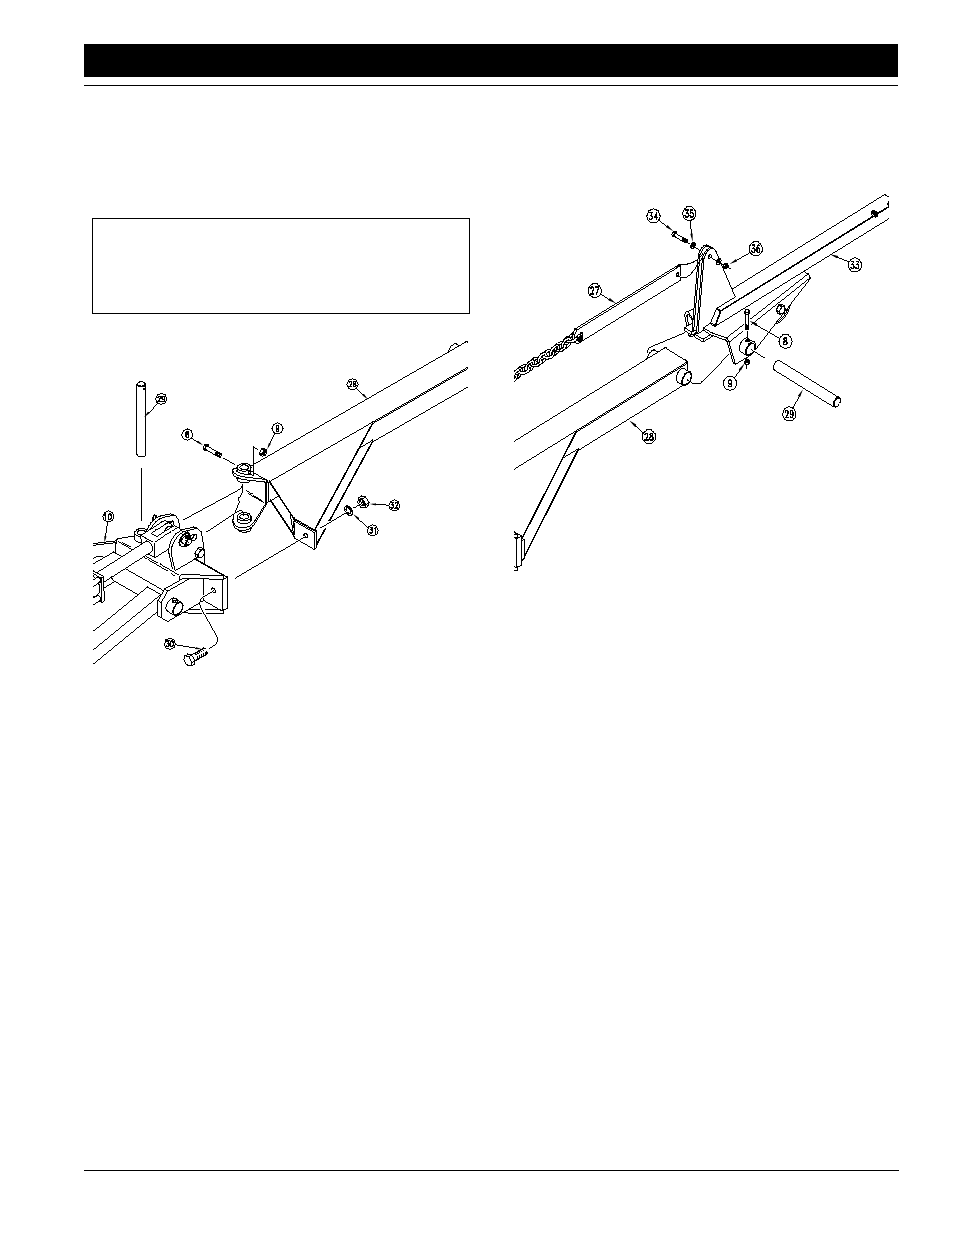
8.
Attach the second section (28) to the breakaway hinge (10)
with the pivot pin (29). Secure the pivot pin (29) with the bolt
and lock nut (8 and 9). Complete this joint by passing the
grade 5 breakaway bolt (30) through the holes in the hinge
and second section. Install the lock washer (31) and nut (32)
on the breakaway bolt.
IMPORTANT: The breakaway bolt (30) is a 7/16 x
2 1/4-inch, grade 5 (G.P. # 802-234C). It is identified as a
grade 5 by having three marks on the head. If it breaks, re-
place it with an equivalent grade 5 bolt to prevent marker
damage.
Figure 1
Attaching Second Section
11101
9.
Attach the third section (33) to the second section (28) by us-
ing the pivot pin (29). Secure the pivot pin with the bolt (8) and
lock nut (9).
Fasten the loose end of chain bar (27) to the ears on the
third section (33) by using the bolt (34) flat washers (35) and
lock nut (36). Do not over tighten this pivot, which would
cause the ears to bend in. The chain bar must pivot freely
around the bolt.
Figure 1
Attaching Third Section
11102
10. Slide the fourth-section tube (37) inside the third section
(33). The holes in the fourth section must be to the outside of
the drill and on the top and bottom side as shown. Thread
the jam nuts (38) on the square-headed set screws (39).
Thread the set screws into the nuts welded to the outer end
of the third section (33). Tighten the set screws and jam nuts.
11. Slide the blade and spindle (40) over the fourth-section tube
(37). Secure the spindle to the tube with bolts (41), flat
washers (42), lock washers (43) and nuts (44). Tighten the
two nuts.