Great Plains 1006 Assembly Instructions User Manual
General information, Assembly instructions, Harrow option
© Copyright 2003 Printed
Great Plains Mfg., Inc.
Used with:
Installation Instructions
116-280M
End Wheel No-Till Drill
Harrow Option
• 706
• 1006
General Information
When you see this symbol, the subsequent instructions and
warnings are serious - follow without exception. Your life and
the lives of others depend on it!
!!
These instructions explain how to install the Har-
row Option.
These instructions apply to:
116-278A
706 Harrow Assembly
116-279A
1006 Harrow Assembly
Manual Update
Refer to the End Wheel No-Till Drill operator’s
manual for detailed information on safely operat-
ing, adjusting, troubleshooting and maintaining
the Harrow Option. Refer to the parts manual for
part identification.
150-285M
Operator’s Manual
150-285P
Parts Manual
10/23/2003
Before You Start
Page 2 is a detailed listing of parts included in the
Harrow Option package. Use this list to inventory
parts received.
Tools Required
• Basic hand tools
Definitions
Right hand and left hand as used in this manual
are determined by facing the direction the drill will
travel while in use.
Assembly Instructions
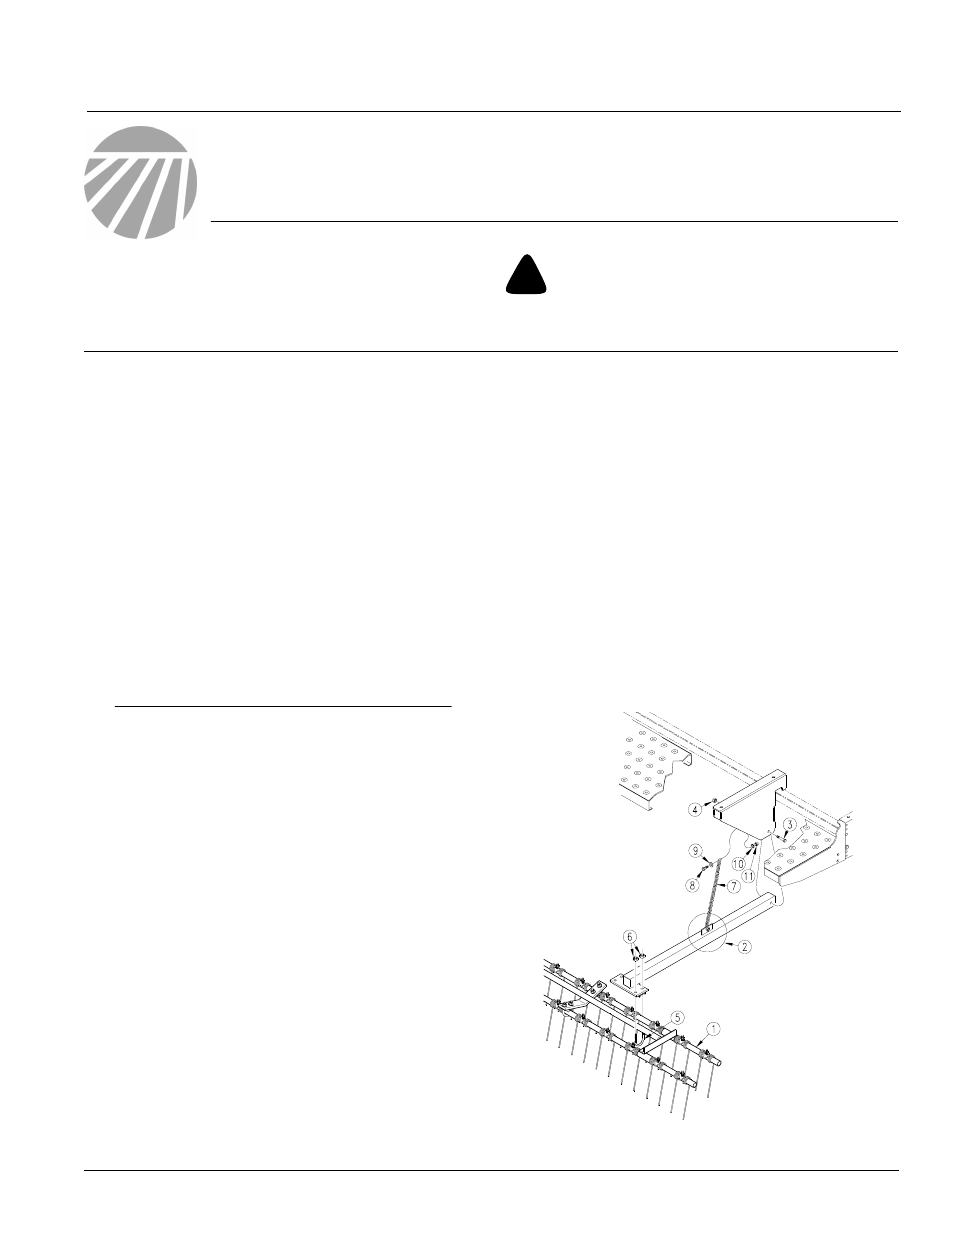
Refer to Figure 1
1.
Set the drill in field position and place the har-
row frame assemblies (1) behind the drill. Lo-
cate the assemblies so the ends of the tine
tubes are centered on the path made by the
openers.
2.
Install the harrow arms (2) so they pivot on the
1/2" x 3 1/4" bolt (3). Secure pivot bolt with a
1/2" nylock nut (4).
3.
Attach the lower ends of the harrow arms (2)
to the harrow assemblies (1) using the 1/2" x
1 3/8" x 3" round bottom U-bolts (5) and ny-
lock nuts (6). Choose the angle of the harrow
frame and hold this position by tightening the
U-bolts.
4.
Attach the chain (7), which is attached to the
harrow arm, between the tab on the walk-
board supports and the harrow arms with the
3/8" x 1 1/2" long bolts (8), flat washers (9),
lock washers (10) and nuts (11).
14613
Figure 1
Assembly