Danger, Warning, Tools required – Great Plains ADC1150 Predelivery Manual User Manual
Page 5: Pre-assembly checklist, Remove cart from truck
2
Section 1 Assembly
ADC1150 Air Drill Cart 167-101Q
4/7/04
Great Plains Mfg., Inc.
Section 1
Assembly
The following headings are step-by-step instructions for
assembling the cart. Begin with Tools Required and Pre-
Assembly Checklist to make sure you have all necessary
parts and equipment. Then proceed with Remove Cart
from Truck. Follow each step to make the job as quick and
safe as possible and produce a properly working machine.
The cart is shipped via flat bed truck. It is the dealer’s re-
sponsibility to unload the new machine. Unload all equip-
ment before beginning assembly. Do not attempt any
assembly work while the cart is on the truck.
Tools Required
•
Forklift or overhead hoist with 8,000-pound capacity
•
Hand jack with 4-ton capacity
•
General hand tools
•
Jack stands, blocks and safety chain
Pre-Assembly Checklist
1.
Read and understand “Important Safety Informa-
tion” on page 0 before assembling.
2.
Have at least two people on hand while assembling.
3.
Make sure the assembly area is level and free of ob-
structions (preferably an open concrete area).
4.
Have all major components.
5.
Have all fasteners and pins shipped with cart
IMPORTANT: If a pre-assembled part or fastener is
temporarily removed, remember where it goes. Keep
the parts separated.
.
6.
Have a copy of the parts manual on hand. If unsure of
proper placement or use of any part or fastener, refer
to the parts manual.
7.
Check that all working parts are moving freely, bolts
are tight, and cotter pins are spread.
8.
Check that all safety labels and reflectors are correctly
located and legible. Replace if improperly located or
damaged. Refer to Safety Labels, “Important Safety
Information” in the operator’s manual.
9.
Inflate tires to recommended pressure as listed on the
Tire Inflation Chart on the “Appendix” on page 8.
Tighten wheel bolts as specified on Torque Values
Chart on the “Appendix” on page 8.
Remove Cart from Truck
!
DANGER!
Crushing hazard. You may be severely injured or killed by the
cart if it falls. Secure cart to lifting equipment so it cannot fall.
Do not walk or place any body part under the raised sections of
the cart. Always support the cart with jack stands or blocks be-
fore working on the cart when raised off the ground.
!
WARNING!
Obey all safety instructions from lifting equipment manufactur-
er. Be sure shipping stands are securely attached prior to lifting.
Be sure lifting equipment has enough capacity to lift cart.
1.
Use the forklift or hoist to move the cart from the truck
to the center of the assembly area.
2.
Use 4-ton jack to raise frame so rear axle is high
enough to install wheels.
3.
Bolt wheels to hubs and tighten as specified on
Torque Values Chart on the “Appendix” on page 8.
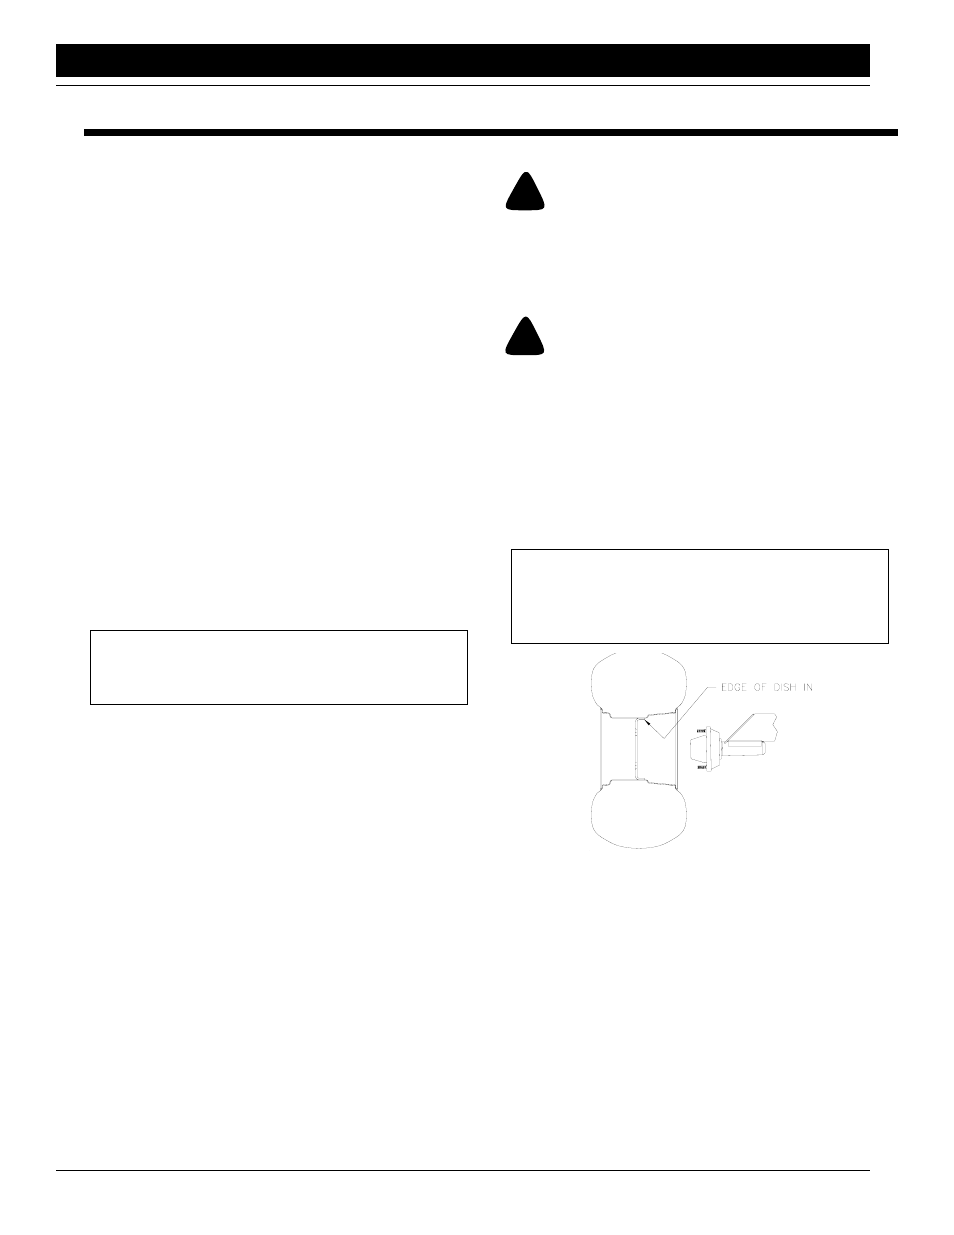
IMPORTANT: Wheels must be installed with the center
dish in the correct position. Bolt wheels with the edge
of the center dish in toward the hub as shown in Figure
1-1. Otherwise, wheels will be positioned too wide.
16119
Figure 1-1
Cart Wheel Installation
4.
Lower cart onto wheels. Inflate tires to pressure rec-
ommended on Tire Inflation Chart on the “Appendix”
on page 8.
5.
Remove cart jack from storage stob on inside of left
tongue rail. Block tires securely and raise cart tongue
with forklift or jack. Place cart jack on stob near cart
hitch and lower jack to support cart.