Attaching the hopper – Wheatheart GHR Augers Intake Hopper User Manual
Page 10
2. A
SSEMBLY
W
HEATHEART
- I
NTAKE
H
OPPER
2.3. A
TTACHING
THE
H
OPPER
BH/GHR A
UGERS
10
30735 R1
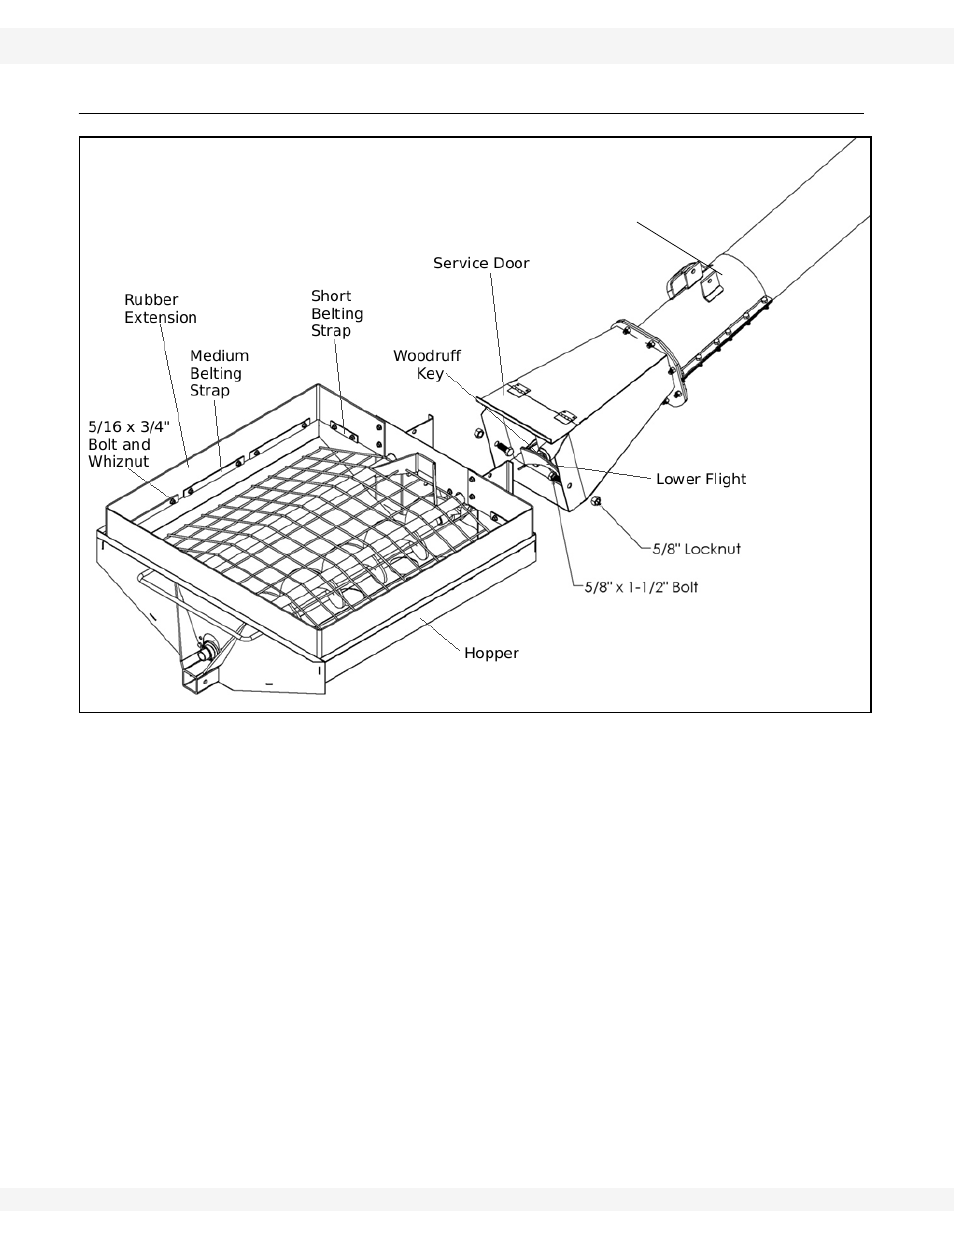
2.3. ATTACHING THE HOPPER
Figure 2.5
1. Clean dirt from inside u-joint on hopper and off of lower flight shaft. Insert
woodruff key into lower flight. See Figure 2.5.
2. Open service door on transition, then bring transition and hopper together,
guiding flight shaft into u-joint.
3. Attach transition to the hopper with two 5/8" x 1-1/2" bolts and locknuts. Do
not over-tighten. Tighten snug only; these bolts act as pivot points. Use top
hole on hopper for 10" auger or bottom hole for 8" auger.
4. Tighten set screws on u-joint, then close and secure the service door with the
provided door pin (see Figure 2.6).
5. Tighten
tube
clamps.
6. Install rubber extension inside of the hopper with:
• For 8” and 10”: twenty-six 5/16" x 3/4" bolts and whiznuts, and eight
medium (10") and three short (4-3/4") belting straps.
• For 13”: twenty-eight 5/16" x 3/4" bolts and whiznuts, seven medium (10")
and two long and two short (4-3/4") belting straps.
TOP TUBE CLAMP