Winchester Repeating Arms 94 Top Tang Safety (Historic Manual) User Manual
Page 12
12
"S
AFE
"
POSITIONS OF
R
EBOUNDING
S
AFETY
AND
T
OP
-
TANG HAMMER STOP
/
SAFETY
TO PUT YOUR MODEL 94 INTO A “SAFE”
CONDITION YOU MUST UTILIZE BOTH THE
REBOUNDING HAMMER SAFETY AND THE
TOP-TANG HAMMER STOP/SAFETY. ALWAYS
USE BOTH — THEY WORK TOGETHER.
T
OP
-
TANG MANUAL HAMMER STOP
/
SAFETY
:
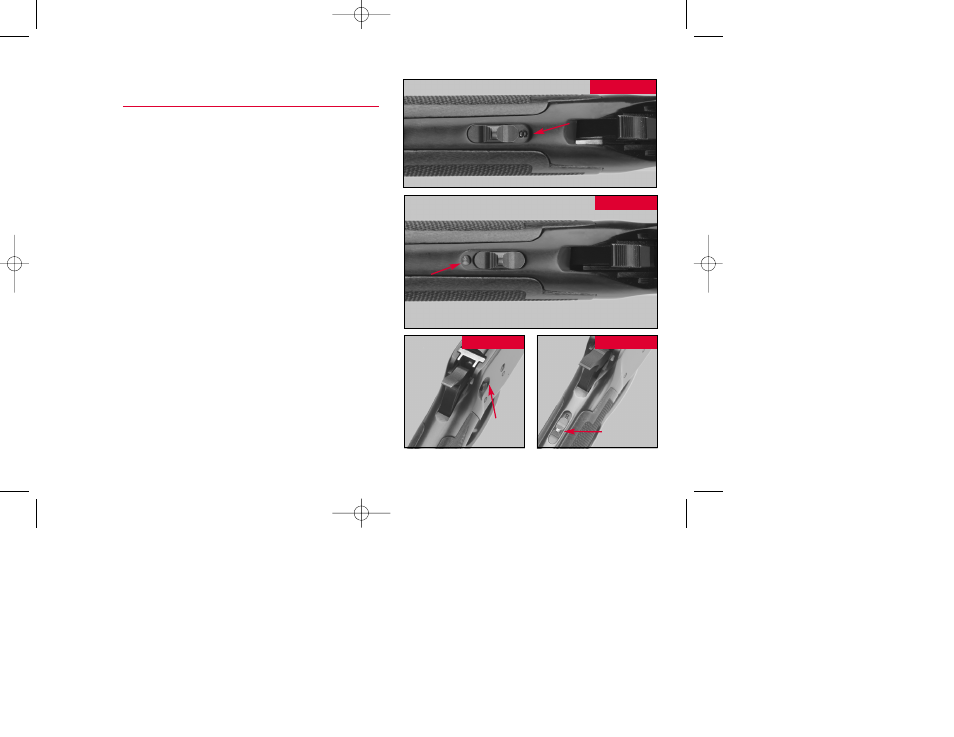
When the manual hammer stop/safety is pushed all the
way rearward it is in the “on” position (Figure 3A). In this
position an “S” is visible directly in front of the manual
hammer stop/safety. Moving the safety fully rearward and
exposing the “S” blocks the hammer from striking the
firing pin. When the safety has been placed
in the “on” position it serves the function of blocking the
hammer from striking the firing pin. Even if the safety is
on, it does not prevent the hammer from falling to the
rebound position when the trigger is pulled. When the
trigger is pulled — with the safety on — the hammer
drops, going immediately to the rebound position without
impacting the firing pin. The “on” position is the
recommended position of the hammer for all times except
when firing is imminent.
FIGURE 3A
FIGURE 3B
Hammer stop/safety in
"on" (safe) position
FIGURE 3D
FIGURE 3C
Hammer stop/safety
mounted on side of receiver
Hammer stop/safety
mounted on top tang
Hammer stop/safety
in
off (fire)
position
02-227-WFA_94 OM Revised 7/17/03 9:33 AM Page 12