Winchester Repeating Arms Wildcat User Manual
Page 18
2. Hold the bolt in your left hand, with your thumb
bracing the bolt handle.
3. Grasp the bolt end cap with your right hand and
rotate it fully counterclockwise, approximately 60°.
Remove the bolt end cap to the rear.
4. Grasp the cocking indicator and pull rearward to
remove the firing pin. Note the orientation of the
firing pin as it is crucial to have it positioned the
same way during reassembly. It is not necessary or
recommended that you disassemble the firing pin
assembly beyond what is shown in Figure 11.
5. Slide the bolt handle sleeve rearward and off the bolt.
The bolt is now disassembled to the extent necessary to
perform cleaning and lubrication. A light coat of oil or
grease on the bolt, including the bolt lug and guide rails
is all that is necessary to lubricate the bolt. Do not
disassemble the bolt beyond what is shown in Figure 11.
R
EASSEMBLY
—
1. With the top of the bolt up, make sure the thrust
washer is installed on the bolt and slide the bolt handle
sleeve, with the guide lug forward, onto the bolt so the
handle is on the right side of the bolt.
2. Insert the firing pin assembly into the rear of the bolt.
Orient the pin as shown in Figure 12. The cocking
element must be in the secondary detent in the bolt
handle sleeve as shown in Figure 13.
17
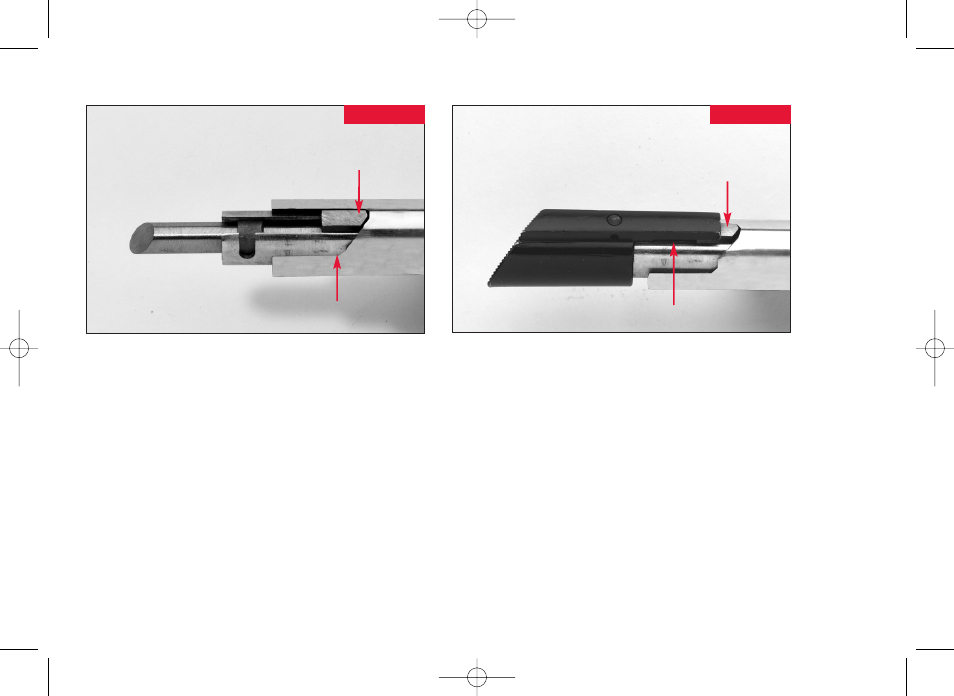
FIGURE 13
The cocking element must be in
the second detent.
First Detent
Second Detent
FIGURE 14
Align the protrusion on the bolt
cap with the cocking element.
Bolt Cap Protrusion
Cocking Element
05-572-WFA_OM Wildcat 6 3/21/06 11:28 AM Page 17