Casio Privia MA1001-B User Manual
Page 34
E-32
Assembling the Stand
12.
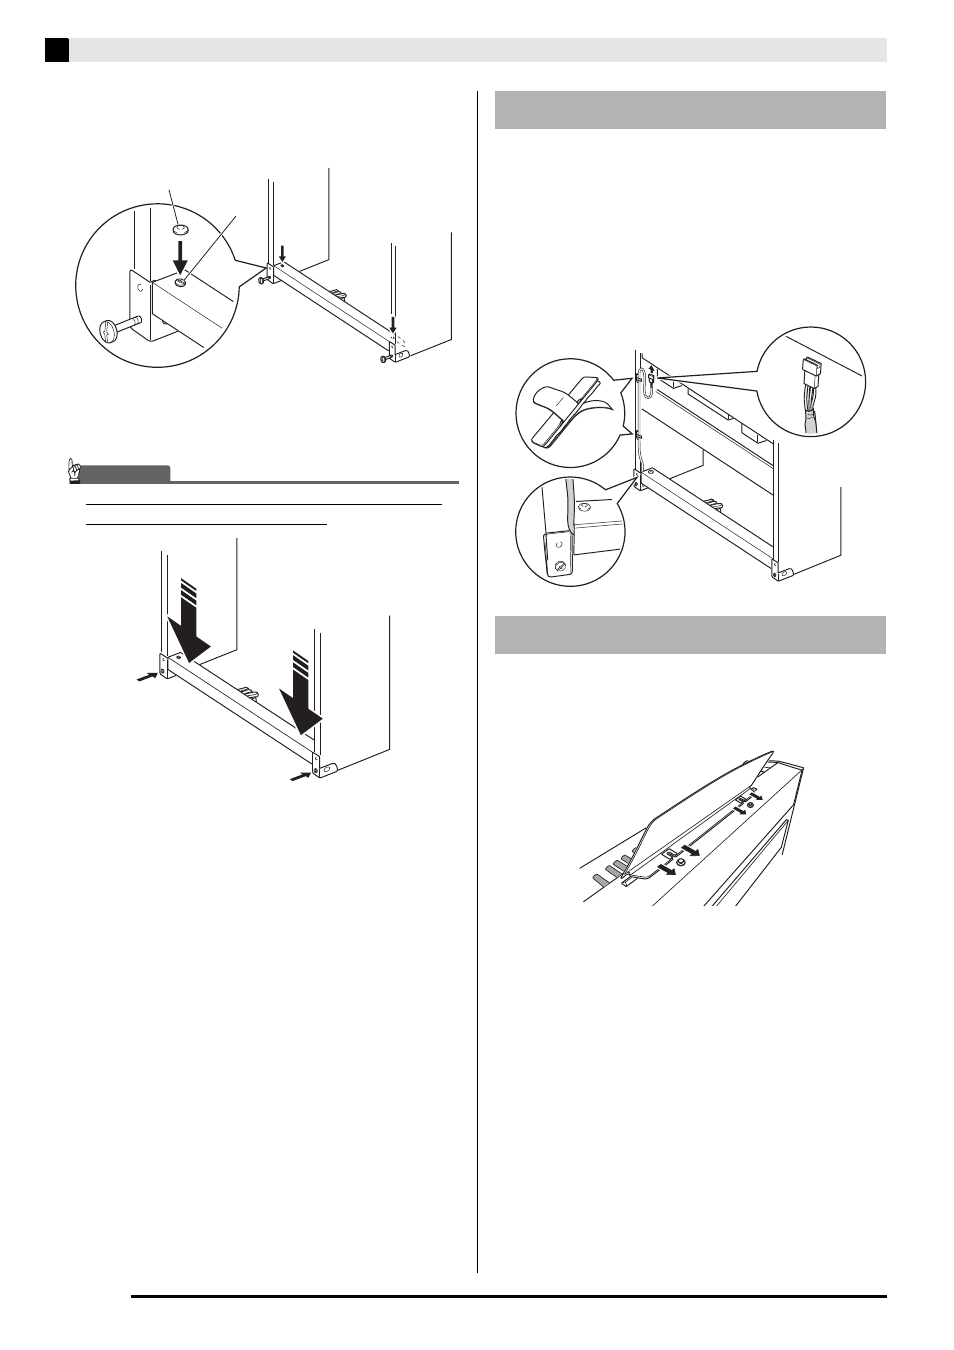
Securely tighten the screws
that you
temporarily tightened in step 9.
• Cover the screw heads with the caps .
13.
Tighten the screws you loosened in step 10 to
secure the corner brackets to the side panels.
IMPORTANT!
• Press down on the edges of the pedal unit as you
tighten the corner bracket screws.
1.
Making sure that the pedal unit cable plug is
oriented as shown in the illustration below,
plug it into the pedal connector on the bottom
of the digital piano.
• Press the plug fully into the connector as far as it will
go.
• Use the clips to secure the pedal cable to two
locations on side panel .
1.
Slide the music stand under the two bolts on
the top of the digital piano as shown in the
illustration and then tighten the bolts.
G
J
To connect the cable
To install the music stand
H