Illustration 9, Illustration 10, Illustration 11 – Trail Master Suspension TM103N CHEVEROLET SILVERADO 4WD/2WD 6 SUSPENSION LIFT KIT User Manual
Page 9
9
TM103N
Revised
1.28.14
hardware in the rear pocket.
46. Install the new knuckle to the lower ball joint.
Torque the lower ball joint nut
74
ft./lbs.
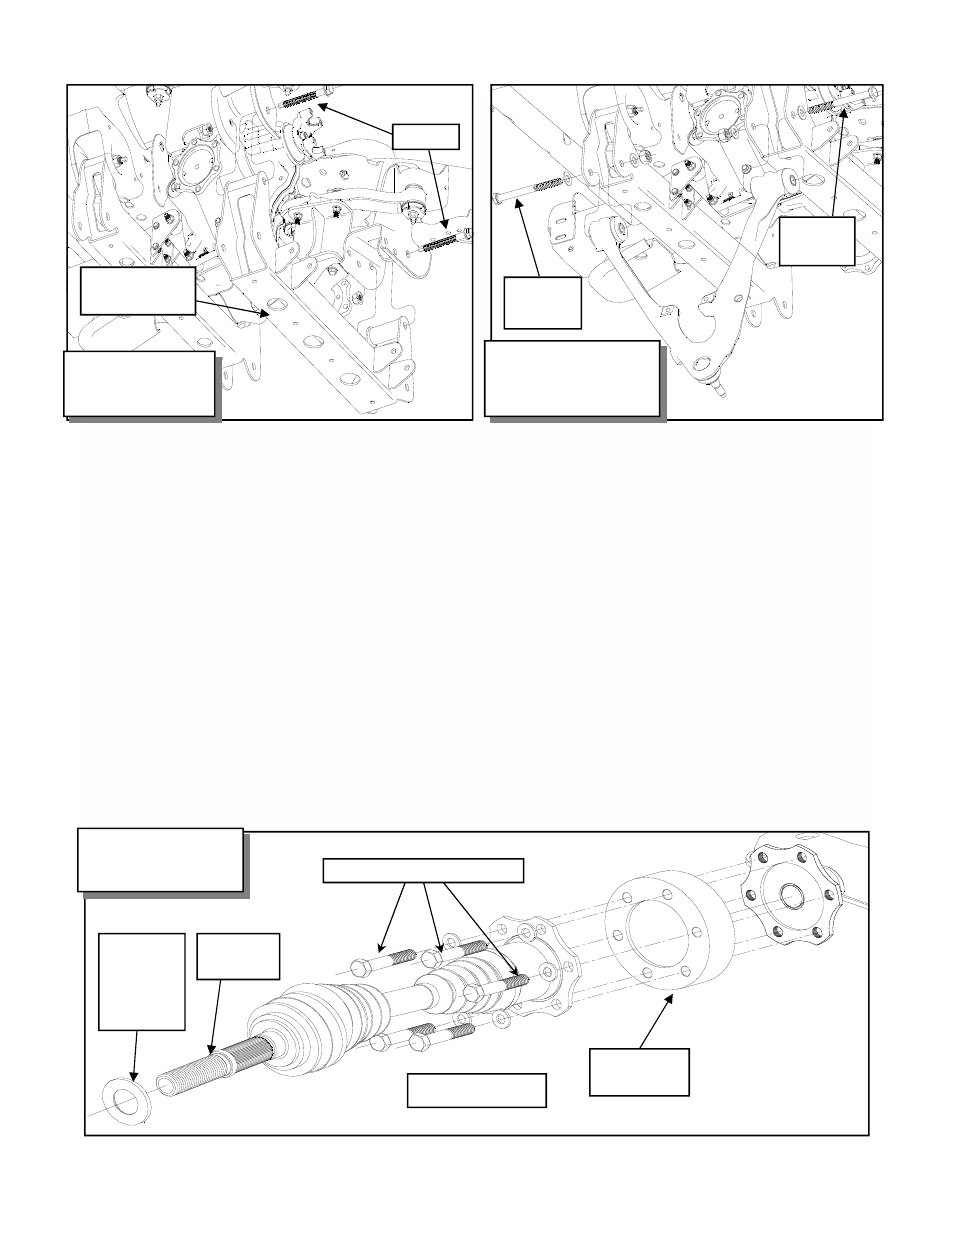
47. Slide the CV spacer ring (90-3809) onto the
splined end of the outer CV axle. Be sure that
the tapered end of the ring is facing toward the
inside of the axle. Slip the CV axle through the
bearing hub in the knuckle from the inside.
48. Secure the CV axle and the CV spacer (90-
4077) to the differential using the supplied
10mm X 60mm bolts and washers. See ILLUS-
TRATION 11.
49. Install the new knuckle to the upper ball joint.
Start the nut and leave hand tight until Coil over
installation is complete.
50. Reinstall the CV shaft washer and retaining nut
to CV axle. Torque this nut to factory specifica-
tions. (See your GM service manual for details)
51. Attach the strut spacer (82-2614) to the top of
the strut using the OE hardware. Torque to
manufacturers specifications. See ILLUSTRA-
TION 12.
52. Fit the strut and spacer assembly into the stock
mounting locations. Fasten using the supplied
hardware on the top from hardware pack (90-
6317) torque to
45-50
ft./lbs. See ILLUSTRA-
TION 12.
NOTE: Be sure that the locating tab on the
top ring of the strut spacer is facing toward the
outside of the vehicle.
IMPORTANT!: Be sure the OE wiring
harness clips are reinstalled to the strut spacer
studs. Failure to do so may result in the wiring
harnesses being damaged by the steering column.
Illustration 9
Rear Crossmember
OE Bolt
82-3688 Rear
Crossmember
Illustration 10
Lower A-Arm Install
5/8” X 4
1/2” Bolt
5/8” X 5
1/2” Bolt
10mm X 60mm Bolts (6)
Illustration 11
CV Spacer Install
90-4077 CV
Spacer
Outer CV
CV
spacer
ring
(90-3809)
4WD ONLY!