Illustration 8, 4wd only – Trail Master Suspension TM103N CHEVEROLET SILVERADO 4WD/2WD 6 SUSPENSION LIFT KIT User Manual
Page 8
8
TM103N
Revised
1.28.14
38. Reinstall the front driveshaft to the front differ-
ential using the previously removed OE hard-
ware.
39. Reattach the wiring harness, wiring clips and the
vent tube to the differential.
IMPORTANT: Secure the vacuum line out
of the way of the steering rack.
NOTE: The differential vent tube may need
to be carefully pulled down to provide more slack
for it’s new mounting position.
40. Unbolt the CV axle retaining nut and remove the
CV axle from the OE knuckle.
41. Separate the knuckle from the lower control arm
and remove the OE knuckle.
42. Disassemble the OE knuckle on your work
bench, remove the bearing hub assembly from
the OE knuckle by removing the OE bolts.
Save the mounting bolts, bearing, and dust
shield for re-use. Discard the OE knuckles.
43. Reassemble the bearing hub and brake dust
shields into the new Trail Master steering
knuckle (90-4491 Drvr and 90-4492 Pass).
Make sure that the ABS wiring is oriented in
exactly the same position as it came from the
OE knuckle and out of the way of the tire.
44. Torque the bearing to the knuckle with the OE
bolts. Torque to
133
ft./lbs. Repeat on the other
side.
45. Install the lower A-arms into the crossmember
mounting pockets. Secure using the supplied
5/8” X 4 1/2” bolts and hardware in the front
pocket and the supplied 5/8” X 5 1/2” bolts and
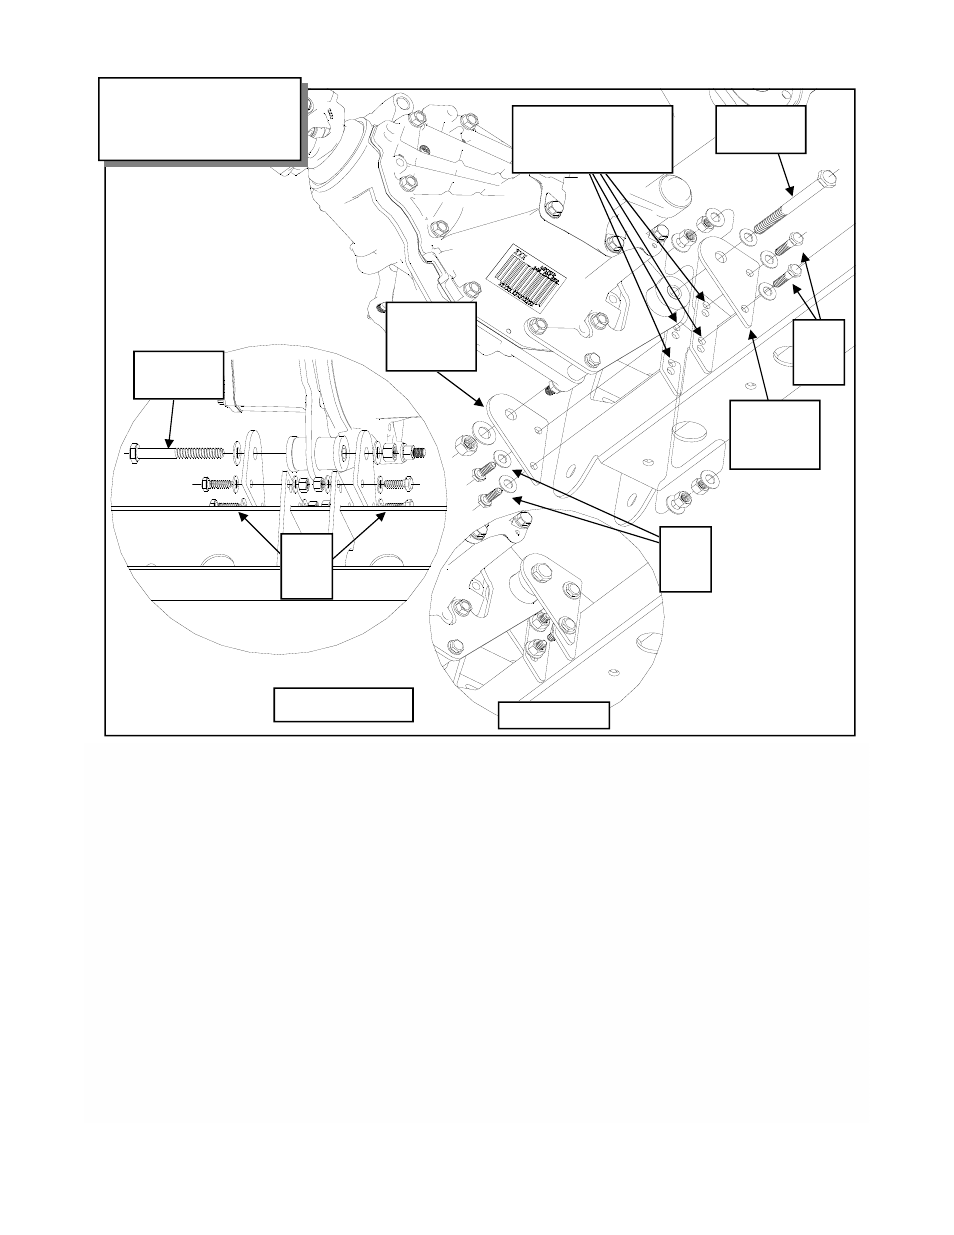
Illustration 8
Front Differential Mount Tab
Install
9/16” X 4”
Bolt
5/16”
X 1”
Bolt
82-3691
Front Diff
Mount Tab
82-3691
Front Diff
Mount Tab
5/16”
X 1”
Bolt
9/16” X 4”
Bolt
Finished View
5/16”
X 1”
Bolt
Mount to Upper
Holes In Front Cross-
member Mount Tabs
4WD ONLY!