Sky-Watcher EQ8 User Manual
Page 13
13
Note:
• When adjusting the Allen screws, loosen one screw only ¼ of a turn, and then tighten the
other two.
• Do not over tighten the Allen screws; it might damage the pattern plate in the polar scope.
• Do not loosen one screw completely or loosen more than one screw at a time; otherwise,
the pattern plate in the polar scope will be disengaged and further adjustment is impossi-
ble.
• If the pattern plate does disengage, remove the polar scope’s eyepiece by turning the
knurled ring counterclockwise and then engage the pattern plate again.
PART II: POLAR ALIGNMENT
1.
Release the R.A. clutch and level the counterweight rod, then lock the R.A. clutch again.
2.
Choose a fixed object (the Polaris at night, or a faraway object in daytime); put the reticle
in the FOV of the polar scope on the object by adjusting the two azimuth adjustment knobs
and the latitude jackscrew of the EQ8 mount.
3.
Rotate the mount in R.A. axis for half a turn exactly. Tighten the R.A. clutch after the rota-
tion.
4.
If the object remains at the center of the reticle in the polar scope after the rotation, then it
means the polar scope’s rotating axis has been aligned to the R.A. axis and no calibration
is needed.
5.
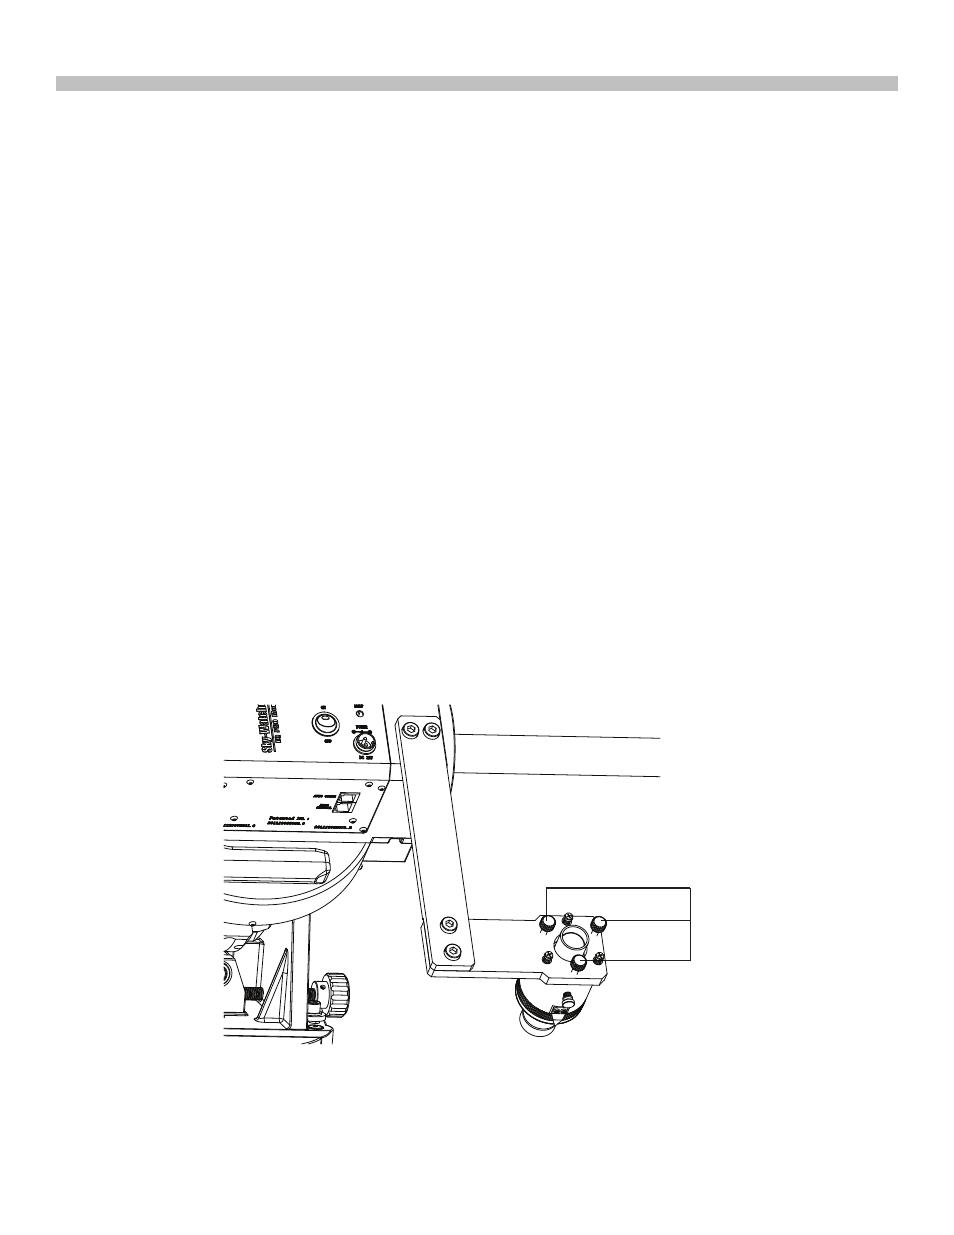
If the object deviates from the reticle, then adjust the three small adjustment screws as
shown in
Fig. 2.5d
to eliminate the deviation to HALF.
Routine 2 - Align the rotating axis of the polar scope to the R.A. axis of the mount
Fig. 2.5d
Adjustment
Screws
6.
Repeat steps 1-5 a few times until the object keeps at the center of the reticle when rotat-
ing the mount in R.A. axis