Wall-mounting the c10 – Revel C10 User Manual
Page 4
4
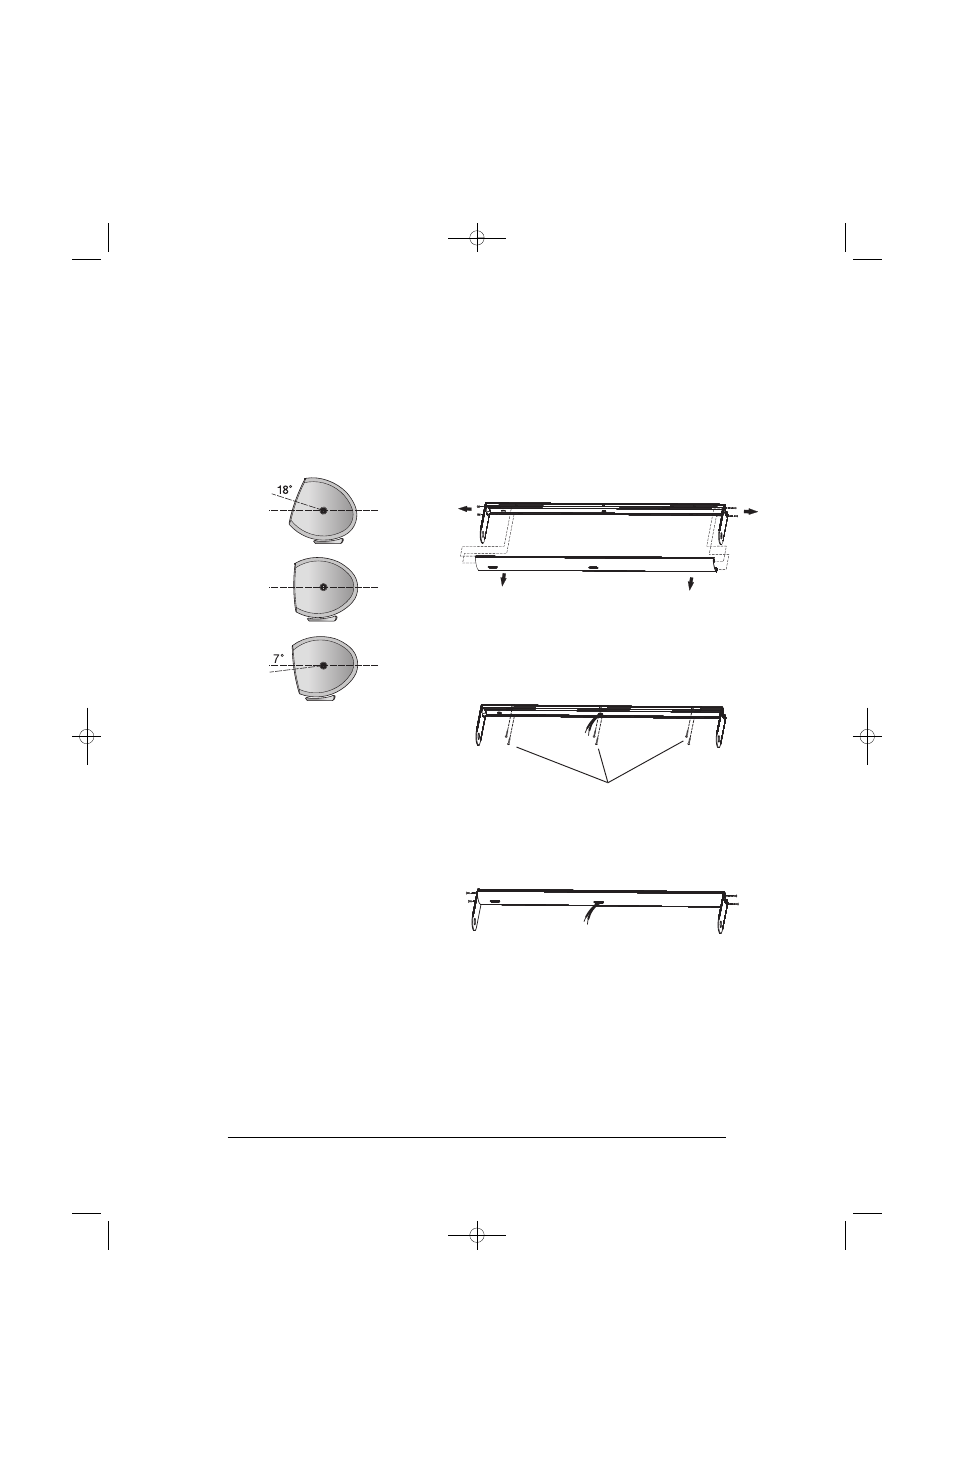
Tilting the Speaker
If needed, the enclosed stand allows you to tilt the
speaker across a wide range (i.e., upward to a maximum
of 18° or downward to a maximum of 7°), as shown in
Figure 3.
Important! DO NOT exceed the tilt range.
Doing so may cause the speaker to fall out
of its stand.
Figure 3
Wall-Mounting the C10
Using the Included Wall Bracket
The customer is responsible for proper selection and
use of mounting hardware, and for correctly and safely
wall-mounting the speakers.
Step One
Remove the wall bracket cover by removing the four wall-
bracket screws on the ends, as shown.
Step Two
Run the speaker wire for the left, center and right
channels behind the wall bracket and out through the
holes in the bracket. After deciding where to place the
speaker, attach the wall bracket (in a horizontal position)
to the wall, using the appropriate screws and anchors.
Step Three
Run the speaker wires out through the holes in the wall
bracket cover. Resecure in place, as shown, with the
four wall bracket screws.
Mounting screws and
anchors not included
Wall bracket
HSGP1053-C10_OM 9/12/08 12:29 PM Page 4