Step four, Step five, Step six – Revel LCR8 User Manual
Page 5
5
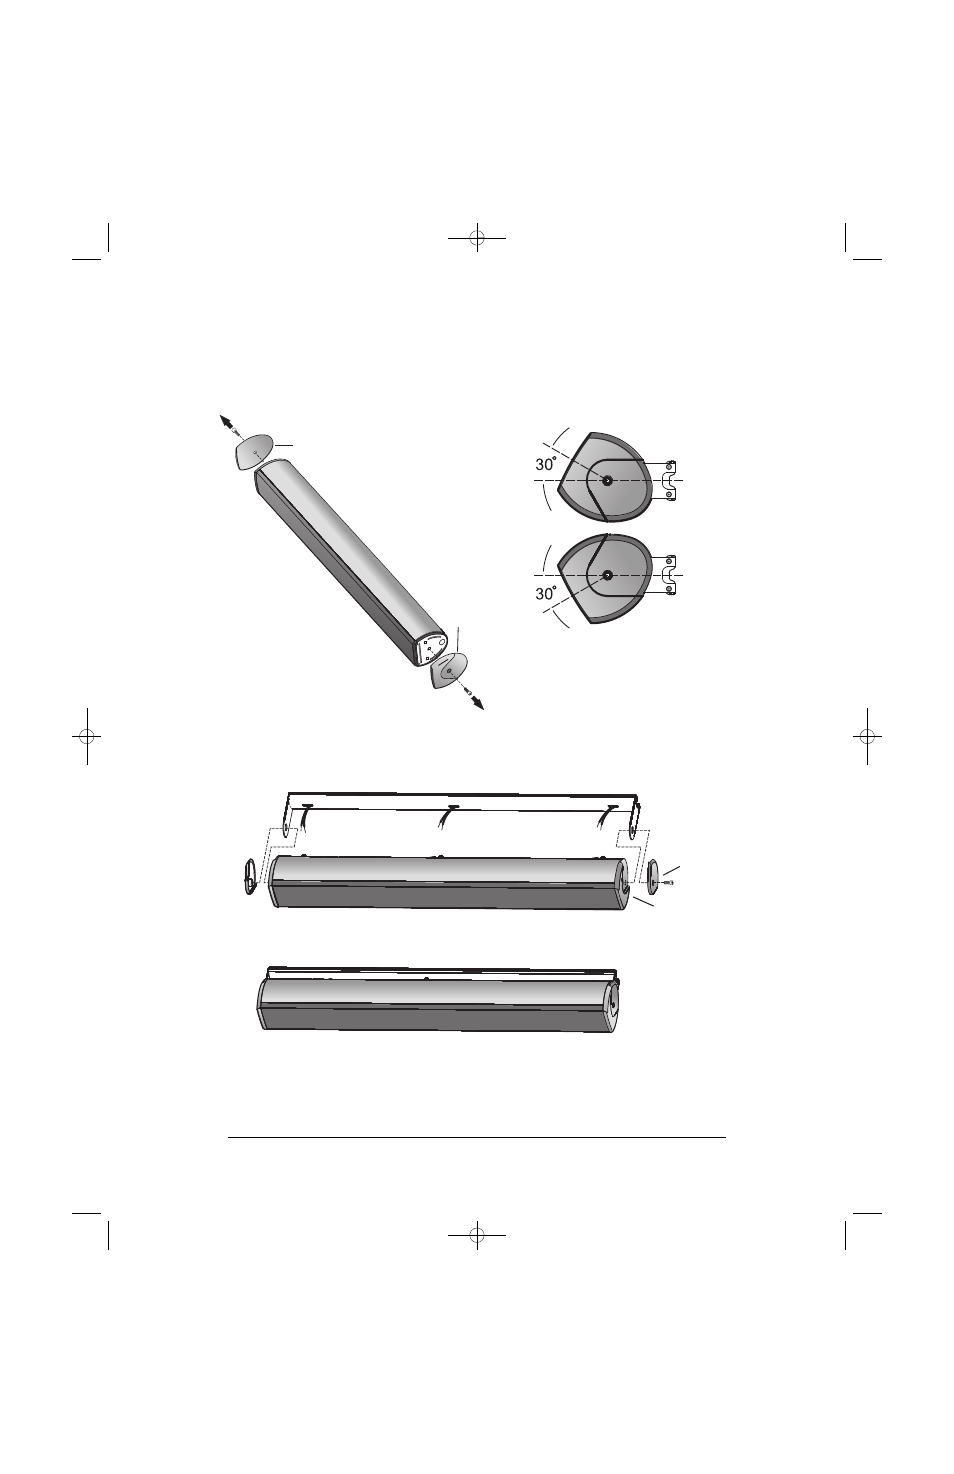
Step Four
Using the included Allen wrench, remove the top and
bottom end caps of the speaker by unscrewing the single
center screw on bottom.
Step Five
Connect the wires (see page 6). Replace the end caps while
capturing the wall bracket between parts A and B of the
end cap, securing it in place.
Step Six
The wall-bracket design allows for rotation of the speakers
at angles of up to 30º of center. Position the speakers so
that they face toward the primary listening position, before
fully tightening.
End cap
1/4-20 x 3/4"
Screw
End cap
Wall-mount
end cap A
Wall-mount
end cap B
HSGP1054-LCR8_OM 9/12/08 12:42 PM Page 5
See also other documents in the category Revel Acoustics:
- C363 (8 pages)
- C540 (7 pages)
- W970 (9 pages)
- M8 (8 pages)
- C10 (9 pages)
- M10 (12 pages)
- B110 (11 pages)
- S12 (24 pages)
- S206 (10 pages)
- C205 (10 pages)
- Voice 2 (34 pages)
- M12 (18 pages)
- Gem 2 (32 pages)
- M105 (8 pages)
- F12 (22 pages)
- F206 (13 pages)
- Studio 2 (30 pages)
- C360DT (9 pages)
- C760L (9 pages)
- IC80 (14 pages)
- IC15 (8 pages)
- W890 (9 pages)
- I20 (28 pages)
- IW90 (12 pages)
- B12 (28 pages)
- Sub 30 (32 pages)
- B15a (28 pages)
- S30 (24 pages)
- Embrace (24 pages)
- C32 (24 pages)
- C50 (24 pages)
- C30 (24 pages)
- Voice (19 pages)
- M22 (20 pages)
- M20 (20 pages)
- Gem (24 pages)
- F30 (20 pages)
- Studio (24 pages)