RCBS QC Powder Measure User Manual
Page 6
6
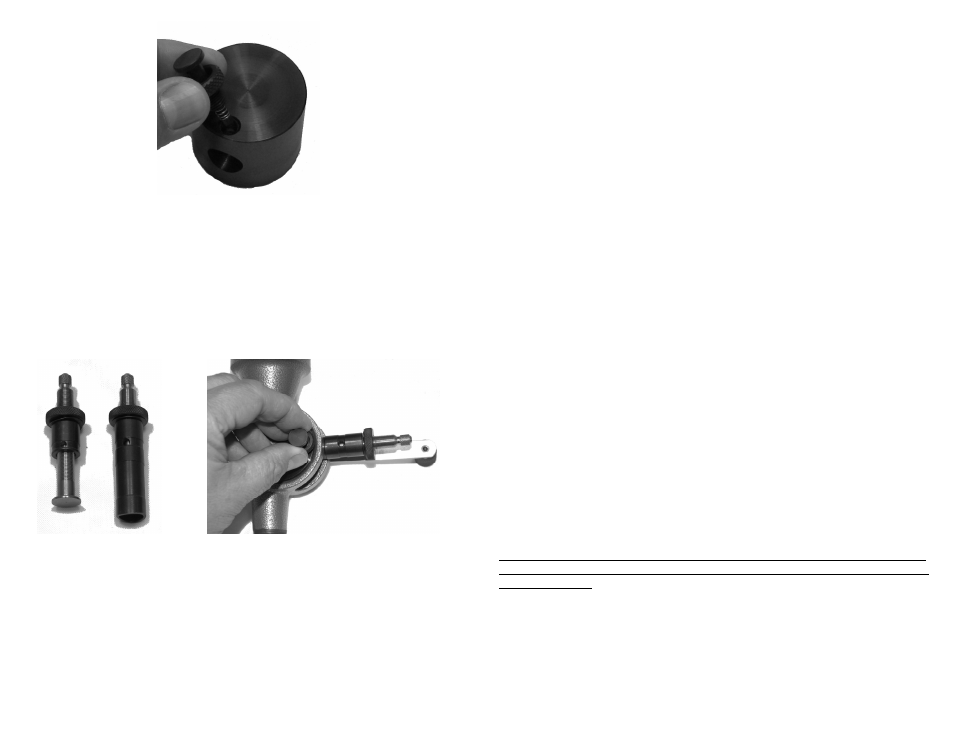
Installing Locking Pin
Now is the time to decide if you will be dispensing small pistol charges or larger
rifle charges. The small Metering Assembly will dispense from .5-40 grains of
smokeless powder. The large Metering Assembly will dispense from 10-110
grains of smokeless powder. You will notice a tapered hole on the side of the
Metering Screw Assembly body, this is the locking point for the Quick Change
Locking Pin. Pull the Locking Pin, align the hole in the Metering Screw body with
the Locking Pin, insert into the Metering Cylinder and release the Locking Pin.
Try to rotate the Metering Assembly Body to insure that it has been locked in
place. Tighten the knurled Pin Retainer.
Large and small assembly Aligning locking pin hole on metering assembly
The Powder Measure can be mounted on an optional Powder Measure Stand,
available from your reloading dealer. Two threaded drop tubes are furnished;
one with a small hole for .22 to 7mm calibers, and one with a large hole for .30
caliber and up. An optional .17 caliber drop tube is available from your dealer.
The optional QC Drop Tube Adapter, part number 98855, allows you to use the
QC Funnel Extended Drop Tube or Adapters for a more precise fit to your
cartridge case.
7
TO USE
Before attempting to throw a series of powder charges, set the powder measure
for the maximum charge and run about a pound of powder through it. This will
deposit a film on the inside of the measure and help the powder flow through
more evenly and consistently.
Be sure you use the same uniform movements for each powder charge. To
throw a charge, raise the handle until it comes to the end of the stroke with a light
tap. Then lower the handle in the same manner. This tap at the end of each
stroke helps to settle the powder uniformly in the measure.
A dependable powder scale should be used to set the first charges in the powder
measure as follows: throw a powder charge directly into the scale pan by raising
the handle and lowering it. Weigh the charge. If it is too heavy, adjust the
measuring screw “in” with the handle in the down position. If the charge is too
light, adjust the measuring screw “out”. When you arrive at the exact charge you
need, lock the metering screw in place with the knurled lock nut on the shaft.
Now you’re ready to throw a series of charges. Additional metering assemblies
can be purchased so that you can leave them preset to your favorite charges,
thus allowing for quick powder changeovers.
As a precaution, throw every tenth charge into the scale pan and weigh it to be
sure of consistency.
METERING ASSEMBLY CHANGE
If the same powder is to be used, but you wish to change out the Metering
Assembly for another one that is preset for different charge, it is not necessary to
empty the powder hopper.
Dispense the remaining charge and hold the handle in the “up” position. Loosen
the knurled Lock Pin Retainer, pull the Lock Knob and remove the Metering
Screw Assembly. Align the Lock Pin hole on the side of the other Metering Screw
Assembly and insert into the Metering Cylinder, release the Lock Knob. Try to
rotate the Metering Screw Assembly to insure that the Lock Pin is in place.
Tighten the knurled Locking Pin Retainer. As a precaution, dispense a charge
and weigh it to be sure that you have installed the correct preset Metering Screw
Assembly.
CAUTION: If the handle is in the “down” position when the Metering Assembly is
removed, the powder will flow through the Measuring Cylinder and spill out of the
powder measure!
TO DRAIN POWDER HOPPER
It is not necessary to empty the powder hopper each time you change charges
unless a different powder is required.
Powder should not be left in the measure as it will deteriorate and may clog and
jam the measuring cylinder and etch the powder hopper. The measure can be