RCBS Ultrasonic Cleaner User Manual
Page 6
10
11
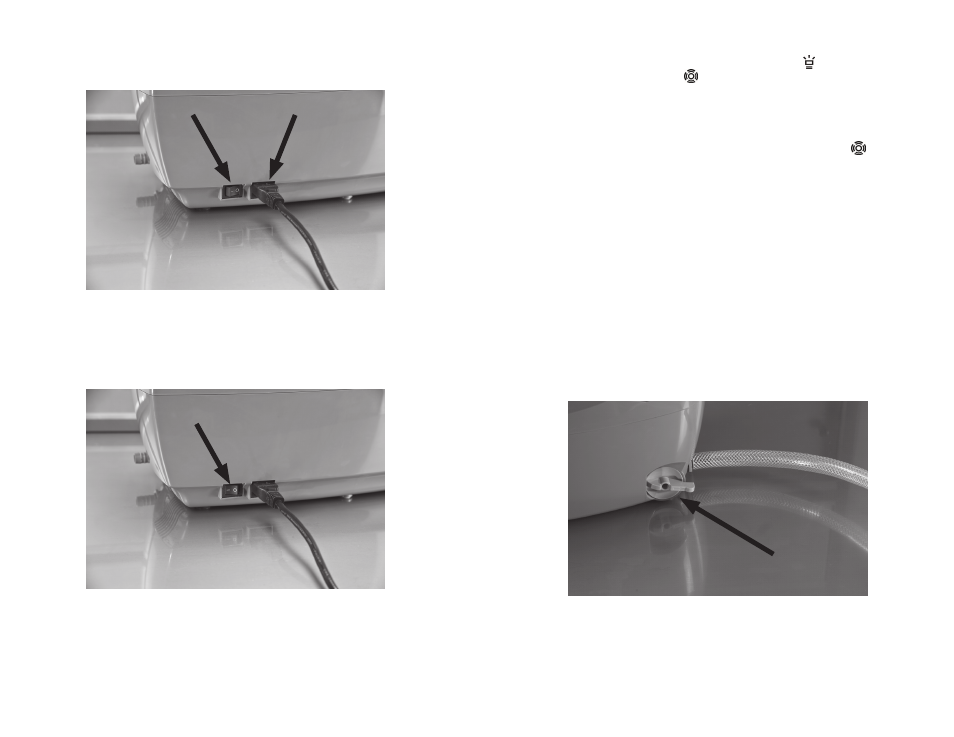
4. Insert Power Cord into socket located in the back of the RCBS Ultrasonic
Cleaning Unit. See Photo 6
Photo 6
5. Plug opposite end of Power Cord into a grounded 120VAC wall socket.
6. Turn the On/Off switch to the On position, see Photo 7.
Photo 7
7. Set temperature by depressing Temp Button until desired temperature is
displayed.
8. When fluid reaches desired temperature, slowly place loaded basket into
Ultrasonic Cleaning Unit.
9. Place lid securely onto Ultrasonic Cleaning Unit.
10. Set time by depressing Time Button until desired time is displayed.
11. If Degassing is desired, depress Function Button until the symbol is displayed.
12. If Degassing is not desired, the symbol will be displayed specifying normal
cleaning operation.
13. Ensure the Green ready light is illuminated.
14. Depress the On/Off button to initiate cleaning. You will hear a buzzing sound
indicating the Ultrasonic Cleaner has begun the cleaning cycle.
15. If the degassing function is being used, the unit will cycle on and off for
2 minutes until the degassing operation is completed, at which time the symbol
will automatically display and normal cleaning operation will begin
16. Once the Ultrasonic Cleaner has been in operation for the desired time the unit
will automatically shut off.
17. When cleaning has been completed, turn off the Power Switch, located in the
back of the unit, see Photo 6.
18. Unplug Power Cord from socket on back of unit.
19. Remove the lid and remove basket from Ultrasonic Cleaner.
20. Place basket inside another container containing rinse water. Agitate items in
rinse water and continue to rinse until all cleaning solution has been rinsed from
items. Be sure to discard rinse water and cleaning solution according to cleaning
solution manufacturers recommendations and local disposal regulations.
21. Place cleaned and rinsed items onto a clean, dry surface. Spread items out and
allow to dry. Drying time can be reduced by using a hair dryer, or placing in direct
sunlight.
22. If more cleaning is necessary repeat steps 4 through 16 mentioned above.
If cleaning solution is dark and murky it will need to be replaced. If cleaning is
completed proceed to step 23.
23. Attach drain hose to drain or place a 3L / 3.17Qt. reservoir below drain. Rotate
Drain Valve CW 90 degrees to begin draining fluid from tank, see Photo 8.
Photo 8
24. When tank has been completely drained, rinse tank with clean water, rotate Drain
Valve CCW 90 degrees to close drain, as shown in Photo 2.
25. Wipe tank and other areas of cleaner with a clean dry cloth to remove any
excess moisture accumulated during use.
26. Store unit in dry, cool ventilated area.
On/Off Switch
Power Cord
On/Off Switch
ON Position
Drain Valve In Open Position