Table of contents specifi cations, Prefl ight checklist, Installed – E-flite UMX B-17G Flying Fortress BNF User Manual
Page 3: Included, Needed to complete
3
EN
To register your product online, go to www.e-fl iterc.com
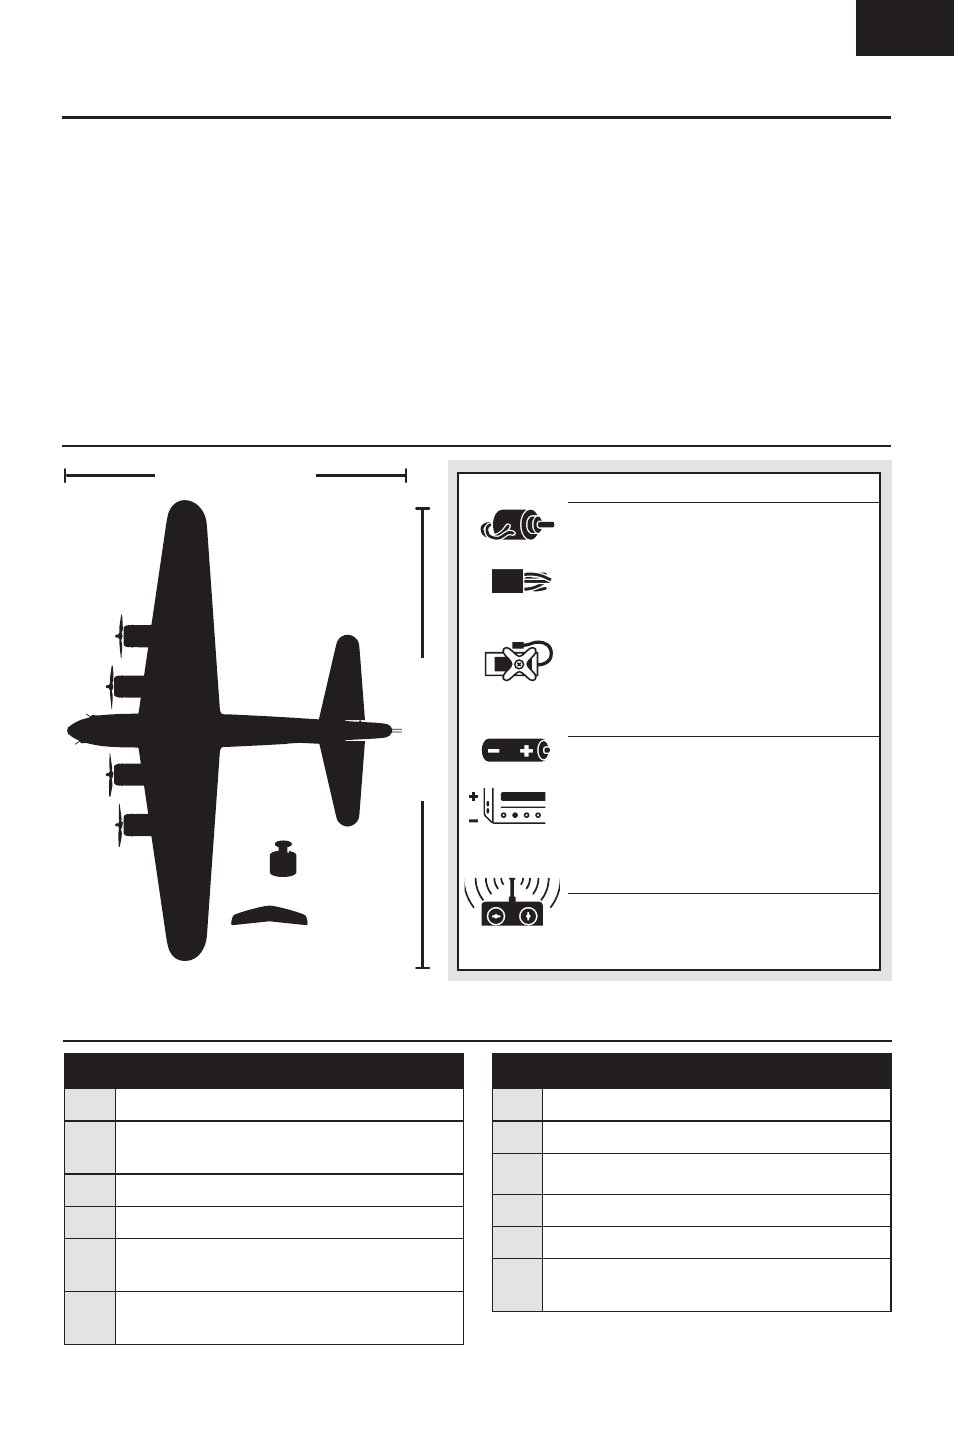
Installed
Motor: (4) 6mm Brushed Inrunner (Left
and Right Rotation)
Receiver : Spektrum
™
AS6410Q DSMX
6Ch UM AS3X Receiver w/Quad motor
ESC (SPMAS6410Q)
Servo: (2) 2.3-Gram Performance
Linear Long Throw Servo Offset
(SPMSA2030LO)
Included
Battery: 250mAh 1S 3.7V 20C Li-Po
(EFLB2501S20)
Battery Charger:
E-fl ite
®
1S USB Li-Po Charger, 300mA
(ELFC1008) and adapter (EFLC1009)
Needed to Complete
Recommended Transmitter:
Spektrum
™
DSM2
®
/DSMX
®
full range
with dual-rates (DX4e and up)
26.0 in (660mm)
18.3 in (465mm)
2.75oz
(78 g)
Wing Area:
87.5 sq in
(5.65 sq dm)
Charger Warnings ..................................................4
Battery Charging ....................................................4
Transmitter and Receiver Binding ...........................5
Low Voltage Cutoff (LVC) ........................................5
ESC/Receiver Arming, Battery Installation
and Center of Gravity .............................................6
Control Direction Tests ...........................................7
Control Centering ..................................................8
Control Horn Settings .............................................8
Dual Rates .............................................................8
Flying Tips and Repairs ..........................................9
Post Flight Checklist ..............................................9
Power Components Service .................................10
Installing the Retracted Landing Gear ...................11
Installing the Landing Gear ..................................11
Troubleshooting Guide .........................................12
Troubleshooting Guide (Continued) .......................13
Limited Warranty .................................................13
Warranty and Service Information ........................15
Compliance Information for the European Union ...15
Replacement Parts ...............................................58
Optional Parts and Accessories ............................59
Table of Contents
Specifi cations
1. Charge fl ight battery.
2. Install fl ight battery in aircraft (once it
has been fully charged).
3. Bind aircraft to transmitter.
4. Make sure linkages move freely.
5. Perform Control Direction Test with
transmitter.
6. Perform AS3X Control Direction Test with
aircraft.
7. Set dual rates.
8. Adjust center of gravity.
9. Perform a radio system Range Check.
10. Find a safe and open area.
11. Plan fl ight for fl ying fi eld conditions.
12. Set fl ight timer for 5 minutes for fi rst
fl ight.
Prefl ight Checklist