English – Clay Paky S.I.P. 300 User Manual
Page 3
S.I.P. 300
7
ENGLISH
MAINTENANCE
4
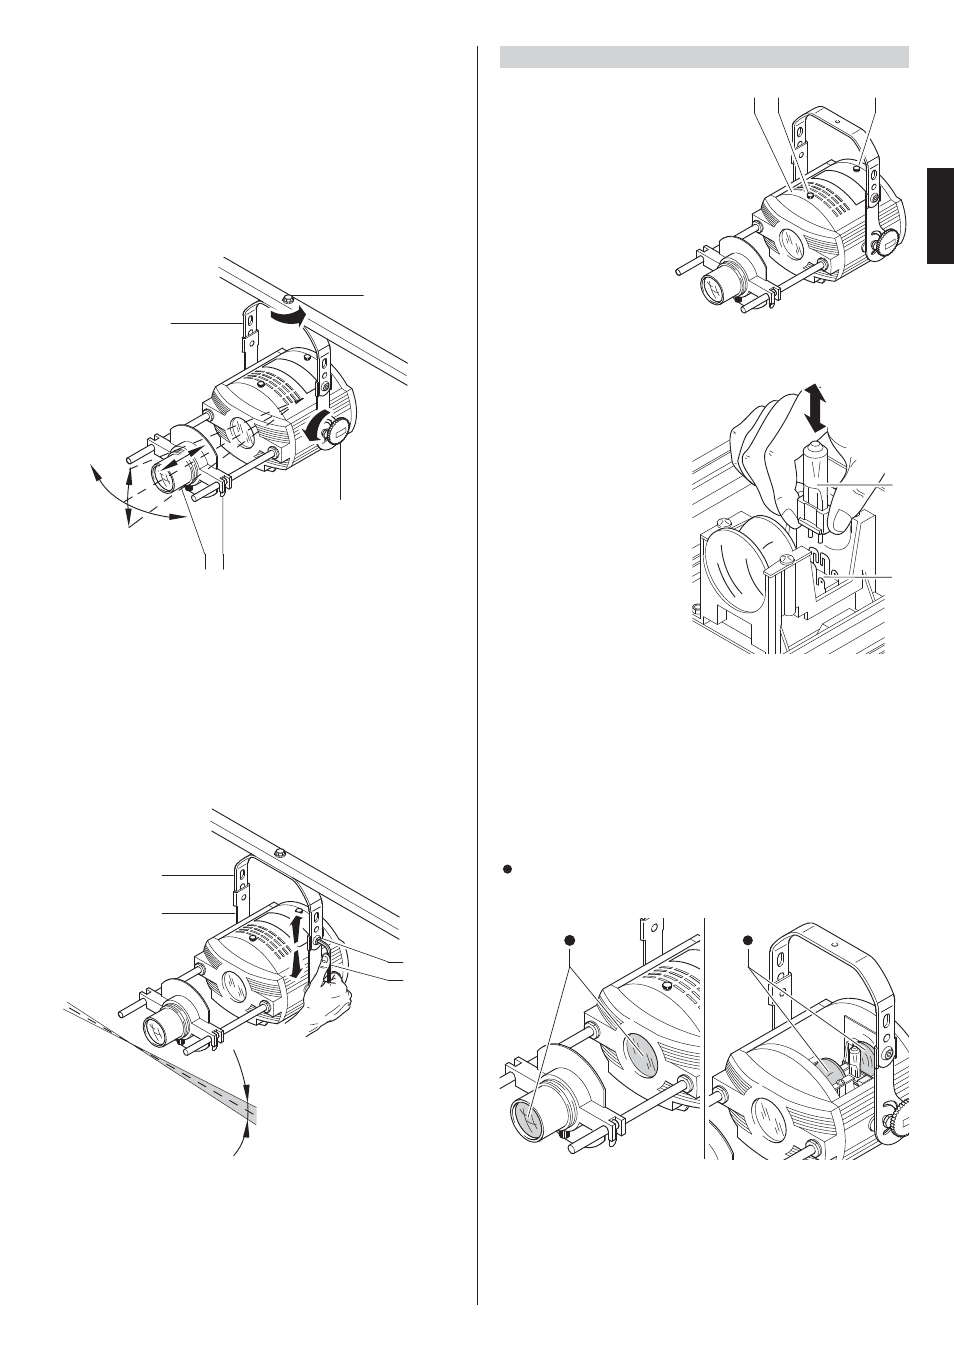
• Centring the projector
Slightly undo the mounting screw (22), move the projector horizontally, turning the
beam of light in the desired direction, then re-tighten the mounting screw.
Loosen the knobs (14), move the projector vertically on the bracket (1) to position the
beam of light at the desired point, then lock the knobs (14).
• Centring the lens
Move the lens (8) and/or lens holder (9) axially to obtain perfect focusing.
• Rotating the axis of projection
The holes on the bracket (1) for fixing the plates (13) are appropriately slotted to
permit rotating the fitting on its axis by approximately 3°. This permits fine adjustment
of the angle of the image projected, which is useful when using some particular
accessories such as for gobo projection.
Using the hexagonal wrench (4) supplied, loosen a screw (2) and turn the projector
to the position required, and then re-tighten the screw (2).
3
ϒ
1
13
2
4
Y
X
8
X
Y
9
14
22
1
24 23
23
• Opening and closing the
projector
Loosen the handwheels (23) and
remove the re-lamping cover (24)
from the projector.
After maintenance, fit the cover (24)
back on and lock the handwheels (23).
• Periodical cleaning
To keep the luminous efficiency of the projector unchanged, it is vital to periodically
clean the parts where dust and grease can accumulate.
Observing the following guidelines will help keep the projector in perfect working
order for a long time.
To remove dirt from the lens, use a soft cloth dampened with any liquid detergent for
cleaning glass.
Caution: Never use solvents or spirits.
Parts requiring frequent cleaning.
• Re-lamping
Take the cover off the projector, then
remove the lamp to replace (25) from
the connection (26) by gripping its
base and taking it out ver tically.
Inser t the new lamp into the
connection (26) checking the correct
position of the terminals.
WARNING: Do not touch the lamp’s
bulb with bare hands.
Should this happen, clean the bulb
with a cloth soaked in alcohol and
dry it with a clean, dry cloth.
25
26