BIC Volvo S40 T5 Front Mount Intercooler System User Manual
Page 4
Volvo S40 T5 Intercooler System
/ Installation Manual
2
Bell Intercoolers, inc. © 2009 All rights reserved. S40-IMv1
Removing Front Fascia (Nose Section)
The first step in the installation will involve removal of the front fascia
(front nose section) of the vehicle (see Fig. 2.1). Attached to the front
fascia are the upper grill assembly, the front license plate and mount-
ing bracket, the driving light assemblies and driving light grills, if so
equipped. All of these pieces remain attached to the front fascia when
it is removed and only require that you disconnect one wiring connec-
tor for each driving light assembly, one per side.
In addition to the front fascia there is a plastic lower panel and a
plastic splash guard (see Fig. 2.2). The plastic lower panel does not
need to be detached from the front fascia for this process. Figure 2.2
shows the lower panel detached for instructional purposes only. The
splash guard is a separate plastic panel positioned underneath the
engine and it must be removed for installation.
To reduce the chance of damaging the vehicle paint on the front
fascia and the surrounding bodywork, we recommend you have
someone available to help when removing the front fascia.
2.1 Remove Headlight Washer Covers (If so equipped)
There are two headlight washer covers, one per side, that will need
to be removed. This is actually the trickiest part of the entire instal-
lation process though it only requires patience and some time to get
the covers off. It may be helpful to have someone to hold the covers
in their extended position to allow you to see the clip mechanism that
secures the covers.
• Carefully pull headlight washer covers away from the bodywork.
These covers are attached directly to the headlight washer mecha-
nism, be careful not to twist or damage washer mechanism.
• Insert a small screwdriver into the clip on the underside of the
cover to release clip.
• Remove cover.
• Repeat for opposite washer assembly.
2.2 Splash Guard
• Locate and remove the seven (7) T30 Torx fasteners securing the splash guard.
• Remove splash guard.
2.3 Remove Front Fascia Fasteners
• The front fascia is secured by fasteners, plastic rivets and clips in the following locations:
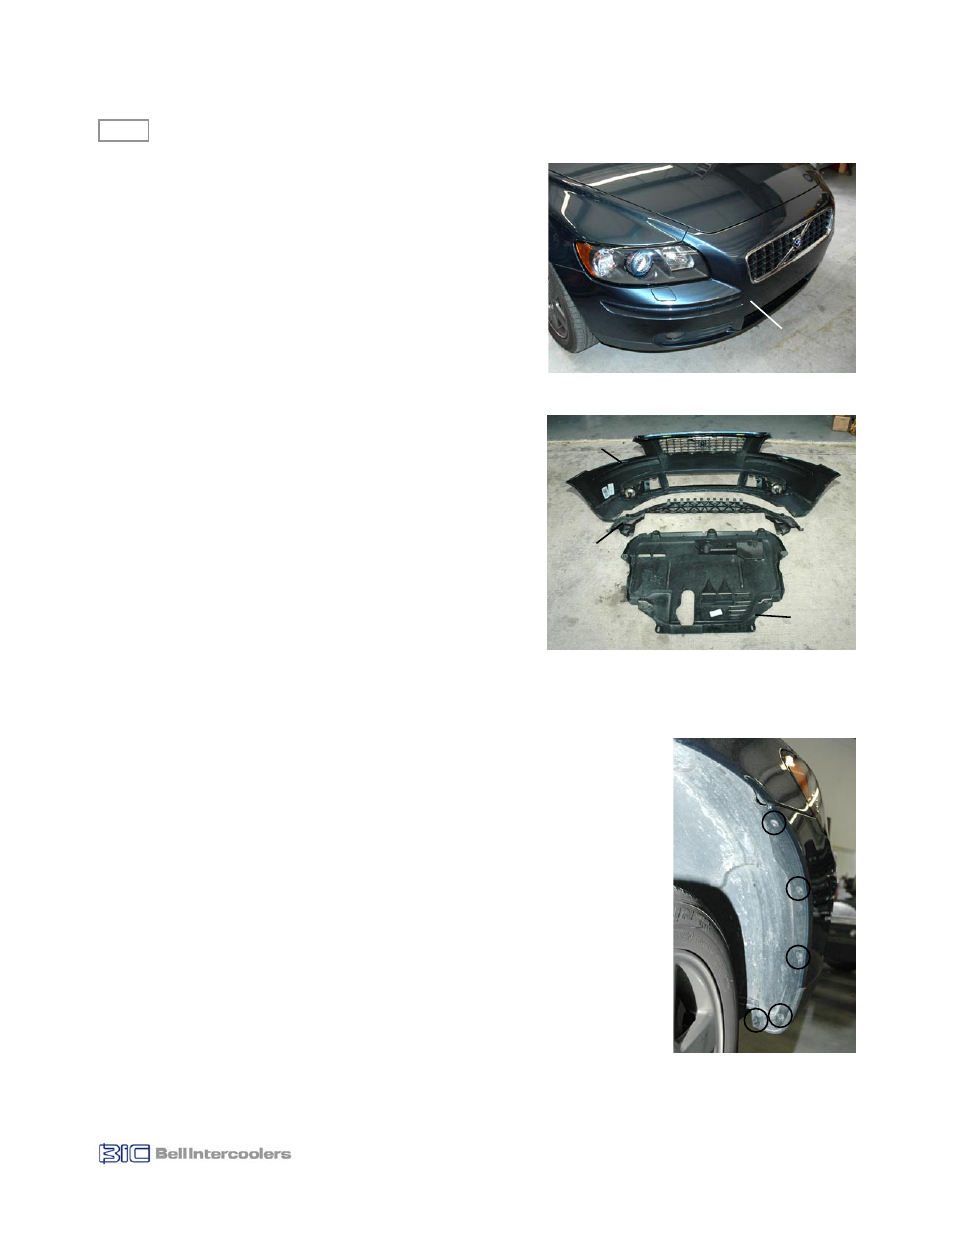
Passenger Fender Well
Fasteners (x5)
Driver Fender Well
Fasteners (x5)
Upper Radiator Bulkhead (across top)
Fasteners (x2), Plastic Rivets (x5)
Lower Radiator Support (across bottom)
Clips (x3)
• Using the T20 and T30 Torx bits remove the five (5) fasteners securing the front fascia in
each fender well (see Fig. 2.3).
• Using the T20 Torx bit remove the two (2) fasteners from the upper radiator bulkhead
(see Fig. 2.4).
• Carefully remove the five (5) plastic rivets securing the front fascia to the upper radiator
bulkhead (see Fig. 2.4). Please note, these rivets are designed to be reused. Using a
Phillips screwdriver press the center section of the rivet down approximately 1/8”, until
2.0
Figure 2.1
Front
Fascia
Figure 2.2
Splash
Guard
Front
Fascia
Lower
Panel
Figure 2.3
1
2
3
4
5