Fig. 4, M13 m3 m2 – Bell'O AVSC2155 User Manual
Page 7
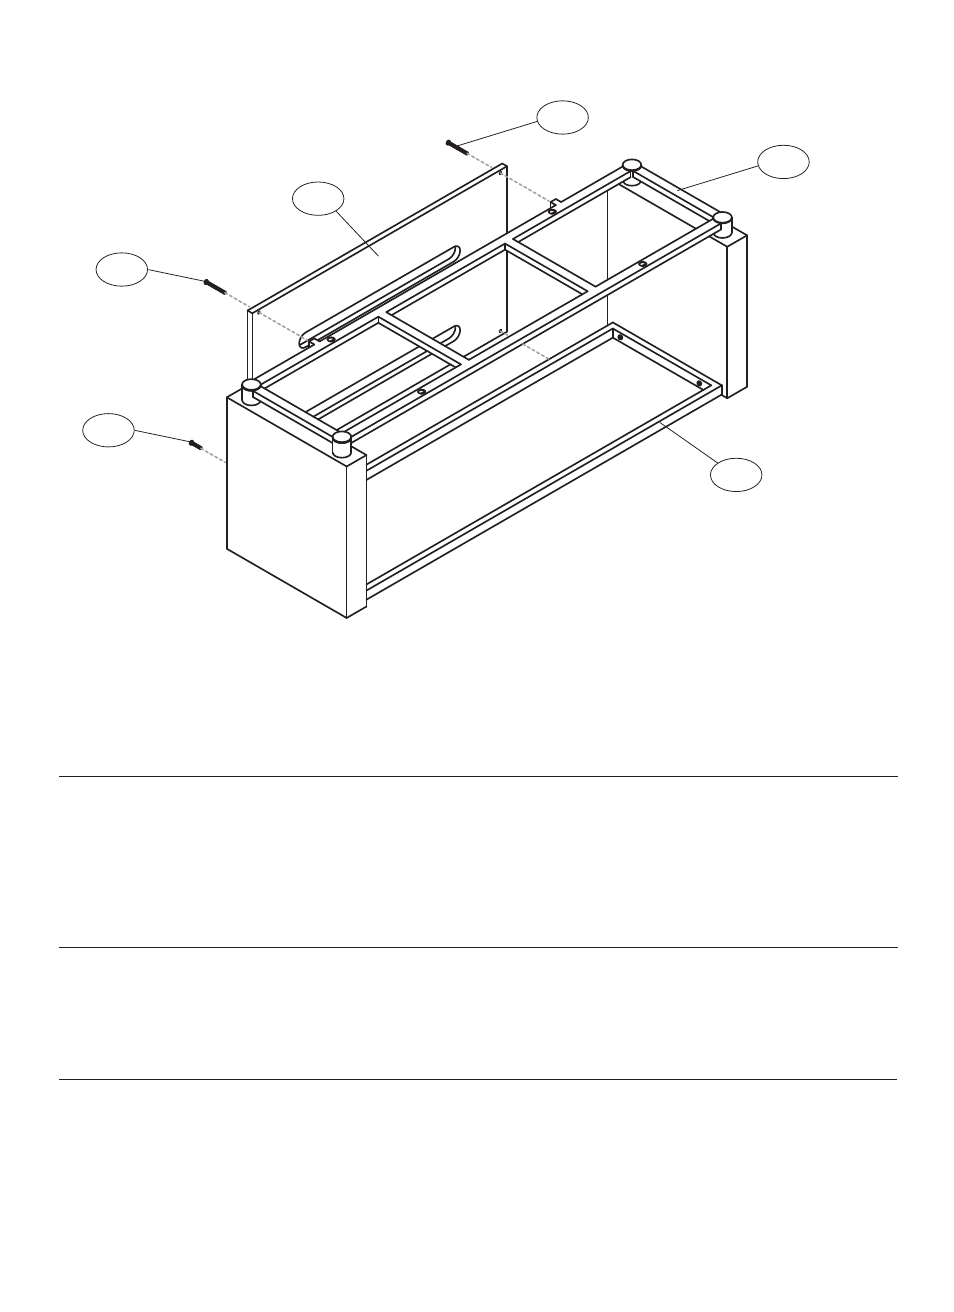
Fig. 4
M4
M12
M12
4. ATTACH the Rear CMS
®
(Cable Management System) Panel (M4) to the Top Shelf Support Frame (M3) using two
50 mm Bolts (M12) as shown above.
Do not yet tighten fully.
5. ATTACH the Rear CMS
®
(Cable Management System) Panel (M4) to the Bottom Shelf Support Frame (M2) using two
28 mm Bolts (M13) as shown above.
Tighten ALL bolts (M12, M13) fully.
M13
M3
M2
4. FIXEZ le panneau CMS
®
(angl. Cable Management System, pour Système de gestion des câbles) arrière (M4) au cadre de soutien
de la tablette supérieure (M3) à l’aide de deux boulons 50 mm (M12) tel qu’indiqué ci-dessus. Ne serrez pas complètement à cette
étape-ci.
5. FIXEZ le panneau CMS
®
(angl. Cable Management System, pour Système de gestion des câbles) arrière (M4) au cadre de soutien
de la tablette inférieure (M2) à l’aide de deux boulons 28 mm (M13) tel qu’indiqué ci-dessus. Serrez fermement TOUS les
boulons (M12, M13).
4. FIJE el panel posterior CMS
®
(Cable Management System) (M4) al bastidor del soporte del estante superior (M3) con dos pernos de
50 mm (M12) como se muestra arriba. No ajuste completamente todavía.
5. FIJE el panel posterior CMS
®
(Cable Management System) (M4) al bastidor del soporte del estante inferior (M2) con dos pernos de
28 mm (M13) como se muestra arriba. Ajuste TODOS los pernos (M12, M13) completamente.
4. ПРИКРЕПИТЕ заднюю панель CMS
®
(системы скрытой прокладки кабелей) (M4) к опорной раме верхней полки (M3) с помо-
щью двух болтов длиной 50 мм (M12), как показано на рисунке выше. Не затягивайте болты до конца.
5. ПРИКРЕПИТЕ заднюю панель CMS
®
(системы скрытой прокладки кабелей) (M4) опорной раме нижней полки (M2) с
помощью двух болтов длиной 28 мм (M13), как показано на рисунке выше. Полностью затяните все болты
(M12, M13).