Hood assembly, Components, Bracket set assembly – Autocue LWA Hood User Manual
Page 2
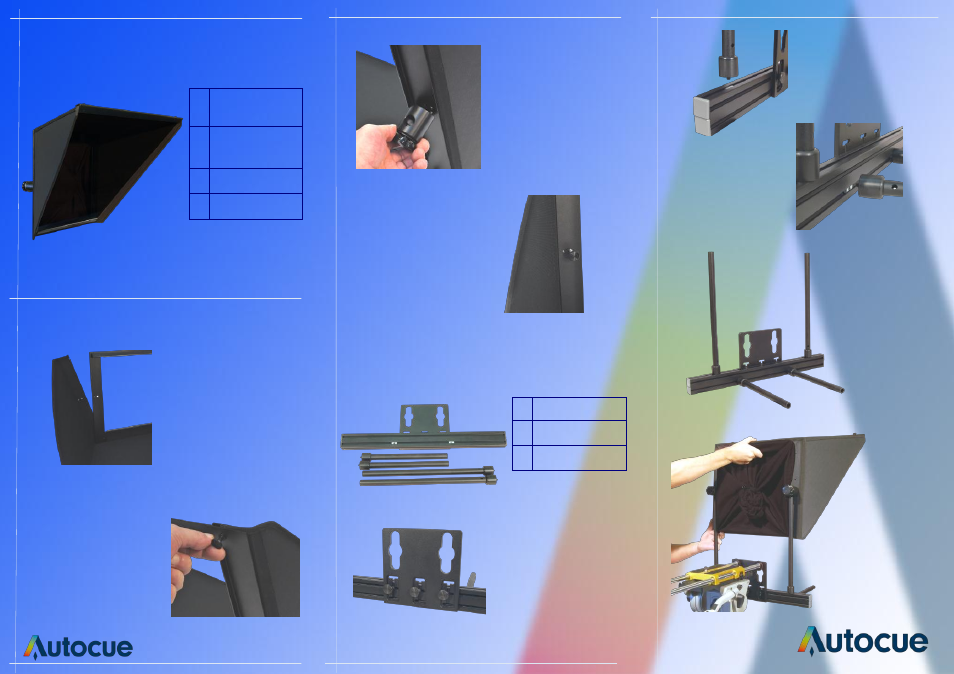
Hood Assembly
1. Fold back the sides of
the hood and loosen the
four studs on the metal
frame. Insert the side
panels between the front
and back sections of the
metal frame. Ensure that
they are pushed in com-
pletely.
2. Re-tighten the four
studs to secure the frame
and clamp each side in
position. On the back of
the metal frame, halfway
down each side, there is
a large hole adjacent to
a small recess. In one
end of each tube clamp
is a thumbscrew and a
small metal locating pin.
3. Remove the large
thumbscrew from a tube
clamp and align the
locating pin with the recess
and the large hole with the
tube clamp screw hole.
Repeat for the second
tube clamp.
4. From the inside of the
hood, insert the large
thumbscrew and tighten to
secure the tube clamp in
position.
A
Upper glass
retainer
B
Lower glass
retainer
C
Glass
D
Tube clamp
Components
A
B
C
D
Bracket Set Assembly
1. Ensure the keyhole plate
is in the appropriate
position on the bracket.
2. Screw in the vertical
hood mounting bars.
3. Screw in the
horizontal monitor
mounting bars.
A
Keyhole Plate
B
Hood Poles
C
Monitor Poles
A
B
C
Align the hood
mounting bars with the
clamps on the rear of
the hood, pass the
tubes through the
clamps and tighten
using the knobs.
Completed bracket