Components assembly – Autocue Digital Cue Light Kit - Autocue QTV User Manual
Page 2
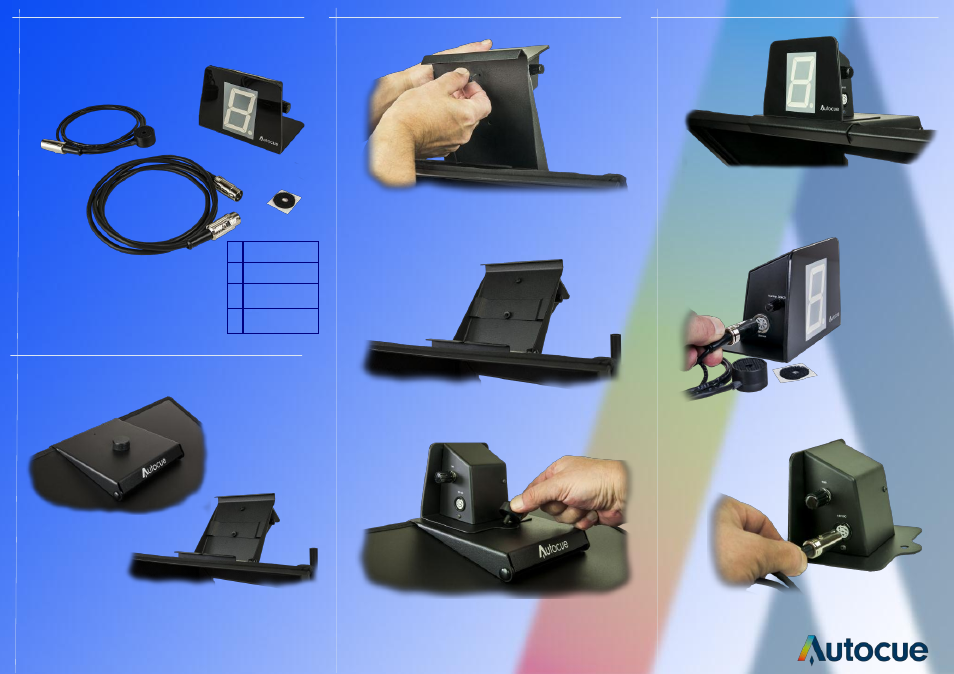
Components
Assembly
1. Remove the knob
(A)
and catch plate
(B)
from the
hood frame Retainer.
A
Sensor Unit
B
Power Cord
C
Velcro Disc
D
Cue Light
2. Secure the Cue Light to the hood frame retainer
using the small thumb screw provided.
4. Re-secure the hood frame retainer. The Cue Light is
now mounted to the hood.
5. In operation the Cue Light display changes
colour from green to red when the sensor unit
sees the camera tally light change.
7. To supply power to the Cue Light, plug the
power cord into the socket marked 12V DC.
3. Replace the catch plate and knob.
6. To install the sensor, plug the unit into the
socket marked sensor.
(A)
(B)
(A)
(B)
(C)
(D)