Installing the drive, Macintosh – Western Digital My Book Premium ES Edition Quick Install Guide User Manual
Page 3
My Book Premium ES Edition | 2
Installing the Drive
Windows
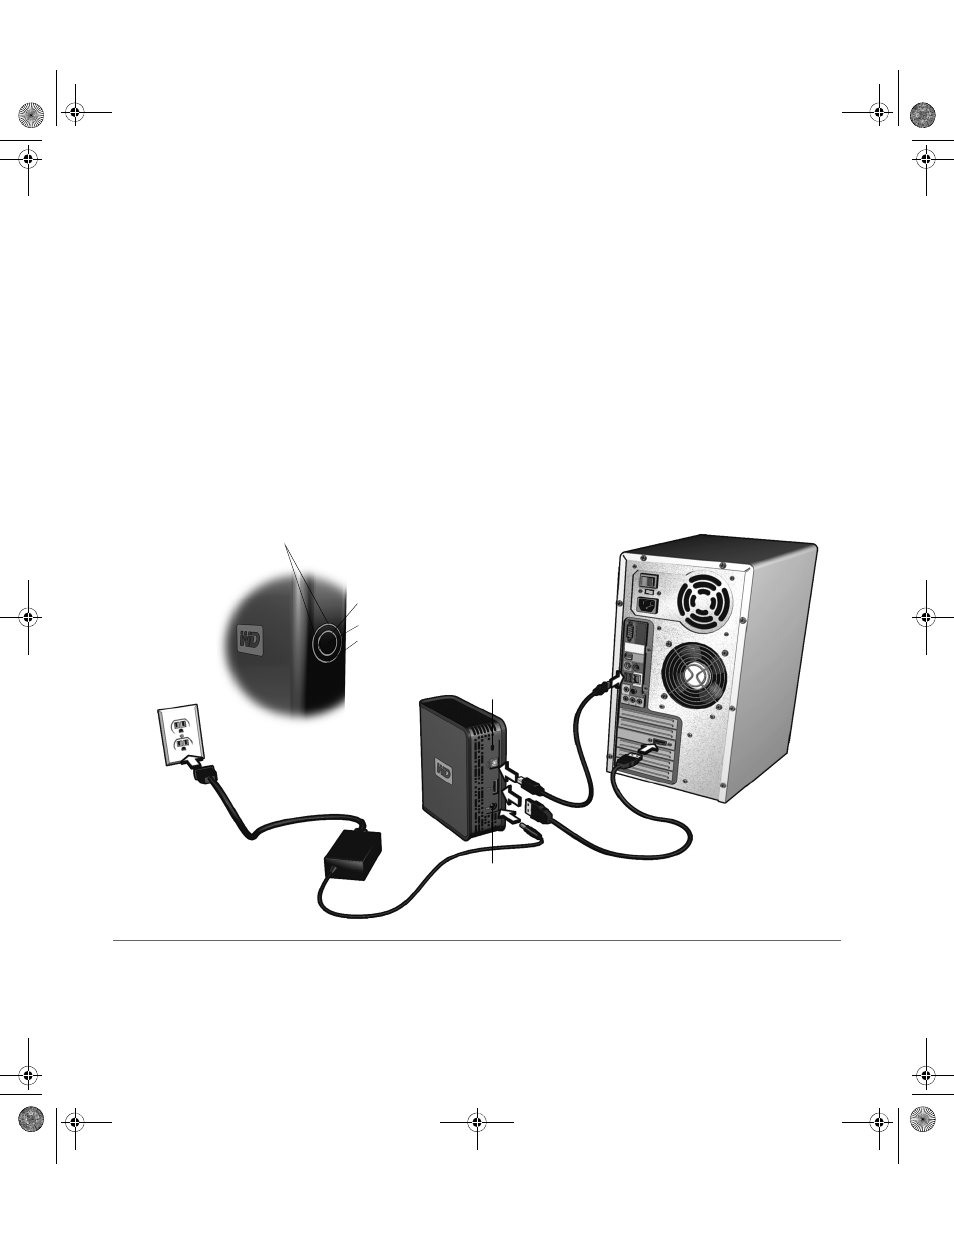
1. Turn on your computer.
2. Connect the drive’s power cord and USB cable
(or optional eSATA cable) as shown.
Note: Some SATA controllers require a system
reboot to recognize the drive in eSATA mode.
3. Drive utilities are installed automatically. If a
security alert is displayed during this installation,
click Accept or Continue.
4. When finished, a menu displays a list of choices
including EMC
®
Retrospect
®
Express HD and
™
software. To install the software, simply
double-click your choice on the menu; otherwise,
click Quit to begin using the drive.
Macintosh
1. Turn on your computer.
2. Connect the drive’s power cord and USB cable
(or optional eSATA cable) as shown.
Note: Some SATA controllers require a system
reboot to recognize the drive in eSATA mode.
3. The drive mounts to the desktop. Double-click the
My Book drive icon.
4. Double-click the Mac folder, then double-click the
WD Button Manager Software disk image that
contains the installer.
5. Double-click the WD Button Manager package
inside the Mac disk image to install the button
manager and EMC Retrospect Express software.
eSATA Cable
Power Port
Power/Safe Shutdown
™
Button
USB Cable
Power Cord
Kensington
®
Security Slot†
Capacity Gauge (inner LED ring)
Power and Drive Activity
indicator (outer LED ring)
USB Mode
eSATA Mode
Power and Drive Activity (both rings)
1SU_QIG-200_MLT.book Page 2 Thursday, December 14, 2006 5:57 PM