Operating instructions – Waring Pro WO50B User Manual
Page 3
3
4
Before you use this product for the first time, please take a
few moments to read these instructions. Keep them for future
reference.
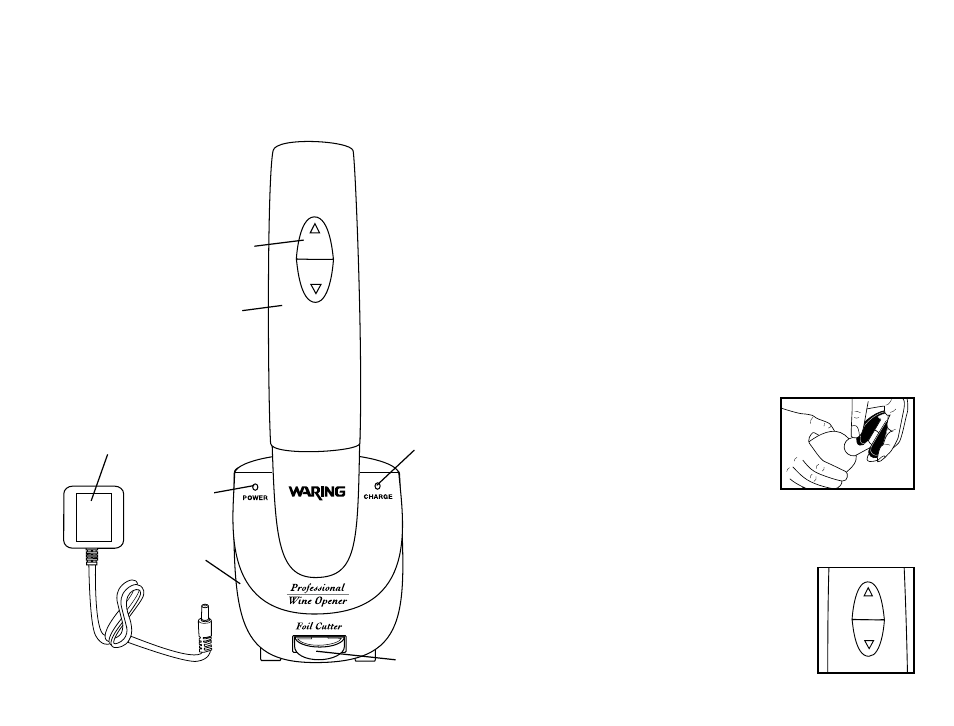
Parts
1. Rubberized handset
2. Power Up/Down switch
3. Power indicator light
4. Charge indicator light
5. Charging base
6. Foil cutter
7. Power adapter
OPERATING INSTRUCTIONS
Connection and Use
We recommend that you charge your electric wine opener for at
least eight hours before using for the first time. Please follow the
instructions for recharging as stated below:
This appliance is for 120 volts only and should not be used with
a converter.
Recharging your Electric Wine Opener
Plug one end of the adapter cord into the base of the recharging
base and the other end into an electrical outlet. Place the
electric wine opener into the recharging base, making sure
that it is firmly in position and that it is fully engaged with the
recharging connection. A green charge light will flash indicating
that the unit is charging. It will take approximately 6-8 hours to
recharge your electric wine opener. When your electric wine
opener is fully recharged, the green light will stop flashing and
become a solid green light.
Your wine opener can open approximately 80 bottles of wine
on a full charge.
Foil Cutter
For your convenience, this unit has a
removable foil cutter, which is stored in
the base of the unit. Before removing the
cork, you must remove any foil from the
bottle (see fig 1). Attach foil cutter to the
top of the wine bottle. Keep hand on lower
part of bottle and turn foil cutter in twisting
motion to remove foil. Remove foil to expose
top part of cork surface.
CAUTION: Blade on foil cutter is sharp. Please keep fingers away
from cutter's sharp edges.
To Operate your Wine Opener
Press the lower part of the switch (indicated
by a down arrow) to remove a cork from the
bottle. Press the upper part of the switch
(indicated by an up arrow) to release a cork
from the mechanism after you have removed
the cork from the bottle (see fig 2).
1
2
3
4
5
6
7
(fig 1)
(fig 2)