Caution, W arning – Traditions PURSUIT (Non-Accelerator Models) User Manual
Page 15
18
CAUTION:
With the safety set in the
“Fire
”
(F) position and with the
hammer pulled back to the fully cocked position, the gun is
now ready to fire. Never rely totally on the firearms
mechanical
“safety
”
device. The word
“Safety
”
describes a
firearms trigger block mechanism. This mechanical device
is designed to place your firearm in a safer status.
No Guarantee can be made that the firearm absolutely will
not fire even if the safety is set on the
“Safe
”
(S) position.
Like any mechanical device, a
“Safety
”
can sometimes fail.
It can be jarred or inadvertently manipulated into an unsafe
condition. Never test the safety while your firearm is loaded
or at any time while it is pointed in an unsafe direction.
A Note About Maintenance Procedures:
Proper maintenance and cleaning of your new muzzleloader will
require you to remove the barrel from the receiver
. Y
ou must
clean the muzzleloader each time it is used. Please see the
Disassembly and Cleaning sections for more information. T
ake
time before such cleaning to study the Disassembly/Assembly
procedures and the accompanying photographs to thoroughly
acquaint yourself with your rifle’
s subassemblies.
VII. DISASSEMBL
Y
:
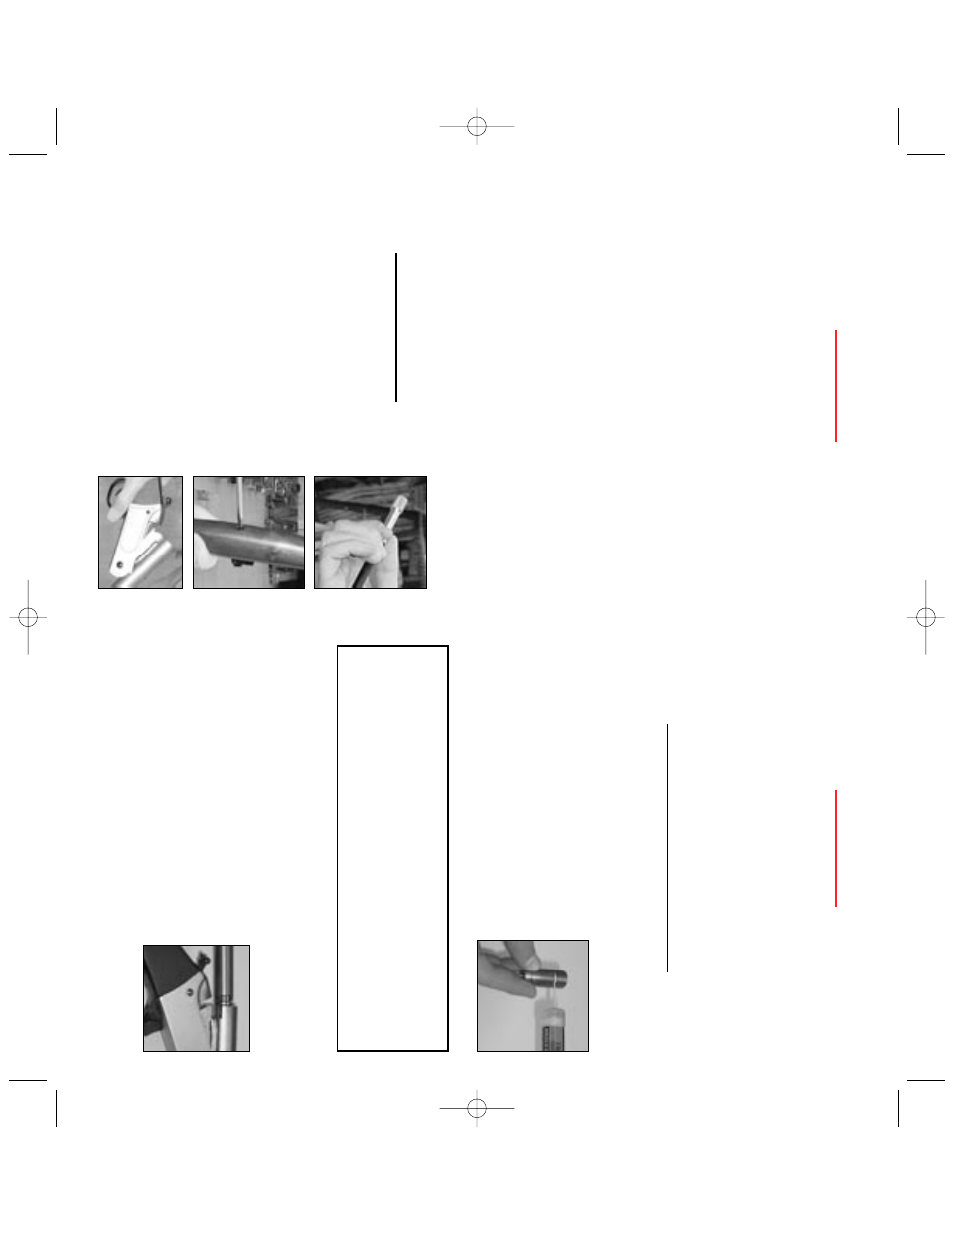
Before proceeding with disassembly and
maintenance of your rifle, make certain the
gun is unloaded and that the cap or primer
has been removed.
1.
Remove the ramrod and make sure the
gun is unloaded. See Section V
.
2.
With gun closed, unscrew forend
and remove.
3.
Open the action and lift barrel from
the receiver
.
4.
To
re-assemble, pull action release
button and lower the barrel back into
the receiver
.
18
1919
W
ARNING:
DO NOT A
TTEMPT TO DISSASSEMBLE THE RECEIVER. THIS
INCLUDES ANY PINS HOLDING THE RECEIVER TOGETHER.
CLEAN AS A COMPLETE UNIT
. IF YOU A
T
TEMPT TO
DISSASEMBLE ANY P
A
R
T
OF THE RECEIVER IT WILL
AUTOMA
TICALL
Y VOID ANY W
ARRANTY ON THIS FIREARM
AND CAN MAKE THE FIREARM UNSAFE FOR USE AND MA
Y
CAUSE MAJOR INJUR
Y OR DEA
TH.
VIII. IGNITION & BREECH PLUGS
Y
our muzzleloader is equipped to use a standard 209 shotgun
primer for the ignition. The 209 primer area is built directly into
the breech plug. Make sure that you remove the 209 breech
plug and clean the threads of both the breech
plug and inside of the barrel before ever
firing your muzzleloader
. Y
ou must lubricate
the thread of the breech plug with T
raditions
breech plug grease before you install it back
into the barrel. This will help prevent the
breech plug from getting stuck inside the
barrel after shooting.
Note:
Breech plugs will wear out over time and should be
replaced periodically
. W
e recommend that you pur
chase at
least one extra breech plug for emergencies in the field or at
the range. W
e recommend that you replace your breech plugs
after ever
y year and nipples after ever
y hunting season.
Removal of the Breech Plug:
1.
Open the action and position the large end of the breech
plug wrench over the breech plug, taking care to fully seat
the wrench over the breech plug.
2.
Insert the rod handle into the hole in
the wrench.
3.
Tu
rn the wrench counter
-clockwise,
unscrew the breech plug and remove
from barrel. It may require some extra
for
ce to free up the breech plug after shooting.
PURSUIT Manual.qxd 6/3/04 4:10 PM Page 18