Ixed, Nstallation, Nstructions – Broilmaster PC2CART-1 User Manual
Page 11
Page 11
B100999-2-0807
F
IGURE
11
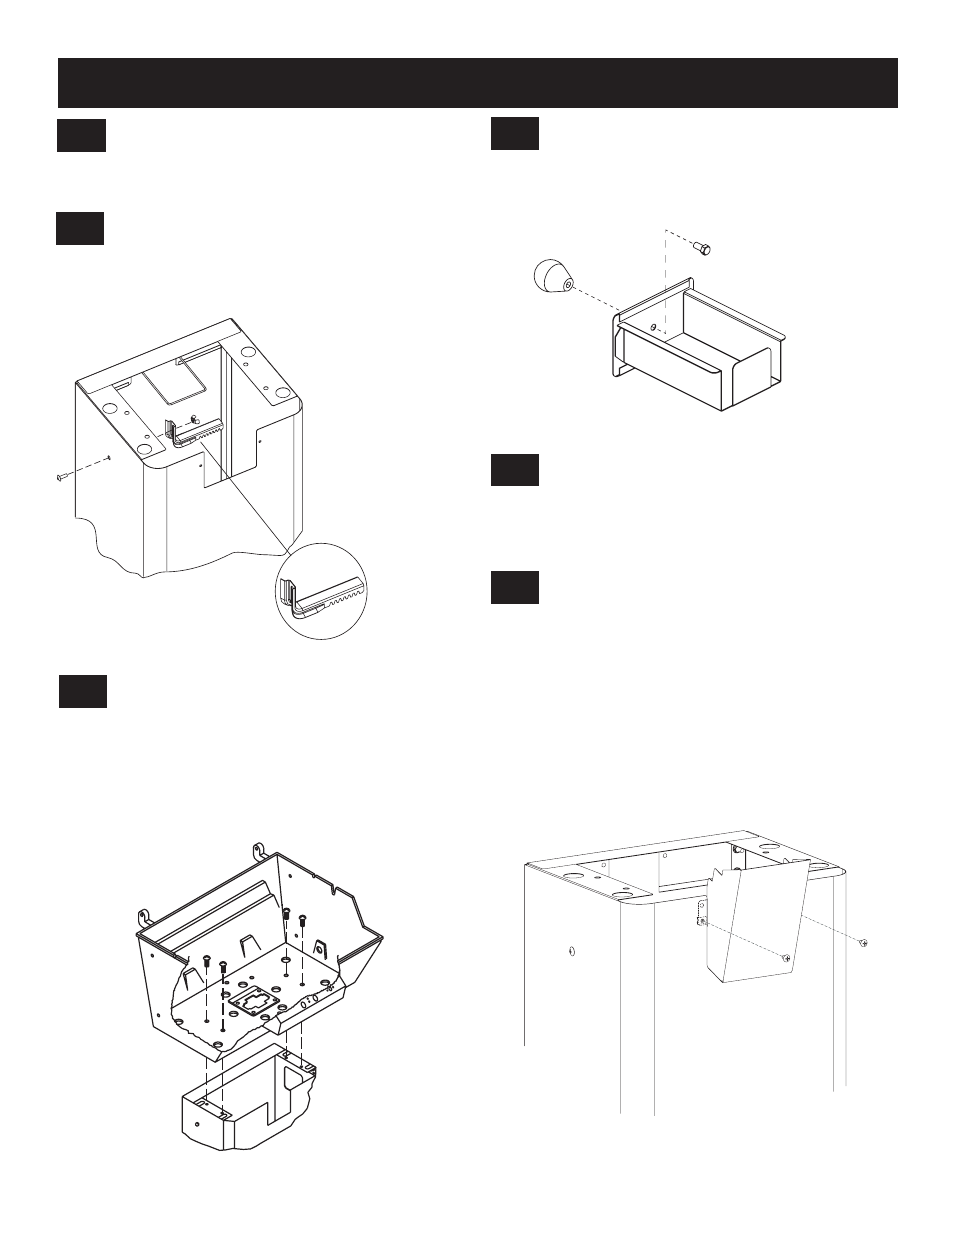
Install one 1/4-20 x 3/4 phillips head screw into the fac-
tory installed nut on the Left Side of cart. Figure 11.
Fasten the Cylinder Retainer (3) to the screw with a
wing nut. Adjust height to accommodate your LP cyl-
inder. Figure 11.
6
7
F
IXED
B
ASE
I
NSTALLATION
I
NSTRUCTIONS
Using four 1/4-20 x 3/4 screws, fasten the grill to the
cart. Figure 12.
Note: To ease assembly you may wish to install the
igniter as shown in your Broilmaster
®
grill manual before
attaching the grill to the cart.
F
IGURE
12
8
Install one 1/4-20 x 1/2 hex head BOS into drip pan
drawer assembly (2) and tighten knob (1). Figure 13.
F
IGURE
13
9
Slide the mounting tabs on the control housing (7) be-
hind the opening on cart. Allow the control housing to
rest at bottom of opening on cart. Figure 14.
F
IGURE
14
10
11
For "P" series head installation, align the holes in
the front of cart with the two upper nuts on the control
housing (with the mounting tabs positioned inside cart)
and attach with the two 10-24 x 3/8 phillips head screws.
Figure 14.
For "T" series head installation, align the holes in
the front of cart with the two lower nuts on the control
housing (with the mounting tabs positioned inside cart)
and attach with the two 10-24 x 3/8 phillips head screws.
Figure 14.