S&S Cycle Frame Lock User Manual
Page 2
FRAME LOCk
TM
BASE INSTALLATION
1- Start installation by deciding where the Frame Lock base will be mounted. It is best to position the motorcycle in the trailer to ensure adequate
clearance between handlebars and wall of trailer, additional motorcycles, doors, etc.
2- Once location has been determined use Frame Lock base station to mark where holes must be drilled. It is best to start with a small drill and
work up to a full ½-inch drill for the final size. Position the support bar under trailer floor. Pass customer supplied ½-inch diameter Grade 5 bolts
(length depends on floor type—be sure that approximately ½” of thread is showing after tightening) through the Frame Lock base plate and
support bar. Secure the assembly by placing a nylon nut on the bottom and tightening to 78 ft-lbs of torque.
FRAME LOCk CLAMPS AND EYELET BRACkET INSTALLATION
For Harley-Davidson® Touring models
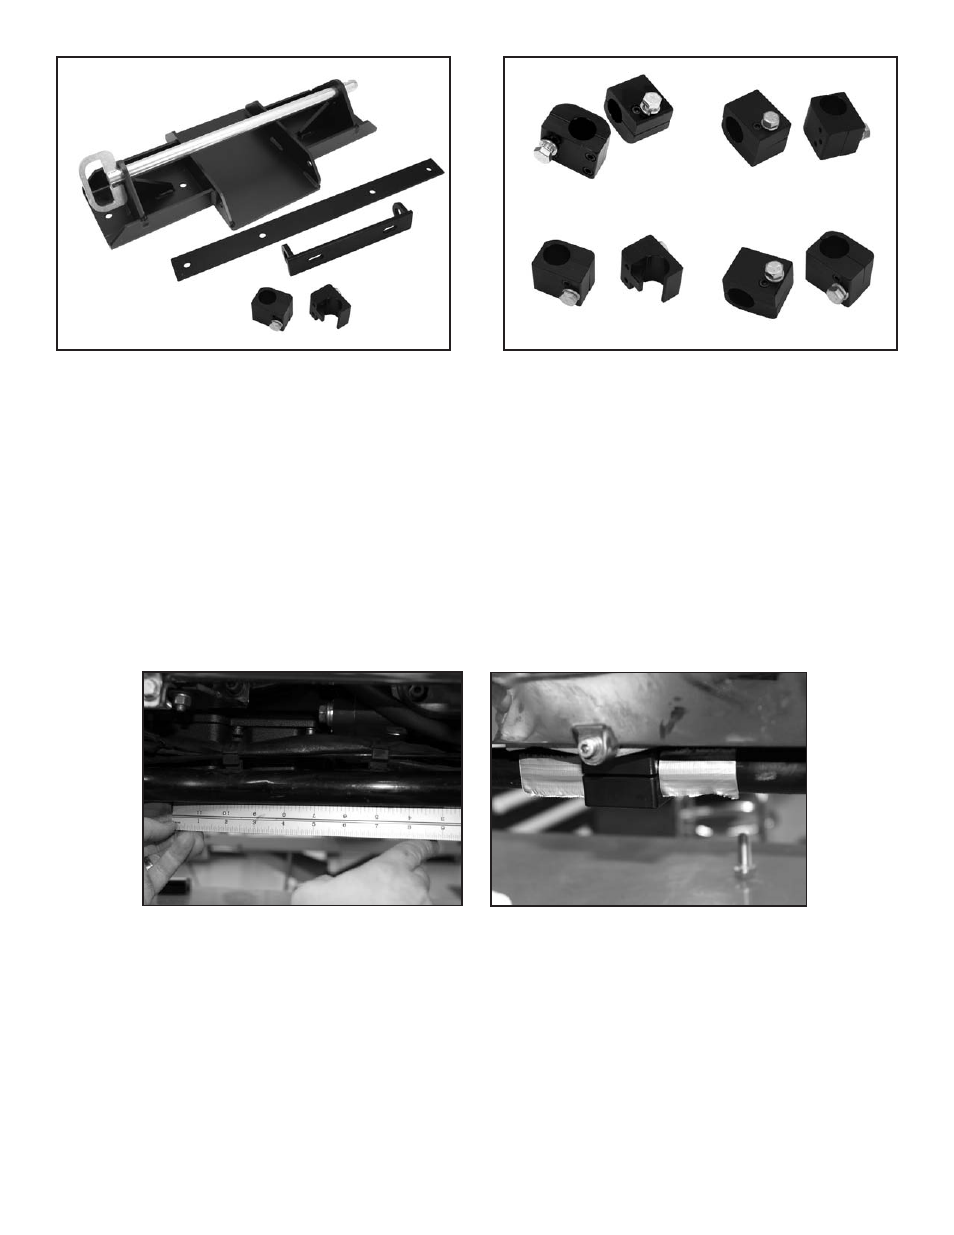
1- Installation starts on the right (carburetor) side of the motorcycle with the two-hole frame clamp.
2- Loosen the clamp that holds wires to the frame.
3- Measure 71/8” to 7½“ from the transmission cross member and feed the two-hole top clamp (rounded profile) in place.
4- Install the bottom clamp and two included sockethead screws snug, but not tight at this time.
5- Measure the same distance from the transmission cross member (71/8” or 7½”) as you did on the carburetor side of the bike and install the
four-hole top clamp (rounded profile). Install the bottom clamp and tighten the four sockethead screws, snug but not tight at this time.
Mark the position of the clamp with tape on either side of the bracket (both sides of the bike) at this time.
Typical complete Frame Lock
TM
kit
Picture 1
Picture 2
53-0516 For H-D® Touring models
53-0517 For Harley-Davidson®
Sportster® models
53-0518 For H-D® Softail® models
53-0519 For H-D® Dyna™ models
Clamp set for each model