Concrete, Purusline living wetroom solution, Tile grout waterproof membrane tile adhesive – Purus Living 800 - Tile Insert Grate User Manual
Page 14
14
PURUSLINE LIVING WETROOM SOLUTION
Concrete
NO
TE: Once
installed
and the
G
rout
is
fully
dr
y,
check for
leaks
befo
re
using.
NOTE: Prior
to
tiling
an
unde
rfloor
heat-
ing mat
can
be
laid,
ensuring
that
the
maximum height
of
13
mm
is
not
exceeded.
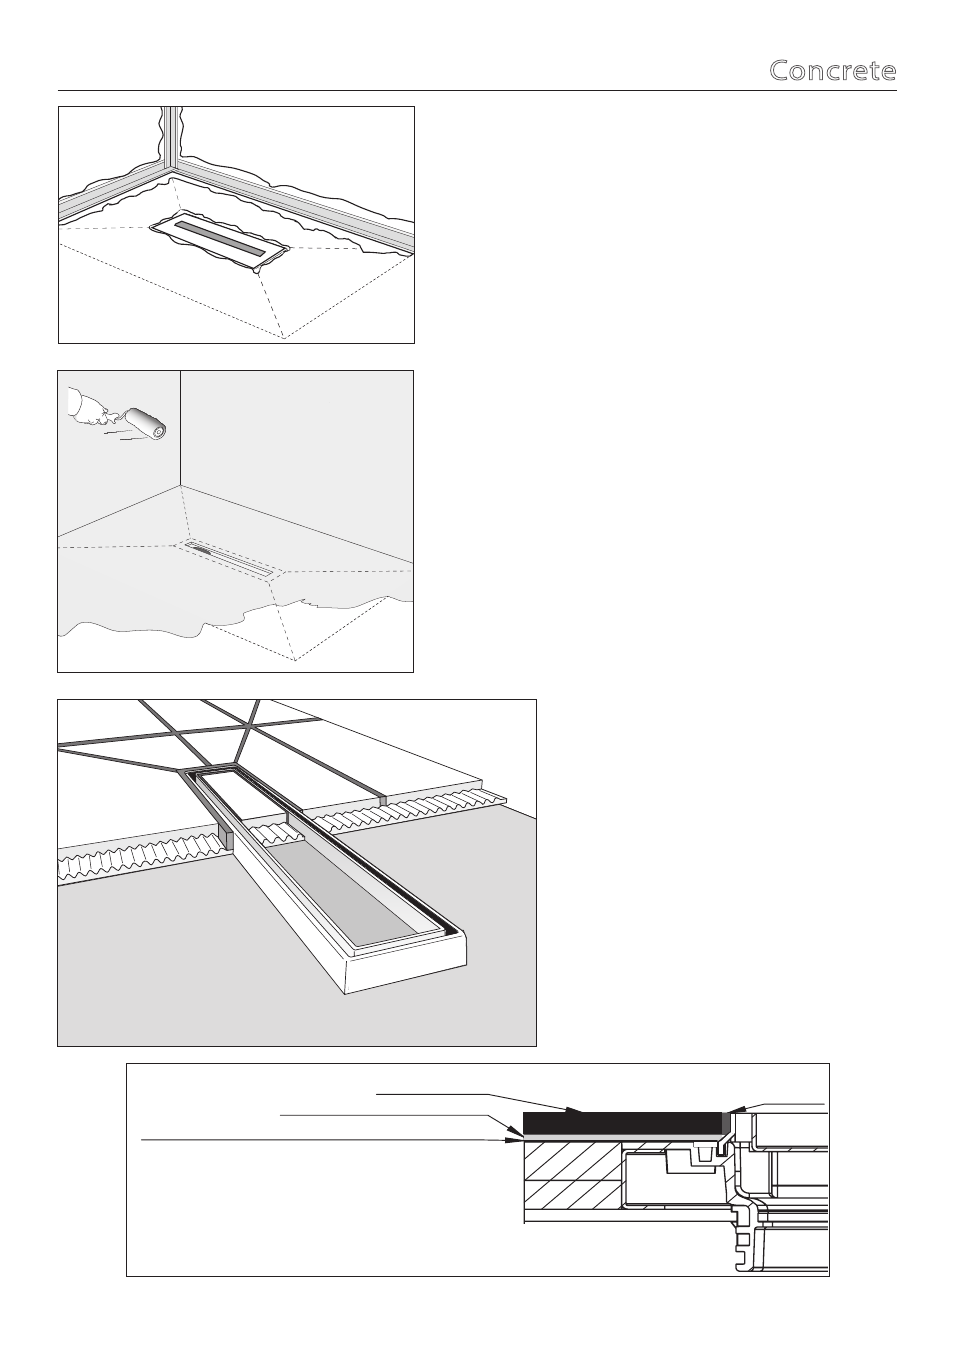
Place the gasket around the gully to check if it fits. Take the Pura Elastomeric Tapes
and dry cut to all wall and floor joints.
Once the MS Polymer has tacked over, using a brush or roller apply the Puragum
to all wall and floor joints one at a time. Apply the Pura Elastomeric Tapes while the
Puragum is still wet, firmly smoothing down the tape as you go so there are no air
pockets or ridges left and the tapes are fully adhered. Ensure the Puragum goes
up the sides of the tile insert grate ensuring you have enough Puragum to overlap
the gasket (when applying the Puragum ensure the weep holes are kept intact).
The gasket membrane is then mounted to the upper part of the channel by using
the Puragum. Firmly smooth down the gasket and tapes so there are no air pockets
or ridges left and the gasket is fully adhered. Make sure the gasket is centred. Now
allow to dry for 3 hours.
Now cover the whole floor, tape, gasket and walls with one coat of Puragum and
allow to dry for another 3 hours, then apply a second coat. Ensure the Puragum
goes up the sides of the tile insert grate ensuring you overlap the gasket with the
two coats of Puragum (when applying the Puragum ensure the weep holes are
kept intact). Leave to dry for a minimum of 24 hours before tiling depending on
site conditions.
Once the second coat of Puragum has fully cured, check the tapes and
gasket are fully secure and sealed before tiling.
Ensure the tanking kit is installed as per the instructions. Ensure you follow
the tanking kit instructions and that all porous surfaces such as concrete and
plasterboard are primed with Puragum Primer. Also ensure that the tapes and
membranes are fully secure before tiling.
Ensure you keep to the minimum drying times. Drying times could be
longer depending on site conditions.
Tile to the desired pattern, followed by the insert cover using flexible EN12004
C2 classified tile adhesive applied using a notched trowel in accordance with the
code of practice BS5385:2009.
Tile
Grout
Waterproof membrane
Tile adhesive
02830
Fix the tiles with adhesive that fastens to stainless steel.
Use a small straight edge up against the gully gap so as to
prevent the tile adhesive falling into the gully body.
Finally grout the gaps with flexible, water proof, anti-mould
grout, ensuring that no grout falls into the gully body. Leave
to dry and settle for 48 hours.
If tile adhesive or grout falls into the gully immediately clean
it up.
The grate when installed must be horizontal and flat. It also
must be level with the ceramic tile surface and not at an angle
or on a slope.
NOTE: Once installed and the grout is fully dry, check for leaks
before using.
Fix Tiles to BS5385 Standard.
Falls in scr
eed
Falls in screed