K200 — operation – Multiquip K200 User Manual
Page 12
PAGE 12 — Wet Screed K200 — PARTS & OPERATION MANUAL — REV. #2 (03/12/01)
K200 — OPERATION
This section describes the operation of the K 200 Wet
Screed.
Tip:
For the location and description of the Wet Screed’s parts,
which are mentioned in the text, refer to the illustration figure
(page. 9): What is a Wet Screed.
How to assemble the K 200 Wet Screed.
When delivered the Wet Screed is not ready for use.You only
have to carry out the following procedures to assemble them:
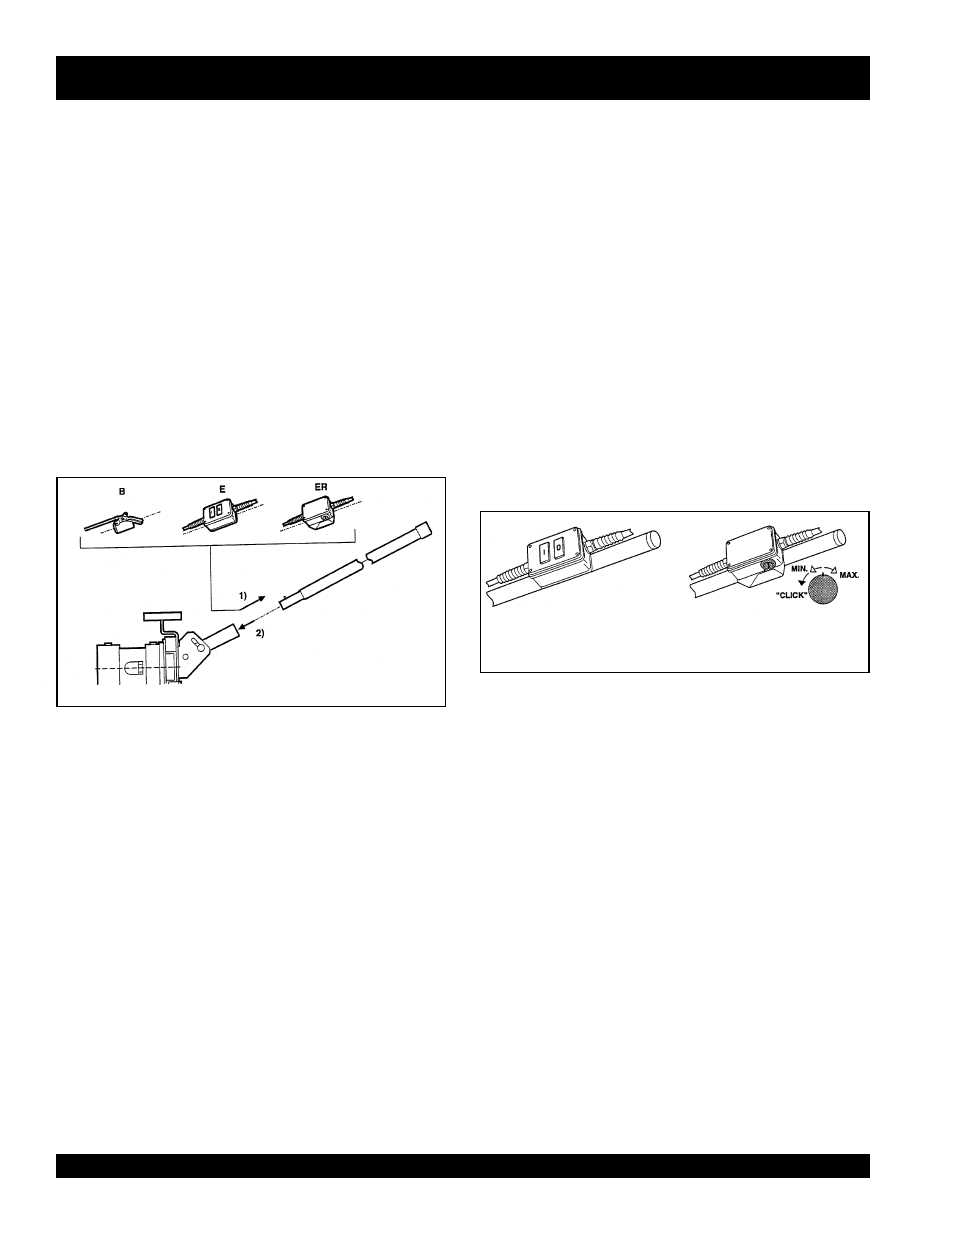
1.
Connect the switch (an electronic speed regulator, or a
gas throttle), to the operating handle by means of the
bracket and the butterfly nut. Now lock the bracket by
tightning the butterfly nut. (Fig. No. 2.0)
2.
Stick the operating handle into the shaft of the motor unit
frame.Make sure that the operating handle is locked
properly.
Operation and use of the Wet Screed
This section describes how to operate and use the Wet
Screed.In the text are numbers in brackets. These numbers are
position numbers and they correspond to the numbers in the
parts list of the corresponding figures.
Careful: Read the safety instructions before you switch
on the apparatus.
Careful:
Prevent the
Wet Screed, from sinking
into the
concrete. After the motor has been switched on, immediately
move the Wet Screed backwards.
Tip:
Before the Wet Screed is brought into action, first compact
the freshly poured concrete floor with a poker-vibrator while at
the same time adjust the height of the floor by means of a
laser device.
Tip:
Pour concrete lanes of approx. 2m wide and approx. 15 m
long. You can finish this surface in one pass without any problem.
Tip:
When using a low slump concrete, move the Wet Screed
slowly across the surface of the concrete. When using a high
slump concrete, move the Wet Screed faster across the surface
of the concrete.
Figure 2.1
Types of switches
Figure 2.0
Assembly of the controls