Mayline Kwik-Track User Manual
Page 2
KWIK TRACK INSTALLATION
MAYLINE recommends the removal of all carpet and padding prior to installing Kwik-Track. We suggest that
carpet be removed the length and width of each track. Product performs best when installed on concrete or tile.
NOTE: MAYLINE cannot assure proper leveling if track is installed on low-pile carpet.
Read all instructions before attempting assembly.
Check floor plan layout. Measure and mark floor for intended layout, preplan exact location
of all units with regard to columns, lights, windows and obstructions.
Check levelness of floor in the proposed install area.
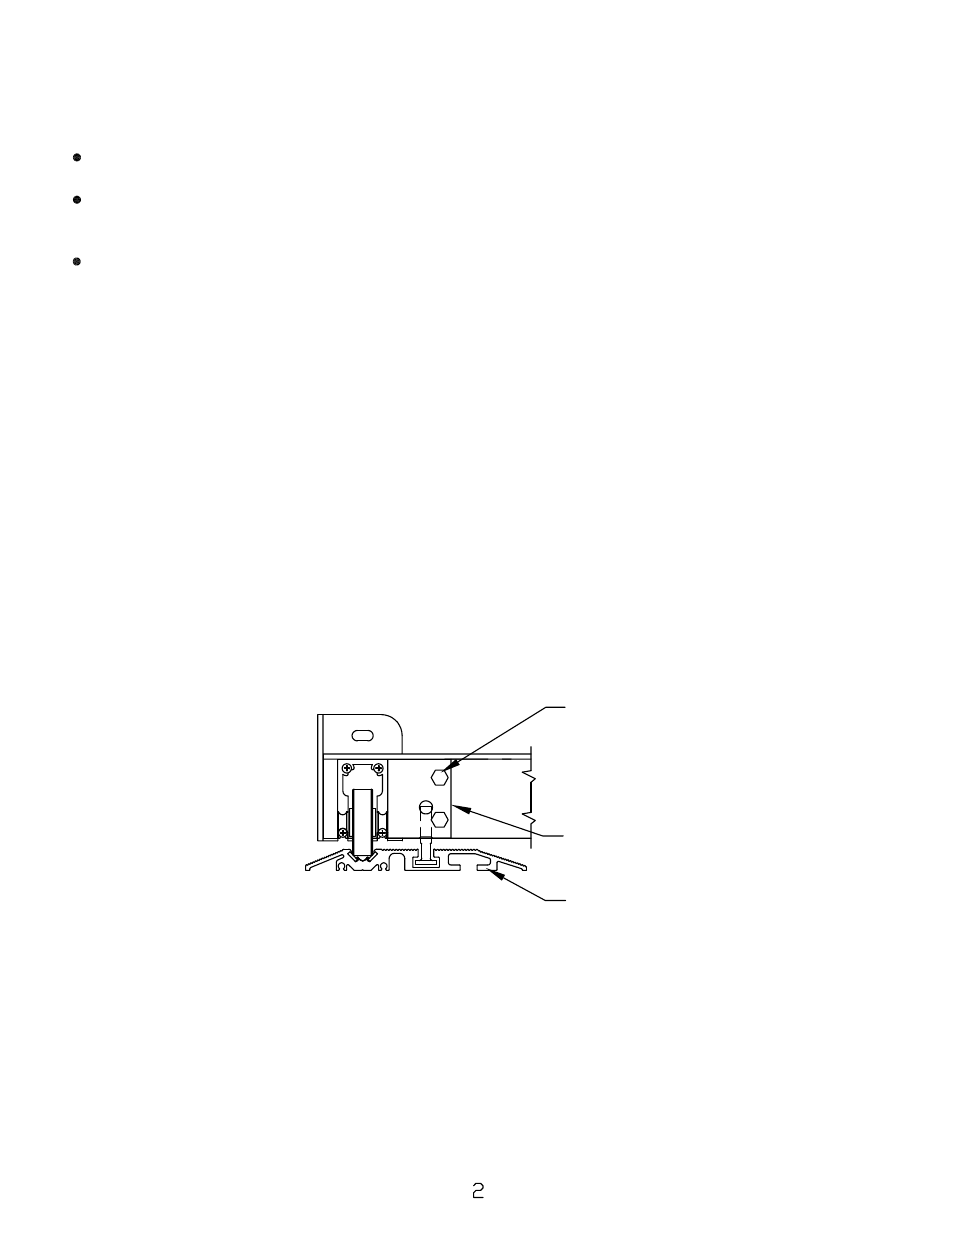
2-BOLT-(1/4-20 X 3/4 GR5)
2 WASHER
ANTI-TIP GUIDE
MLTA TRACK
5. Required tools:
- hammer drill (concrete drill bits are provided in the hardware bag)
- cordless (or electric drill motor) / Phillips screw adapter
- flat and Phillips screwdriver
- 9/16" socket
- hammer
- measuring tape
- chalk line
- level (360 Degree Rotary Laser Level is best suited)
GENERAL NOTES:
1. Installation of Kwik Track begins with the layout of the floor plan. It is imperative for the proper operation
of this system that the tracks be parallel, level and square. On a Kwik Track system the MLTA track, with the
In-track Anti-tip safety feature, is located at the rear.
2. The carriage with the anti-tip guide is designed to be inserted onto the MLTA track after that track is in
the approximate location, but prior to completely securing it to the floor. This will eliminate the need to
disassemble the guide from the carriage.
3. The carriage is shipped completely assembled. If the carriage with the anti-tip guide assembly cannot
be inserted into the MLTA track, it is possible to remove and reinstall the mount assembly. Loosen 1/4" bolts and
remove anti-tip mount(s). Place carriage on track. Care must be taken to properly place the mount(s) tightly to
the channel and angle of the carriage during re-assembly. Re-use fasteners.
4. The KTTV track kits are pre-packaged to include mounting hardware, end stops and shim
material. If KTTV track kits are used in conjunction with each other to obtain longer track runs, insert the
roll pins of one track into the other. This will insure proper track alignment.
Detail of Anti-Tip Guide