Mayline Single Starter User Manual
Page 5
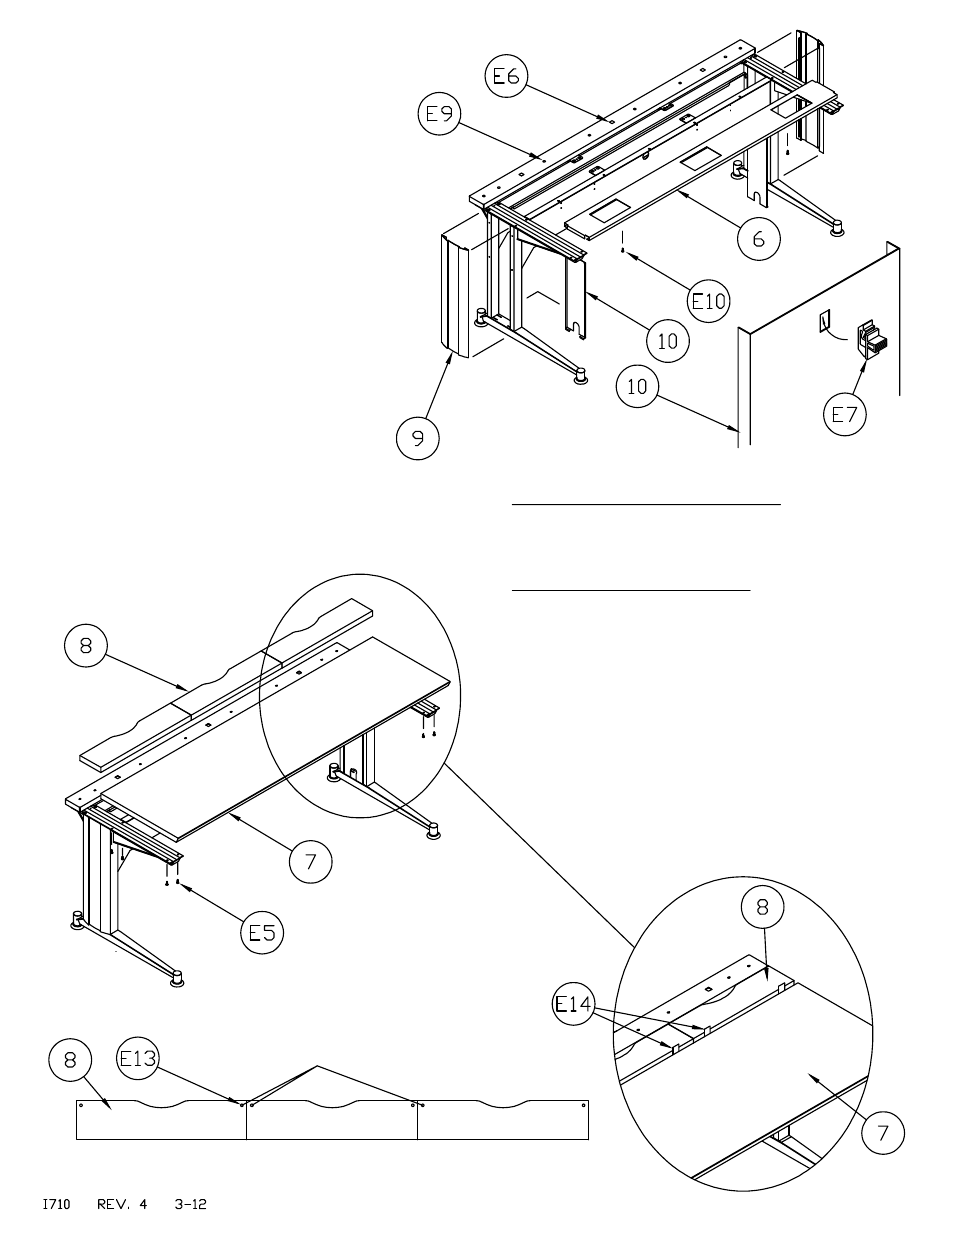
Underside of Access Panels
Install dowels (E13) in
the positions shown
10.
Lay pan (6) onto trough sides flanges (4 & 5).
Secure pan (6) to trough sides (4 & 5) using pine
tree (E10)
11.
Install slam latch (E7) into slot in the inner leg
panel (10) as shown.
12.
Insert tabs in the bottom of inner leg panel
(10) into slots in foot. Rotate inner leg panel (10) up
so that slam latch catches flange on pan (6).
13.
Install outside leg panels (9) by aligning the
one flange with the inside edge of the tube and
applying pressure to create a curve in the end panel
that allows 2nd flange to slide inside edge of tube.
14.
Insert square hole plugs (E6) and ratchet
fastener (E9) into holes in beam. NOTE: This step
should be done after privacy panels or monitor
posts are installed in the beam.
(5)
For tables "WITHOUT" Access Panels (8).
15. Position work surface (7) without access panels and
secure with screws (E5).
For tables "WITH" Access Panels (8).
15. Insert dowels (E13) into holes in access panels (8) as
shown below. NOTE: For 48" W tables use the positions
shown in the far left and right of the view below.
16. Lay access panels (8) onto table frame so that dowels
engage holes in mounting angles.
17. Insert spacers (E14) between access panels and work
surfaces as shown (2 per access panel).
18. Position work surfaces and secure with screws (E5).
Remove spacers.