Mayline Ranger Split-Top User Manual
Page 2
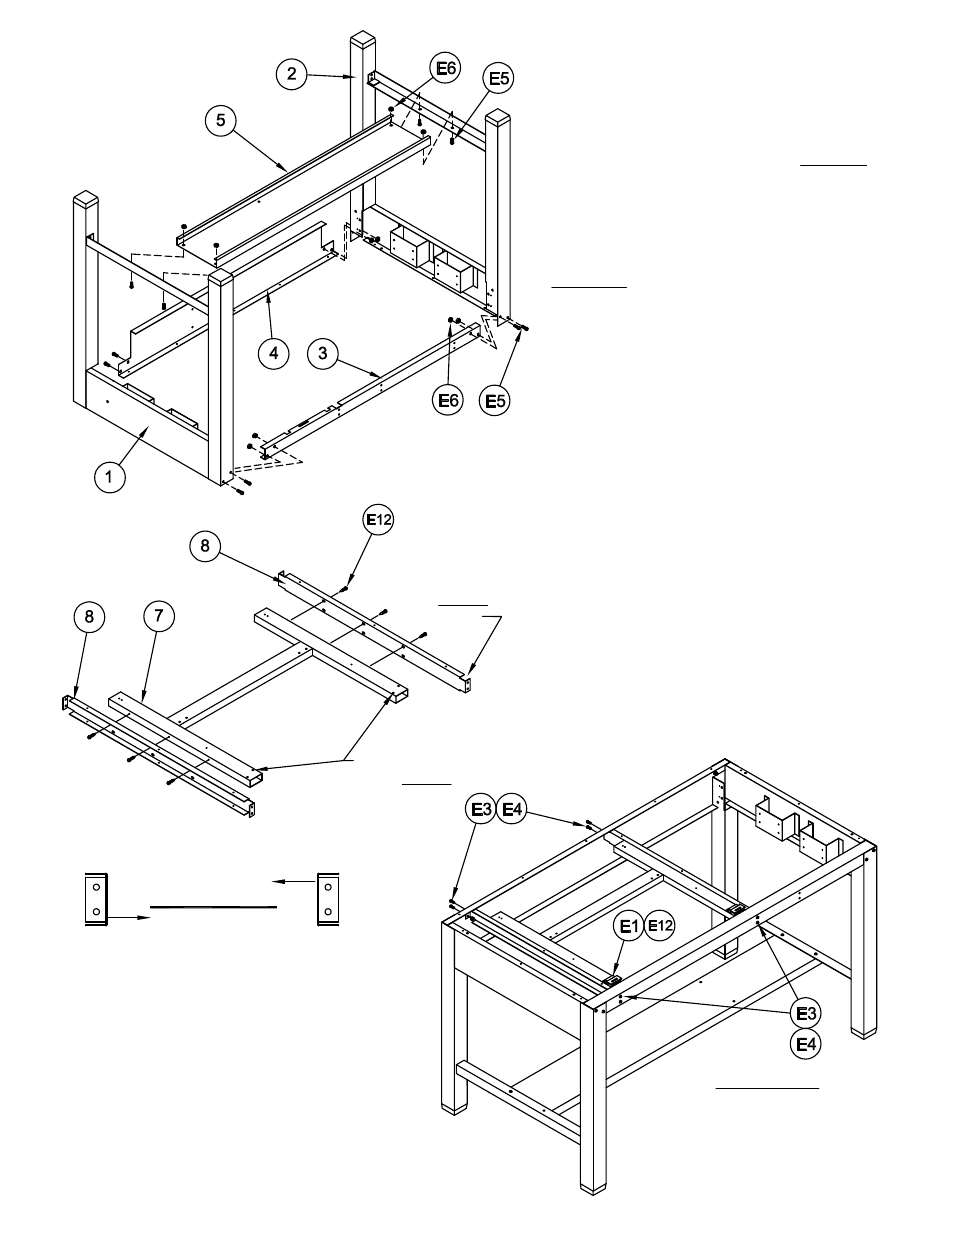
1. Place the two End Assemblies (1 & 2) upside.
Position the Front Rail (3) with notches 'UP'.
Position the Rear Rail (4) with the Dust Cover
attachment holes toward the floor. Secure these
Rails to the End Assemblies with two Screws
(E5) and two Nuts (E6) per end. DO NOT
tighten screws at this time.
2. Position the Foot Rail (5) with flat surface
toward the floor. Attach the Foot Rail to the End
Assemblies with four Screws (E5) and Nuts (E6).
TIGHTEN all rail attaching screws now.
3. Turn assembled table to an upright position.
MAYLINE recommends that two people perform
this task.
4. Attach the Support Channels (8) to the 'H'
Frame (7) using #10-32 x 1/2 Screws (E12).
Position the Frame with the diagonal holes for
the top hinge attachment to the front. Position
each Support Channel with the 7/8 notch to the
front. Frame should be flush with the top of the
Support.
5. Place the 'H' Frame/Support Assembly into
position and attach it to the Front and Rear Rails
using #10-24 x 3/8 Screw (E3) and KEPS Nuts
(E4).
6. Attach Lower Hinge (E1) to 'H' frame with
#10-32 x 1/2 Thread Cutting Screw (E12).
Position with hinge slot toward front of table.
Diagonal holes
toward FRONT
Smaller (7/8) NOTCH
toward FRONT
all Supports
Right Support
CHANNEL FACE
Left Support
CHANNEL FACE
FRONT of TABLE
(2)