Operating instructions, Assembly – Bosch 1274DVS User Manual
Page 7
Operating Instructions
-7-
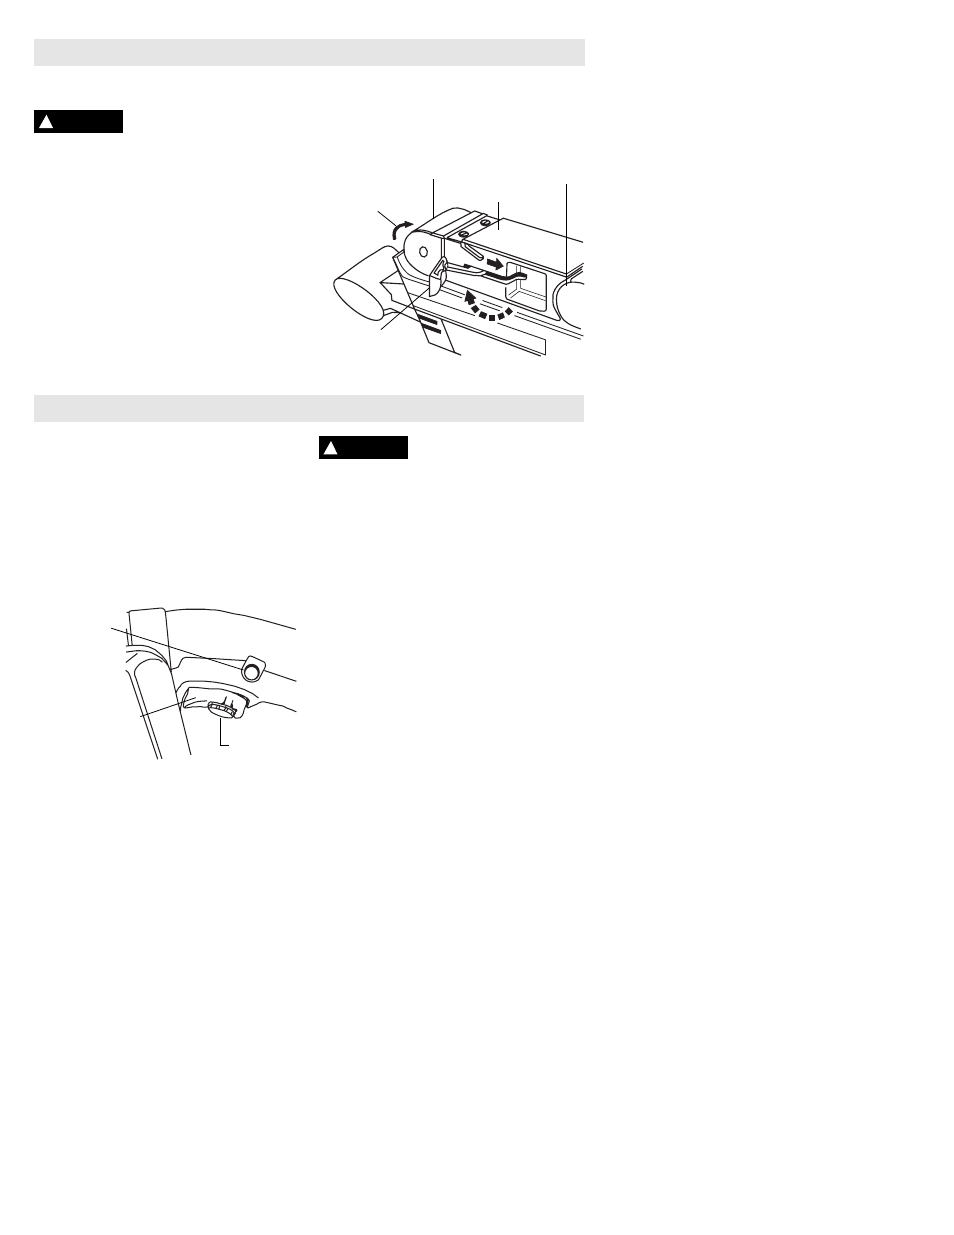
REMOVING AND INSTALLING
SANDING BELTS
To prevent personal injury,
always disconnect the plug
from the power source before removing or
installing the belt.
TO REMOVE BELT:
1. Place sander upside down and move belt
tension release lever in direction of arrow to
retract front pulley and release belt tension.
2. With the sander upside down and the open
side facing you, you can easily remove the
belt.
TO INSTALL BELT:
1. While the sander is still upside down, with
the front pulley retracted and locked, insert the
new belt around both pulleys and over the
platen plate. If the sanding belt has "rotation
direction" markings, be sure the arrow on the
inside of belt is pointing in the direction of
rotation as indicated on housing.
2. Then push lever back to its original position
to return tension to the belt.
VARIABLE SPEED CONTROLLED
TRIGGER SWITCH
Your sander is equipped with a variable speed
trigger switch. The sander can be turned “ON”
or “OFF” by squeezing or releasing the trigger.
The speed can also be adjusted from,
miminum to maximum nameplate rated RPM
by the amount of pressure you apply on the
trigger. Apply more presssure to increase
speed and release pressure to decrease
speed.
The “Lock-ON” button, located near the trigger
allows continuous operation at maximum RPM
without holding the trigger.
TO LOCK TRIGGER ON: Squeeze trigger,
depress button and release trigger.
TO UNLOCK THE TRIGGER: Squeeze trigger
and release it without depressing the “Lock-
ON” button.
If the “Lock-ON” button
is continuously being
depressed, the trigger cannot be released.
VARIABLE SPEED DIAL
This feature enables you to preset the trigger
at desired speeds by rotating the dial on the
trigger. Regardless of the pressure applied on
trigger, the tool will not operate any faster than
maximum preset speed. You can change the
preset maximum speed simply by rotating the
adjusting dial to a higher or lower speed
setting. As a guideline, the following speed
selections apply:
Dial setting
Material/Application
A thru C
Delicate surfaces, veneers,
and with sanding frame for
light surface finishing
B thru D
Plastics or other surfaces
where belt loading or heat
buildup is a problem
C thru E
Solid wood, fast stock
removal, paint removal
E
General service, metal
sanding, chipboard, coarse
sanding on rough surfaces
Assembly
!
WARNING
DIRECTION
OF ROTATION
FRONT
PULLEY
REAR
PULLEY
BELT TENSION
RELEASE LEVER
PLATEN
PLATE
!
WARNING
“LOCK-ON”
BUTTON
VARIABLE
SPEED TRIGGER
SWITCH
VARIABLE
SPEED DIAL