Maintenance – Briggs & Stratton FM3300 User Manual
Page 14
Part No. 520141
Form No. F061604A
Tools Required: 5/32” Allen wrench; 3/8” wrench.
1. Remove the spark plug wire.
2. Remove the belt deck cover.
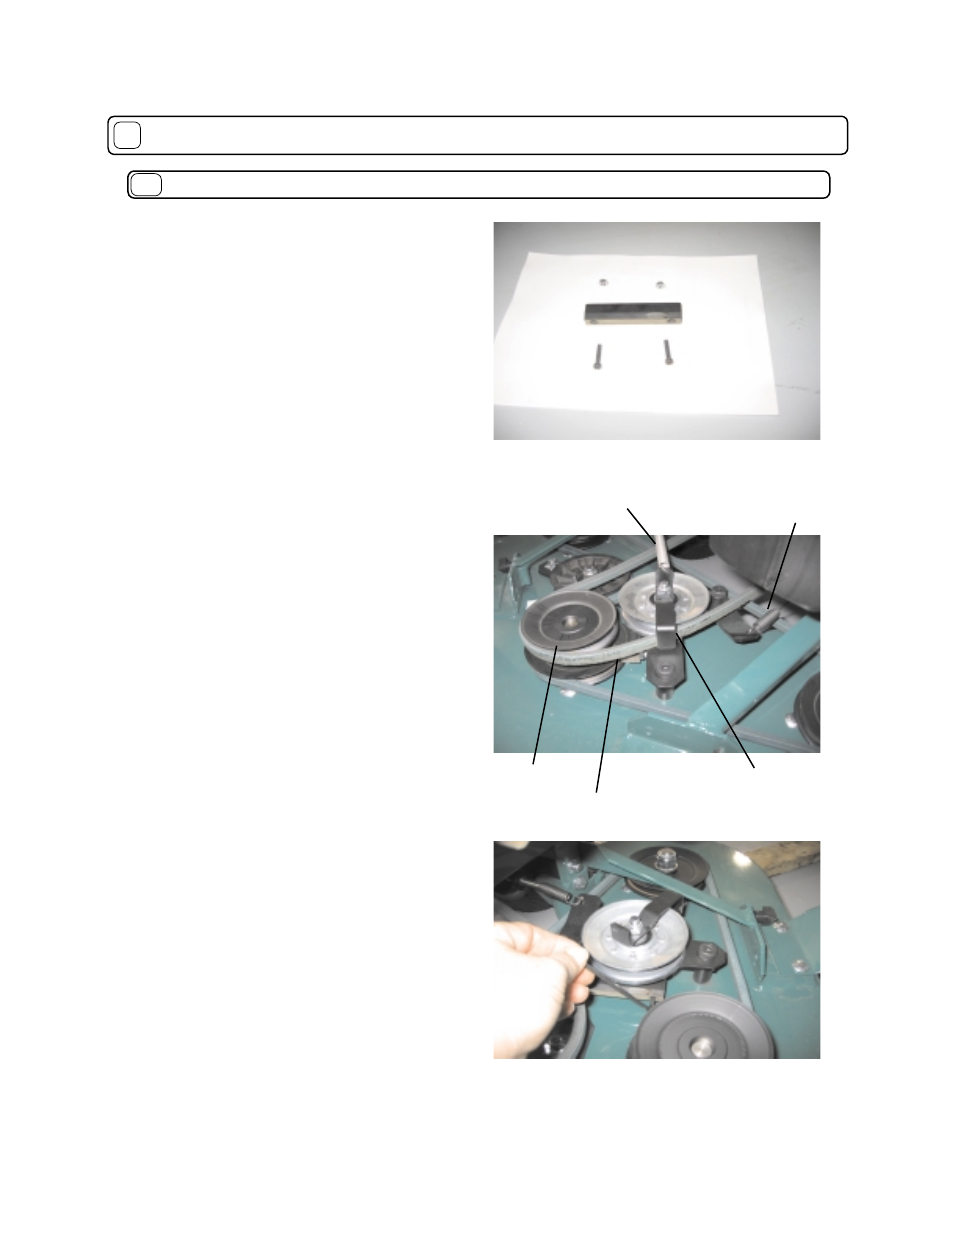
3. Remove the brake spring (A) and control cable spring (B) (see
fi gure 17-10).
4. Remove the blade drive belt (C) from the drive pulley (D).
5. Using a 3/8” wrench and 5/32” allen wrench, remove the
nuts from the #10 puck retaining bolts (see fi gure17-11).
6. Remove the brake puck.
7. Remove the bolts from the puck.
Note: The puck ends are symmetrical and can be interchanged
to use a new braking surface unless both ends are already worn
(Figure 4). When both ends have been used replace the puck with
a new one.
8. Inspect the nylon brake arm spacer (Item 44).
9. Replace the spacer if it shows signs of wear.
10. Reassemble all parts in the same orientation as when
removed.
Note: Before installing fasteners, inspect them for wear and
replace as necessary.
11. Check the operation of the clutch and brake mechanism.
The drive belt should be slack and the brake engaged (center
pulley will not turn easily by hand) when no pressure is exerted
on blade drive lever.
Note: When the blade drive lever is depressed, the brake puck
should not rub on the center pulley, the belt should be under
tension, and not rub on the belt fi nger (see fi gure 17-10).
13. Replace the belt cover and connect the spark plug wire.
Start the engine and check the clutch/brake operation under
power.
Note:
When the blade clutch control lever is pressed down, the
blades should spin up to speed without belt slippage indicated
by a pronounced belt squealing sound. When the clutch control
lever is released, the blades should stop spinning in 5 seconds
or less.
MAINTENANCE
continued
17
BRAKE PUCK REPLACEMENT
17.6
Page 14 of 20
Figure 17-9
Figure 17-10
Figure 17-11
A
B
D
C
Belt fi nger should not
rub on belt when
drive is engaged.