Ride on, Footpeg adapter, Installation – Kuryakyn 8803 FOOTPEG ADAPTER for HONDA CRUISERS User Manual
Page 2
PAGE
2
STEP 2
Remove the cotter key from the stock footpeg pivot pin. Remove the pivot pin.
STEP 3
Remove the stock peg, and “hairpin” style spring. Both may be discarded or stored
as neither will be re-used.
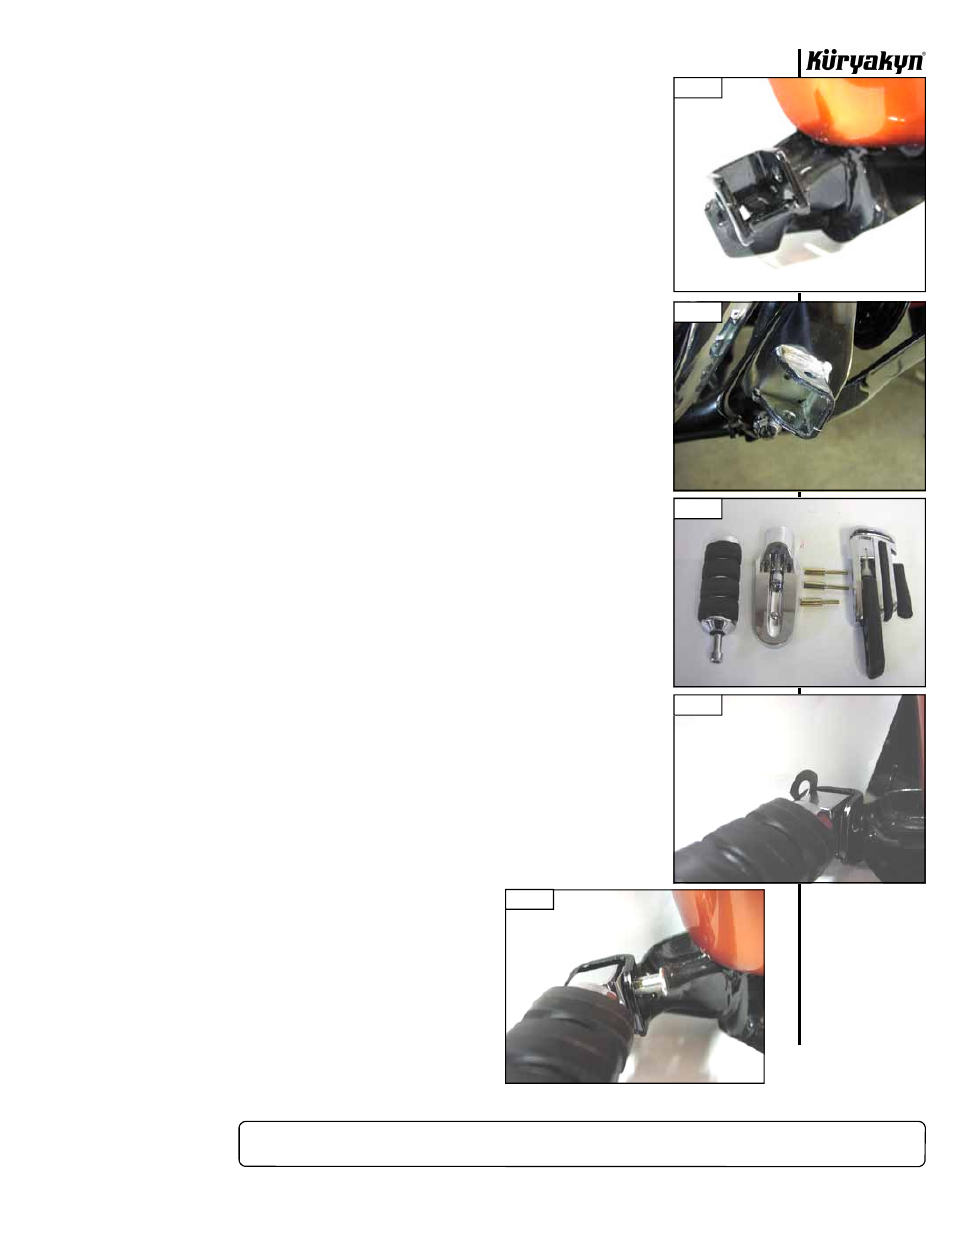
STEP 4
Install the Küryakyn footpeg of your choice on the peg adapter — loosely for now.
(PIC.3 shows the various locations of the mounting bolts for ISO, Pilot and Retro
style pegs.)
STEP 5
Place the peg/adapter assembly into the footpeg mount on the bike. Slide a
“D” washer between the mount and adapter as shown in PIC.4. If more tension is
desired a second “D” washer can be added.
STEP 6
Slide the stock pivot pin through the footpeg mount, “D” washer(s) and footpeg
adapter. Replace the cotter pin in the pivot pin.
STEP 7
Rotate the footpeg on the adapter to the position you desire, and tighten the
footpeg mounting bolt securely.
ATTENTION!
It is the installer’s responsibility to ensure that all of the fasteners
(including pre-assembled) are tightened before operation of the
motorcycle. Küryakyn will not issue a warranty on components lost due to
improper installation. Periodic maintenance may be required.
Ride On!
FOOTPEG ADAPTER
INSTALLATION
PIC 1
PIC 2
PIC 3
PIC 4
PIC 5