Footpeg adapters – Kuryakyn 8802 FOOTPEG ADAPTERS User Manual
Page 2
INSTALLATION
PROCEDURE fOR METRIC CRUISERS
STEP 1
Read and understand all steps in the instructions before starting the installation. Park the
motorcycle on a hard, level surface and turn off the ignition.
STEP 2
Remove the hardware that is securing the stock peg on to the bike. Remove the stock peg.
Set aside the stock hardware, it may be reused depending on the application.
STEP 3
Take the new peg adapter and determine if you will need to use the supplied spacer
(see PIC. 3) to prevent excessive slack in the peg adapter. If you use the spacer (see PIC. 3),
you will need to reuse your stock mounting hardware.
STEP 4
Some applications you will not need to use the spacer. If the spacer is not reused you can use
the provided 5/16-18 x 1 1/2 Button Head Cap Screw mounting hardware.
STEP 5
Once you have determined the proper mounting hardware, put the 10-32 x 3/8 Setscrew in
the back of the peg adapter.
STEP 6
Reinstall peg adapter on the bike and use the supplied “D” Spring Washer(s) to take
up the remaining slack and to make the peg snug when put in an upright position.
STEP 7
Once on the bike you can turn-out the setscrew to raise the peg or turn-in the
setscrew to lower the peg angle
ATTENTION!
It is the installer’s responsibility to ensure that all of the fasteners (including
pre-assembled) are tightened before operation of the motorcycle. Küryakyn
will not issue a warranty on components lost due to improper installation.
Periodic maintenance may be required.
PROCEDURE fOR YAMAhA SPORT BIkES
STEP 1
Read and understand all steps in the instructions before starting the installation.
Park the motorcycle on a hard, level surface and turn off the ignition.
CAUTION! Larger footpegs may limit cornering clearance.
STEP 2
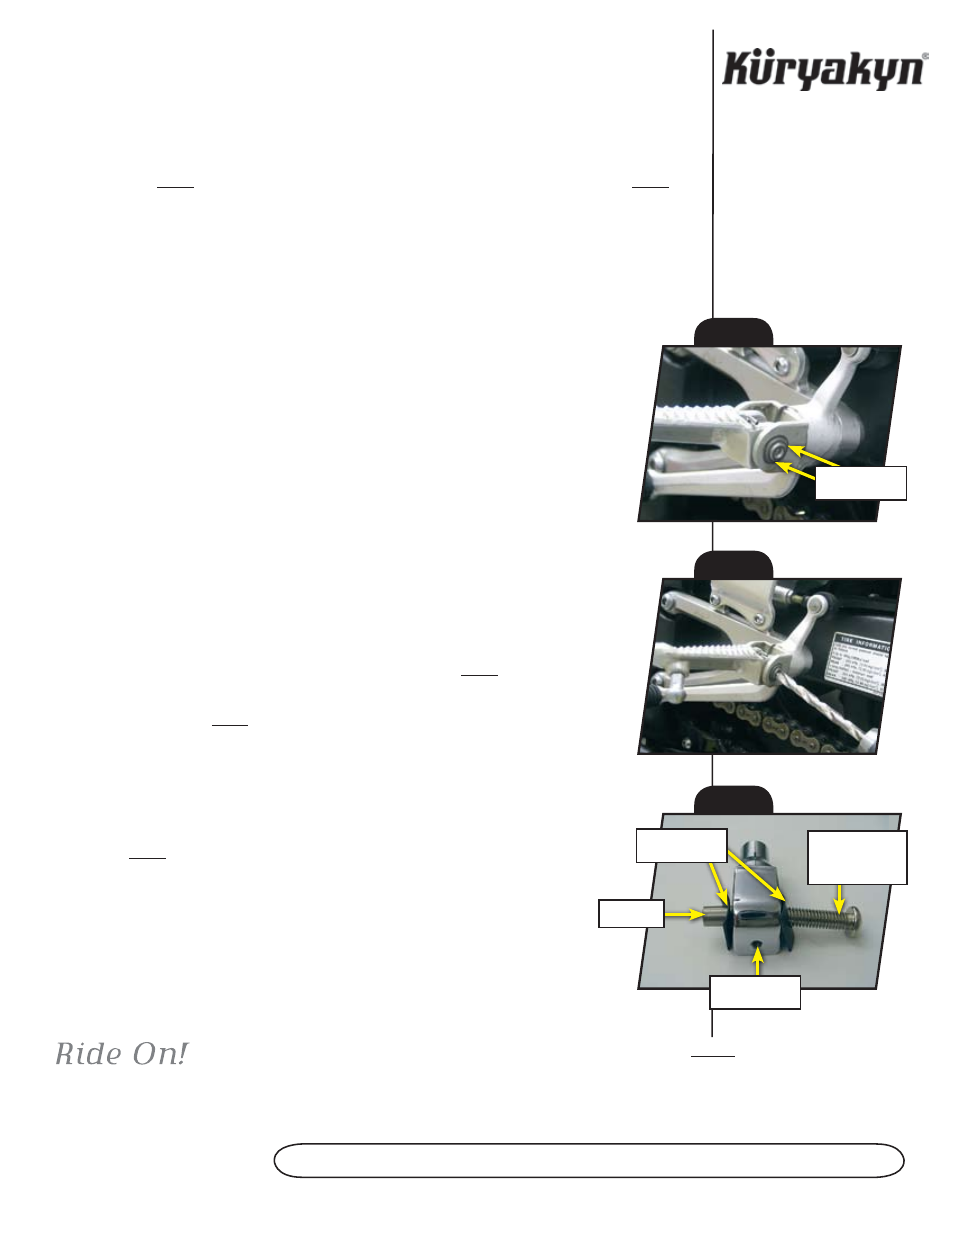
Locate the area of the peg that needs to be drilled. See PIC. 1.
STEP 3
Wearing your safety glasses, use the drill and 1/4" drill bit to drill the rivet
head off. See PIC. 2.
NOTE:
You may need to hold the top side of the rivet with locking pliers to prevent the
rivet from spinning.
STEP 4
With the rivet drilled out, remove the pin and slide the peg out of the mount.
STEP 5
Install the new Footpeg Adapter with the provided hardware. Refer to
PIC. 3 for location of hardware.
STEP 6
When you have the adapter tight, you can set the height of the peg by
turning-in or turning-out the setscrew.
ATTENTION!
It is the installer’s responsibility to ensure that all of the fasteners (including
pre-assembled) are tightened before operation of the motorcycle. Küryakyn
will not issue a warranty on components lost due to improper installation.
Periodic maintenance may be required.
PAGE
2
fOOTPEG ADAPTERS
PIC. 2
PIC. 1
END OF RIvET
PIC. 3
LOCATION OF
SETSCREW
“D” SPRING
WASHER
5/16-18 x 1 1/2
BUTTON HEAD
CAP SCREW
SPACER