Ride on, Fairing eyebrows, Installation – Kuryakyn 7691 FAIRING EYEBROWS for CROSS COUNTRY User Manual
Page 2
PAGE
2
Ensure the area of installation is free of grease, oil,
dirt or other debris including wax/polish products
and bugs to ensure proper adhesion. Küryakyn WILL
NOT issue a warranty on any parts lost due to
improper installation.
STEP 4
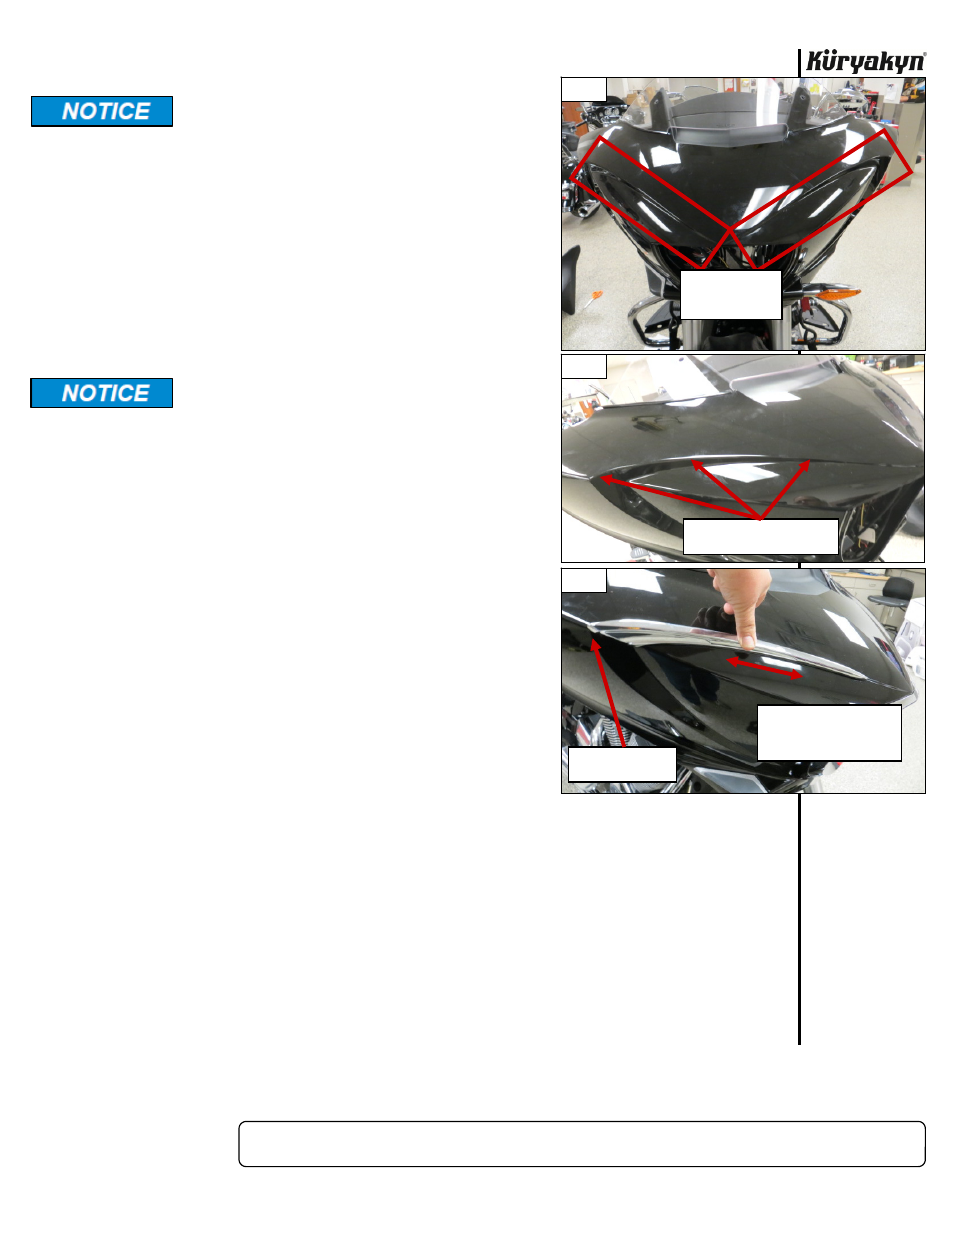
Test fit the Right Eyebrow to the Right side of the outer fairing.
There is a groove in the back of the Eyebrow that will fit over the
body line on the outer fairing shown in PIC 3 and PIC 4.
(Moving the Eyebrow along the body line slightly will
allow you to find the area where the contour on the back
of the Eyebrow will fit best along the body line.) Make any
reference
marks
with
masking
tape or a non–permanent marker.
The adhesive will not bond correctly if applied at
temperatures less than 50°F. Do not attempt this
installation in temperatures less than 50°F.
STEP 5
Rub the backing of the adhesive with your fingernail to activate
the adhesive. Remove the backing. Using any reference marks
made in Step 4, attach the Eyebrow to the right side. PIC 4
Press in place for one minute. Full bonding will occur in 24 hours.
NOTE:
If the motorcycle is to be operated before the 24 hour
cure time has expired, use a good quality masking or
painter’s tape over the Accent to assist in holding the
Accent in place until the cure time is over.
STEP 6
Repeat Steps 4 and 5 for the left side.
Ride On!
FAIRING
EYEBROWS
INSTALLATION
PIC 2
THOROUGHLY
CLEAN THIS AREA
ON BOTH SIDES
PIC 3
GROOVE ON EYEBROW FITS
OVER THIS BODY LINE
PIC 4
MOVING THE EYEBROW
ALONG THE BODY LINE
SLIGHTLY WILL ALLOW YOU
TO FIND THE BEST FIT
EYEBROW SHOULD
“FIT” OVER CORNER