Ride on, Oil dipstick cover, Installation – Kuryakyn 7682 OIL DIPSTICK COVER User Manual
Page 2
PAGE
2
STEP 3
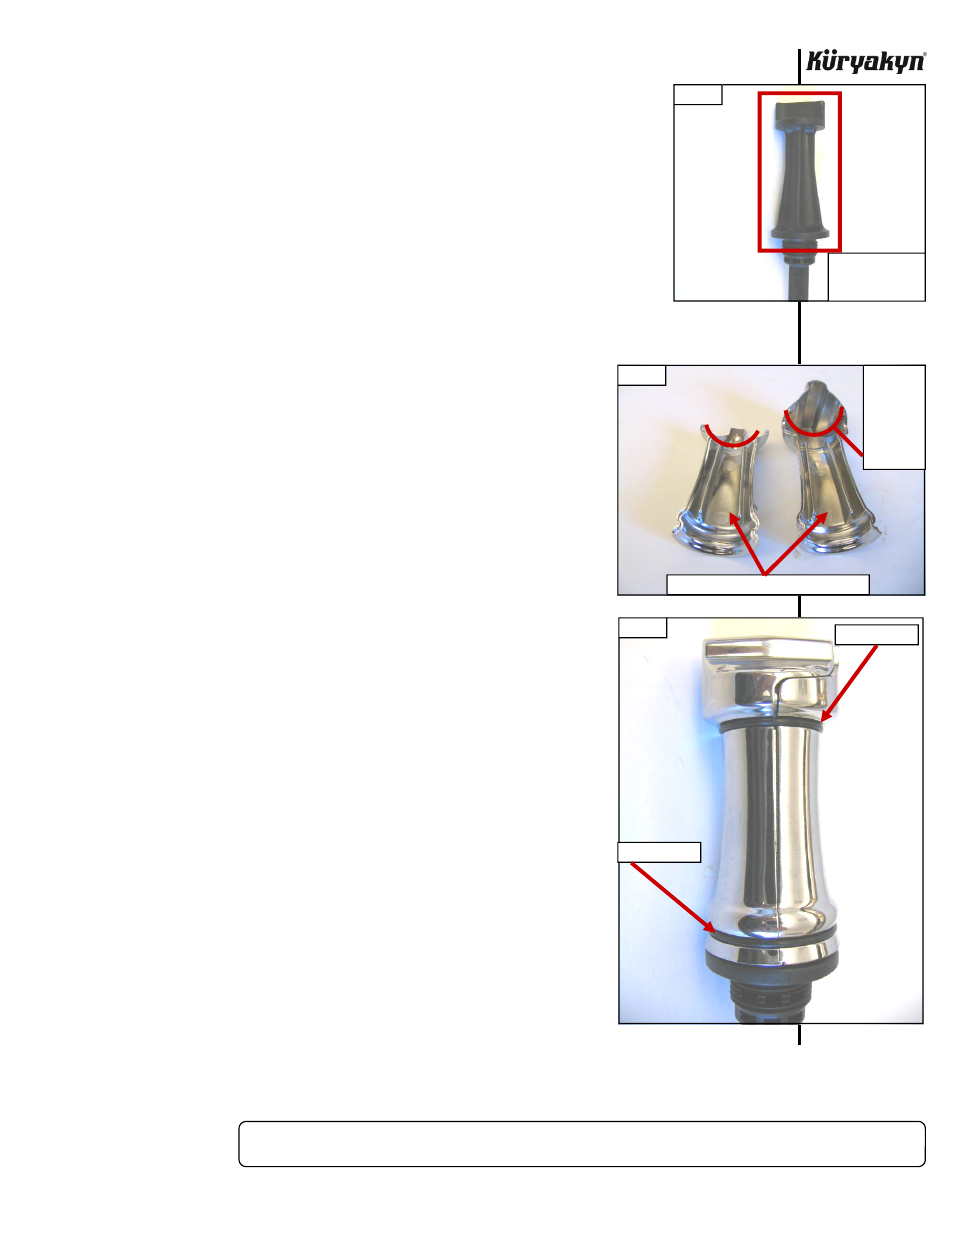
Thoroughly clean the exposed portion of the dipstick. PIC 2
ATTENTION!
Ensure the area of installation is free of grease, oil, dirt or other debris to
ensure
proper
adhesion.
Küryakyn
WILL NOT issue a warranty on any
parts lost due to improper installation.
ATTENTION!
The adhesive will not bond correctly if applied at temperatures less than
50°F. Do not attempt this installation in temperatures less than 50°F.
STEP 4
Using the supplied silicone, apply a large bead down the center tray of both halves
of the Dipstick Cover and along both sides of the top finger hold. PIC 3
STEP 5
Insert the dipstick into one of the halves. Place the other half around the
dipstick and press together firmly. Thoroughly clean any excess silicone
that may have leaked out from around the Cover. (Full curing of the
silicone will take 48 hours.)
STEP 6
Holding the two halves together securely, slide the supplied Small O-ring
over the top of the dipstick. The Small O-ring will seat in the groove on
the top end of the cover. PIC 4
STEP 7
Continuing to hold the two halves together securely, slide the supplied
Large O-ring up from the bottom until it seats in the bottom groove.
PIC 4
STEP 8
Remove any covering from the dipstick location and reinstall the dipstick
to
the
motor.
DO NOT over tighten the dipstick if reinstalling before the
48 hour cure time, just snug will do.
WARNING! USE A GLOVE OR SIMILAR HAND COVERING IF REMOVING
THE DIPSTICK IMMEDIATELY AFTER OPERATING THE
MOTORCYCLE TO PREVENT BURNING YOUR HAND. THE
DIPSTICK COVER IS METAL AND WILL RETAIN HEAT FOR A
PERIOD
OF
TIME.
CAUTION! It is the installer’s responsibility to ensure that there is
adequate
clearance
between
the Dipstick Cover and the
exhaust and side cover. Küryakyn is not responsible for
any damage due to inadequate clearance.
Ride On!
OIL DIPSTICK COVER
INSTALLATION
PIC 2
PIC 3
THOROUGHLY
CLEAN THE TOP
OF THE DIPSTICK
PLACE A BEAD OF SILICONE IN TRAYS
PIC 4
SMALL O-RING
LARGE O-RING
PLACE A
BEAD OF
SILICONE
ALONG
BOTH
SIDES OF
FINGER
HOLD