Trailer hitch for gl 1800, Installation – Kuryakyn 7647 TRAILER HITCH FOR GL1800 User Manual
Page 3
PAGE
3
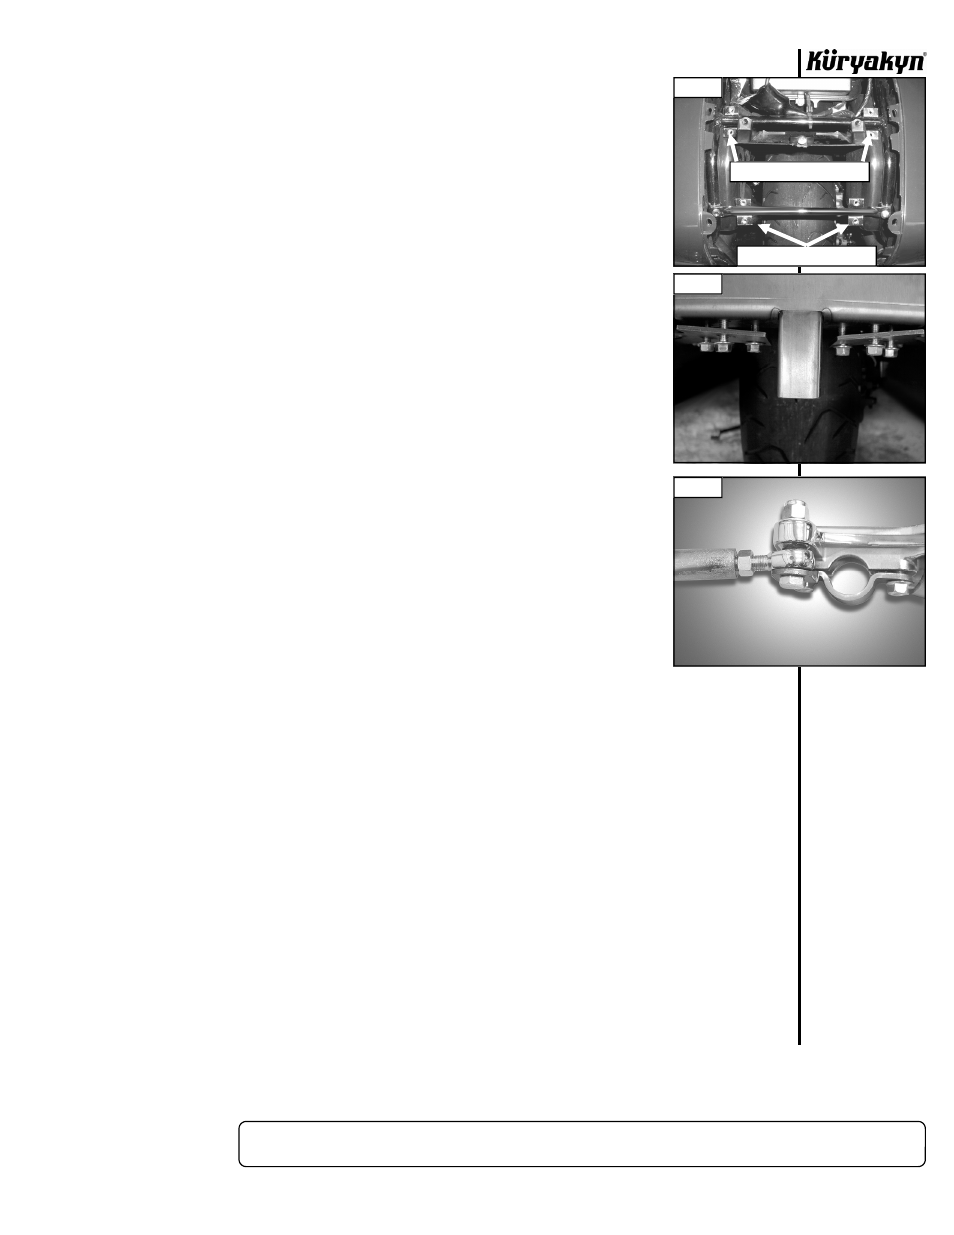
STEP 6
See PIC.6. Place the frame clamps as shown. Note that there are two different
diameter clamps. The larger diameter clamps are used on the upper frame bar,
and the small diameter clamps are used on the lower frame bar. Once the clamps
are in position on the frame bars, set the large subframe plate into place. Loosely
attach the plate to the clamps with the 1⁄4” flange screws and external tooth star
washers
included.
STEP 7
See PIC.7. Using the 3/8” flange screws and external tooth star washers loosely
attach the trunions to the subframe plate.
STEP 8
With all the mounting components now loosely installed on the bike, the heim
joints may now be adjusted to allow final installation to the forward brackets.
PIC.8 shows how the heim joints attach to the forward brackets. Once the final
adjustment has been completed, the 1-3/4” mounting bolt may be inserted and
screwed through the forward bracket. The 3/8” I D flat washer and Nylock nut will
be installed to the section of threads protruding through the top of the bracket.
(This nut will be the last fastener tightened when this assembly is permanently
secured.) Securely tighten both forward brackets in place.
STEP 9
Hold the rear subframe plate as high as possible and tighten the eight mounting
bolts
securely.
STEP 10
Tighten the six 3/8” bolts that connect the trunion bars to the subframe plate.
STEP 11
Install the receiver into the hitch assembly. Secure the two with the hitch pin
and pin clip. Install the ball on the receiver.
STEP 12
Re-install the rear panel.
CAUTION! Ensure that the installation of this product does not interfere with the proper
operation of the motorcycle before riding.
ATTENTION!
It is the installer’s responsibility to ensure that all of the fasteners (including
preassembled)
are
tightened
before
operation of the motorcycle. Küryakyn will not
issue a warranty on components lost due to improper installation. Periodic maintenance
may
be
required.
TRAILER HITCH for GL 1800
INSTALLATION
PIC 6
PIC 7
PIC 8
USE LARGE CLAMPS HERE
USE SMALL CLAMPS HERE
-cont.-