Ride on, L.e.d. rear fender tip, Installation – Kuryakyn 3236 L.E.D. REAR FENDER TIP W/RUN-BRAKE ACCENT User Manual
Page 2
PAGE
2
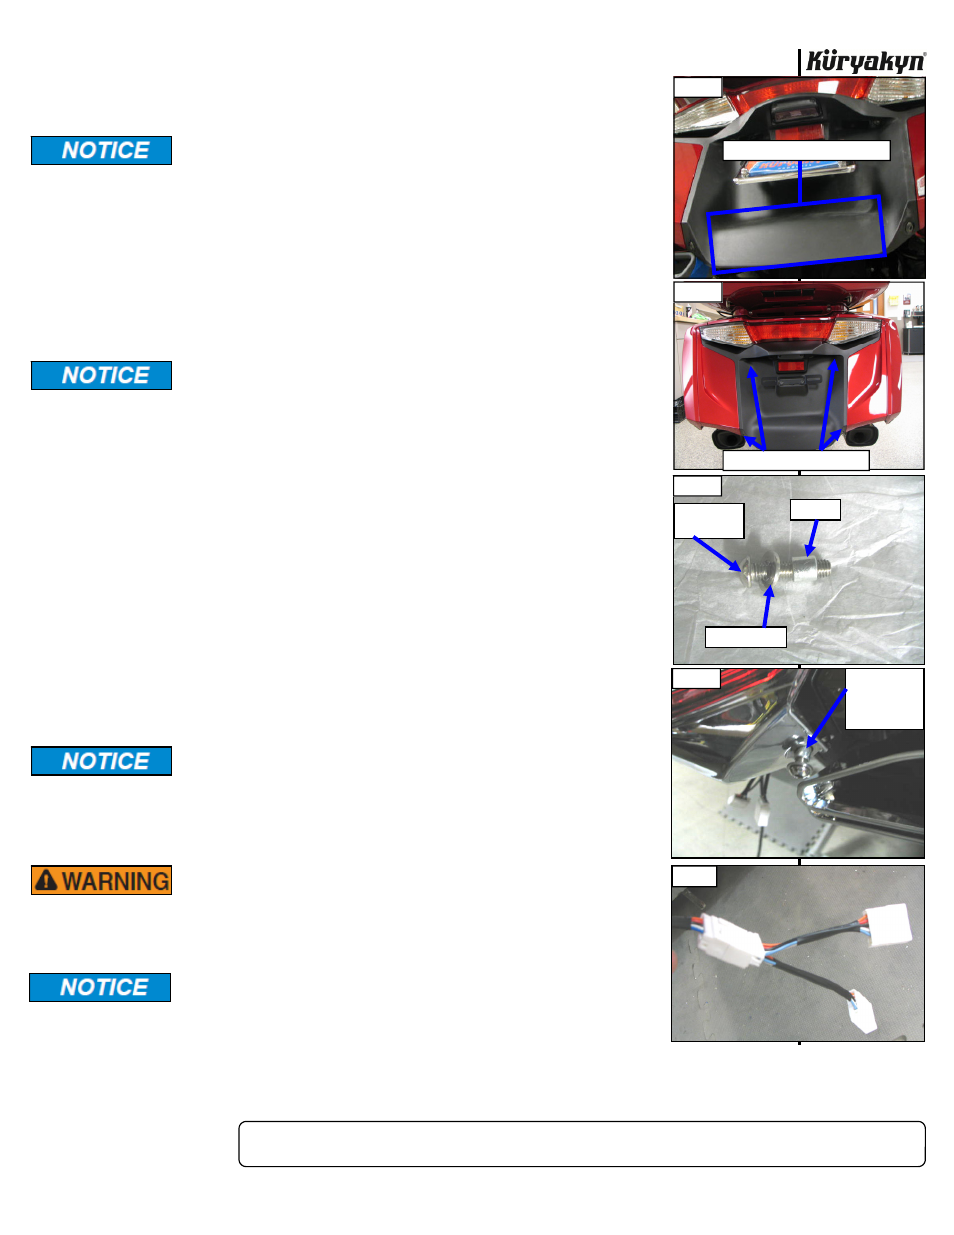
STEP 3
Remove the four fasteners securing the rear fender panel to the motorcycle. Set
these aside, the top two will be reused. PIC 2 Remove the fender panel.
Küryakyn recommends the use of dielectric grease on electrical
connections.
STEP 4
Please refer to the instructions for P/N 3230: If you have an open six pin
connector on the Plug and Play Harness (P/N 3230), apply some of the included
dielectric grease and connect the six pin connector from the Rear Fender Tip
to it. If you do not have an open connector, disconnect one of the six pin sets,
apply some of the included dielectric grease to all connectors and connect the
included Double “Y” connector in line. PIC 5 Connect the existing accessory and
the Rear Fender Tip to the new Double “Y” connector. Use the included cable ties
to
secure
the
harness out of harms way.
Secure all wiring away from any moving parts, pinch points or
extreme heat. Küryakyn WILL NOT issue a warranty on any electrical
component that fails due to pinched, crimped, broken, abraded,
melted or frayed wires.
STEP 5
Install the rear fender panel to the motorcycle using the top two fasteners from
Step 3.
STEP 6
Rub the adhesive backing with the back of your fingernail to activate the adhesive.
Remove the backing. Attach the Rear Fender Trim to the bottom of the rear fender
panel by placing one of the included flat washers, then a spacer over the threads
of each of the included M6 button head cap screws. PIC 3 Then, inserting them
through the Rear Fender Trim, thread them into the boss on the motorcycle. PIC 4
Make sure the spacer goes into the recessed hole in the rear fender panel before
tightening the cap screw. Tighten securely, but DO NOT OVER TIGHTEN these.
Press the top of the Trim firmly for one minute to attach the adhesive. Full
bonding will occur in 24 hours.
NOTE:
The adhesive tape on the Rear Fender Accent is used as a buffer, it is not
meant to completely secure the Accent to the fender panel.
This Rear Fender Accent will fit with a trailer hitch, but check all
clearances when connecting the trailer to the motorcycle.
STEP 8
Test all lights for proper function.
ENSURE PROPER LIGHT OPERATION BEFORE RIDING THE
MOTORCYCLE. VISIBILITY IS A MAJOR CONCERN FOR
MOTORCYCLISTS. A LIGHT MALFUNCTION COULD RESULT IN
DEATH OR SERIOUS INJURY.
It is the installer’s responsibility to ensure that all of the fasteners
(including pre-assembled) are tightened before operation of the
motorcycle. Küryakyn will not issue a warranty on components lost
due to improper installation. Periodic maintenance may be required.
Ride On!
L.E.D. REAR FENDER TIP
INSTALLATION
PIC 1
PIC 2
THOROUGHLY CLEAN THIS AREA
REMOVE THESE FASTENERS
PIC 4
PIC 3
FLAT WASHER
SPACER
M6 BUTTON
CAP SCREW
M6 BUTTON
CAP SCREW
WASHER AND
SPACER
PIC 5