Ride on, Fork brace gen 2, Installation – Kuryakyn 7349 FORK BRACE GEN 2 for GL 1800 User Manual
Page 2
PAGE
2
STEP 3
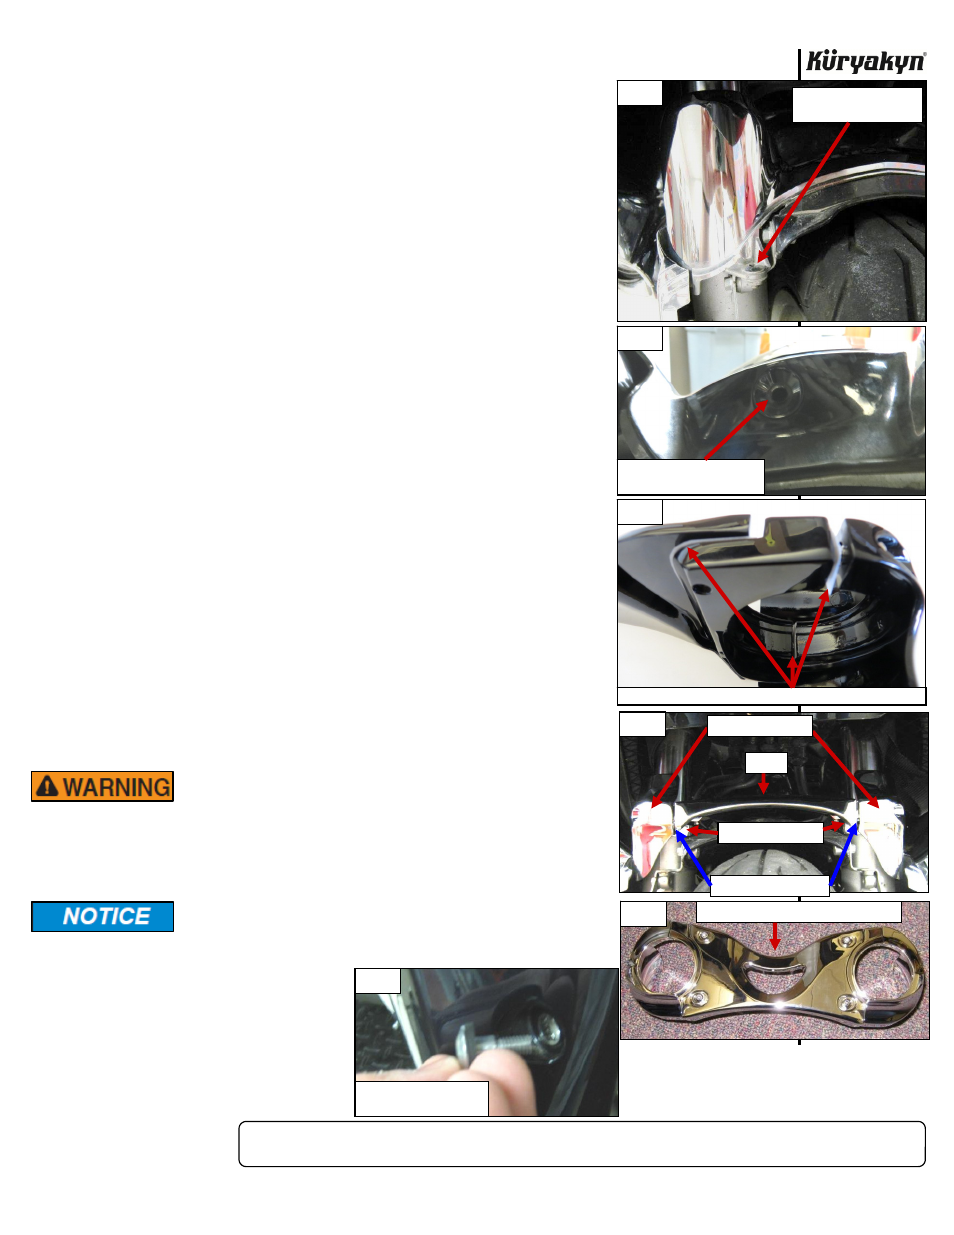
Remove the stock chrome fork cover. Remove the two front screws (PIC 2)and dislodge the plastic
dart located on the backside of the center of the stock cover. PIC 3 The
stock fork cover will not be reused.
NOTE:
There are plastic paint protectors between the clamp halves on
both sides of the center portion and between the center portion
and the inner clamps that should be removed and discarded
before assembling the Fork Brace to the motorcycle. PIC 4
STEP 4
Remove both ends from the new Fork Brace by removing the socket head
cap screws from the end.
NOTE:
The fork brace is marked "R" and "L". Make certain these marks
are on the correct side (R-throttle side, L-clutch side) during
installation. The dust skirts will be located on the front of the
brace
when
installed.
PIC
5
STEP 5
Remove one of the inner clamp halves from the center portion of the Fork
Brace by removing the button socket cap screws and washers. This allows
proper clearance for fitment between the forks.
NOTE:
The indent in the new Fork Brace should be towards the backside
of the forks. PIC 6
STEP 6
Once the center portion is positioned between the forks, reinstall the
inner clamp half with the hardware removed in Step 5, and leave it loose.
STEP 7
Loosely fasten the outer clamps/dust skirts to the fork brace.
STEP 8
Tighten the outer clamps/dust skirts first, working from the outside to the
center. Tighten the center bridge of the fork brace so there is an even
sized gap on each side. PIC 5
STEP 9
Reattach the front fender to the bike. Ensure the longer bolt is utilized in
the bottom hole. PIC 1 and PIC 7
STEP 10
Tighten all fasteners securely.
STEP 11
Move your forks up and down a few times to test for obstructions with the
new fork brace. If you experience a clearance or binding issue, make
adjustments. Tighten all fasteners after adjusting.
ENSURE PROPER SUSPENSION OPERATION AND FORK
BRACE CLEARANCE BEFORE RIDING THE
MOTORCYCLE. INTERFERENCE BETWEEN THE FORK
BRACE AND ANY COMPONENT ON THE MOTORCYCLE
MAY CAUSE LOSS OF CONTROL RESULTING IN
SERIOUS INJURY OR DEATH.
It is the installer’s responsibility to ensure that all of the
fasteners (including pre-assembled) are tightened before
operation of the motorcycle. Küryakyn will not provide
warranty coverage on products or components lost due to
improper installation or
lack of maintenance.
Periodic inspection and
maintenance are
required on all
fasteners.
Ride On!
FORK BRACE GEN 2
INSTALLATION
PIC 6
PIC 2
REMOVE THIS FASTENER
ON BOTH SIDES
PIC 3
REMOVE PLASTIC DART TO
REMOVE STOCK COVER
PIC 5
INNER CLAMP HALF
BRACE
GAP SHOULD BE EVEN
INDENT TOWARDS BACKSIDE OF FORKS
PIC 7
LONGER FASTENER GOES
IN BOTTOM HOLE
OUTER CLAMP HALF
PIC 4
REMOVE PLASTIC PAINT PROTECTORS BEFORE ASSEMBLY