Ride on, Trident brake pedal, Installation – Kuryakyn 4077 TRIDENT WIDE BRAKE PEDAL for GL 1800 User Manual
Page 2
PAGE
2
NOTE:
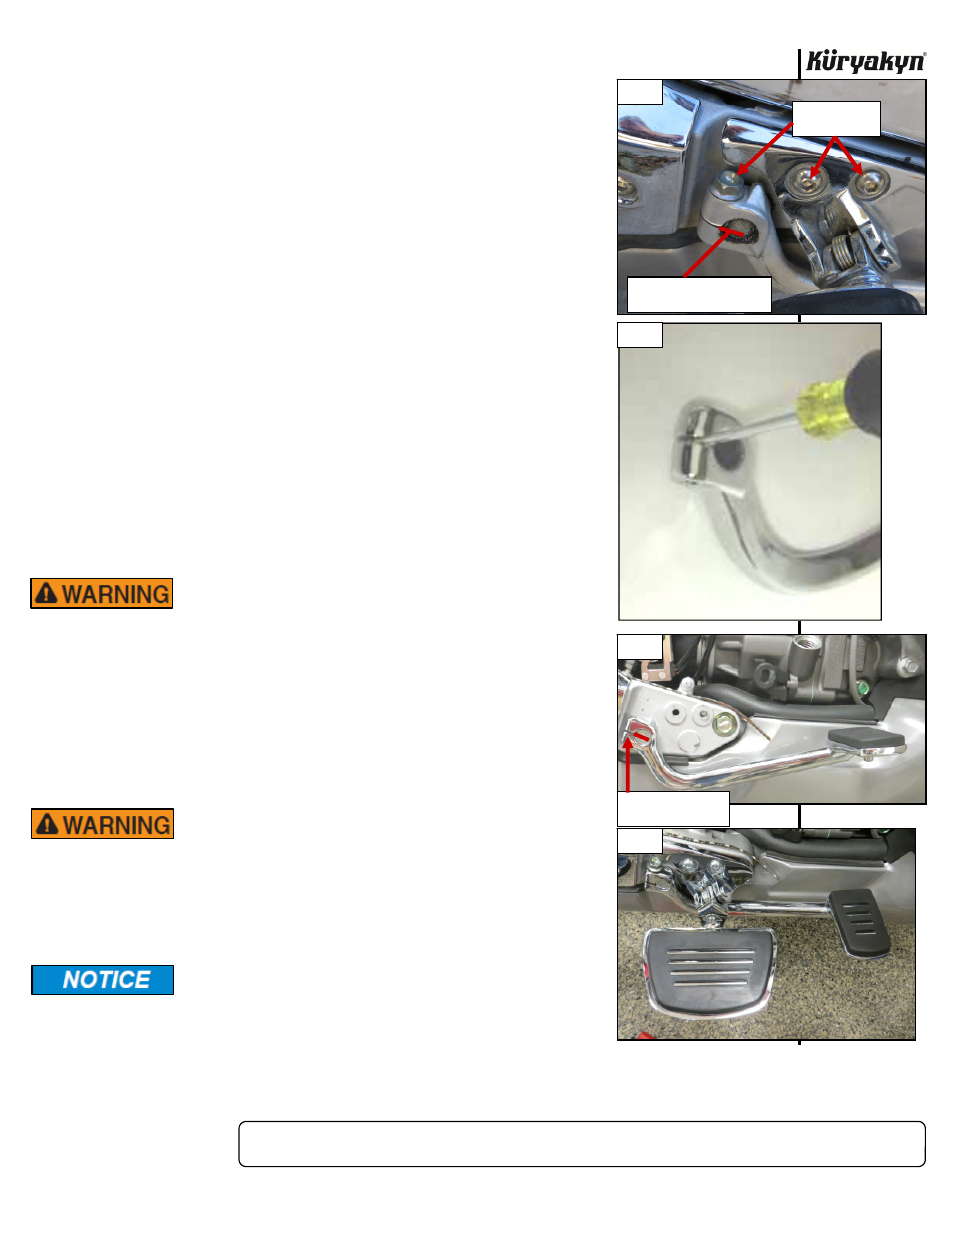
Marking a line on the splined brake shaft that lines up with the split in the brake arm
before beginning will give you a starting point for placement of
the new Trident Brake Pedal. PIC 1
STEP 2
Remove the two hex fasteners that secure the footrest mount on the
brake side. Remove the mount. Loosen the pinch bolt on the stock brake
lever. PIC 1 Set these aside, they will be reused.
STEP 3
Remove the stock brake lever from its splined mount. If this is difficult, it
may help to carefully wedge a screwdriver in the pinch slot where the
pinch bolt was removed. PIC 1 and PIC 2
STEP 4
Line up the seam in the new Trident Brake Pedal with
the mark, and
install the new lever to the brake shaft. PIC 3 Install the new lever in the
same orientation as the original.
NOTE:
It may be necessary to reach in behind the splined brake control
shaft with your finger, or a long screwdriver and hold the shaft in
place while installing the new brake lever.
STEP 5
Sit on the bike and confirm that the new lever is positioned to your liking.
If not, remove it and rotate it on the splines by one or two teeth and
reinstall. Secure the lever in place with the stock pinch bolt (Anti-seize
should be applied to these threads.) removed in Step 2.
ENSURE THE NEW BRAKE PEDAL IS POSITIONED TO
ALLOW FULL APPLICATION OF THE BRAKES WHEN
NEEDED. FAILURE TO PROPERLY POSITION THE
BRAKE PEDAL MAY CAUSE LOSS OF CONTROL
RESULTING IN SERIOUS INJURY OR DEATH.
STEP 6
Replace the footrest mount that was removed in Step 2 with the removed
fasteners. PIC 4 Place a drop of Blue Loctite on the threads of each
fastener
and
torque to 20 FT/LBS.
IT IS THE INSTALLERS RESPONSIBILITY TO TEST THE
TRIDENT BRAKE PEDAL WITH CHROME ARM FOR
PROPER FUNCTION BEFORE OPERATING THE
MOTORCYCLE. IMPROPER BRAKE PEDAL/ARM
FUNCTION MAY CAUSE LOSS OF CONTROL RESULTING
IN SERIOUS INJURY OR DEATH.
It is the installer’s responsibility to ensure that all of the
fasteners (including pre-assembled) are tightened before
operation of the motorcycle. Küryakyn will not provide
warranty coverage on products or components lost due to
improper installation or lack of maintenance. Periodic
inspection and maintenance are required on all fasteners.
Ride On!
TRIDENT
BRAKE
PEDAL
INSTALLATION
REMOVE THESE
FASTENERS
PIC 1
PIC 2
SCRIBE A LINE FROM SPLIT
ON BRAKE SHAFT
LINE UP SEAM WITH
SCRIBE MARK
PIC 3
PIC 4