Fairing scoops with white running lights, Install the wiring harnesses, Installation – Kuryakyn 3903 FAIRING SCOOPS with WHITE RUNNING LIGHTS User Manual
Page 3
PAGE
3
INSTALL THE WIRING HARNESSES:
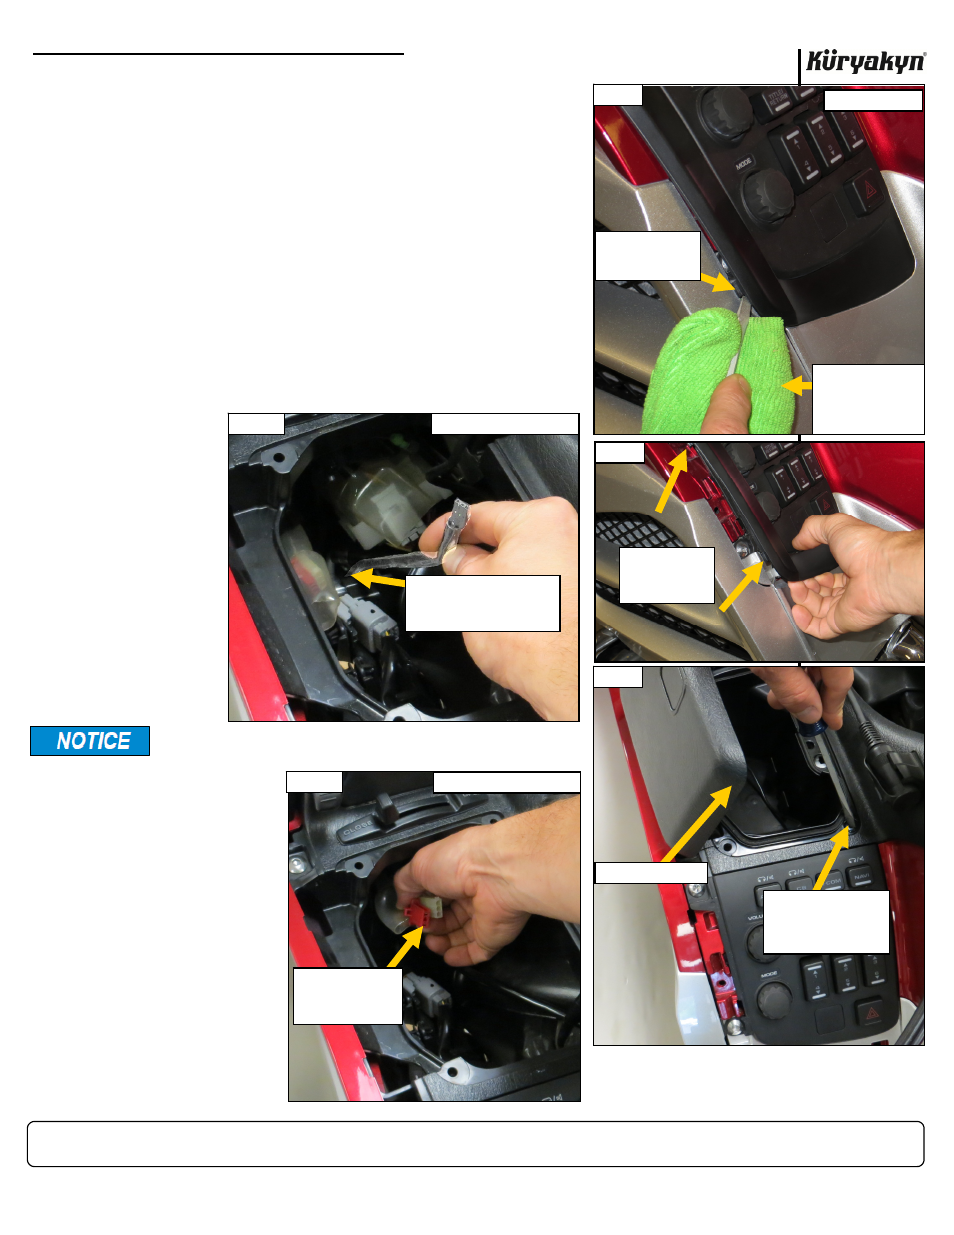
STEP 9
Use a small flat blade screwdriver to CAREFULLY pry the edge of the
clutch-side fairing trim up as shown in PIC 5. Start at the bottom side
as shown in PIC 5. Making your way up the side, gently pull up on the
trim to release the tabs from the fairing. PIC 6 The bottom two tabs
may take considerable force to release. Be Patient and Careful.
STEP 10
Open the side compartment. PIC 7 Use the screwdriver to push in the
center of the four pop rivets. Pull the pop rivets straight out and set
them aside for later use.
STEP 11
Remove the side compartment and set it aside.
STEP 12
Looking into the side-compartment area, you should be able to see
through to the front fender area. Route the double connector-side of
the included Long Adapter Harness through the inside the fairing as
shown in PIC 8. Aim for the front fender area.
STEP 13
Locate
the
RED
OEM
connector in
the clear
plastic boot
shown in
PIC 9.
STEP 14
Apply some of the
included dielectric
grease to the open
ends of the OEM
RED
connector and the
included “Y” Wire
Harness.
FAIRING SCOOPS with WHITE RUNNING LIGHTS
INSTALLATION
PRY UP TO RE-
LEASE THE TABS
FROM THE FAIRING
PIC 5
CLUTCH SIDE
PIC 6
START AT THE
BOTTOM AND
PRY UP TO RE-
LEASE THE TABS
-cont.-
Kuryakyn recommends the use of dielectric grease on
ALL electrical connections.
PUT A SOFT CLOTH
UNDERNEATH THE
SCREWDRIVER TO
PROTECT THE FAIR-
ING
PIC 7
PUSH IN THE CENTER
OF THE FOUR POP
RIVETS THEN PULL
THEM STRAIGHT OUT
SIDE-COMPARTMENT
ROUTE LONG ADAPTER PLUG
THROUGH THE INSIDE OF
THE FAIRING TO THE FRONT
FENDER AREA
PIC 8
SIDE-COMPARTMENT AREA
PIC 9
LOCATE THE
RED
CONNECTOR IN THE
CLEAR PLASTIC
BOOT
SIDE-COMPARTMENT AREA