Ride on, Pro hypercharger, Installation – Kuryakyn 9423 HYPERCHARGER for YAMAHA User Manual
Page 4
PAGE
4
STEP 9
Loosen the clamps securing the stock rubber elbows to the carburetors and air box. Gently wiggle
the air box to ensure that the rubber intake duct is fully seated on the air box inlet
(removing the air box lid makes it much easier to see if it is on completely). Once
everything is situated and comfortably in place, tighten the clamp on the rubber
intake duct first and then tighten the clamps on the stock rubber elbows. Replace
the air box lid.
STEP 10
Wet the radius portion of the intake duct with soapy water solution and slide the
back half of the Hypercharger into place on the intake assembly. It should be
between the two rubber flanges on the intake duct.
STEP 11
Install the 5/16” Barb x 1/8” NPT Right Angle Fitting in the back of the
Hypercharger.
STEP 12
Using a hex wrench, remove the round trap door from the side of the
Hypercharger. Using the 1/4”–20 x 5/8” socket heads and flanged nuts, bolt the
Hypercharger into place. See PIC.6. It is helpful to fold a portion of the radius back
while performing this procedure. Replace the trap door.
STEP 13
Replace the front cover of the Hypercharger in reverse manner as it was removed
in
STEP
10.
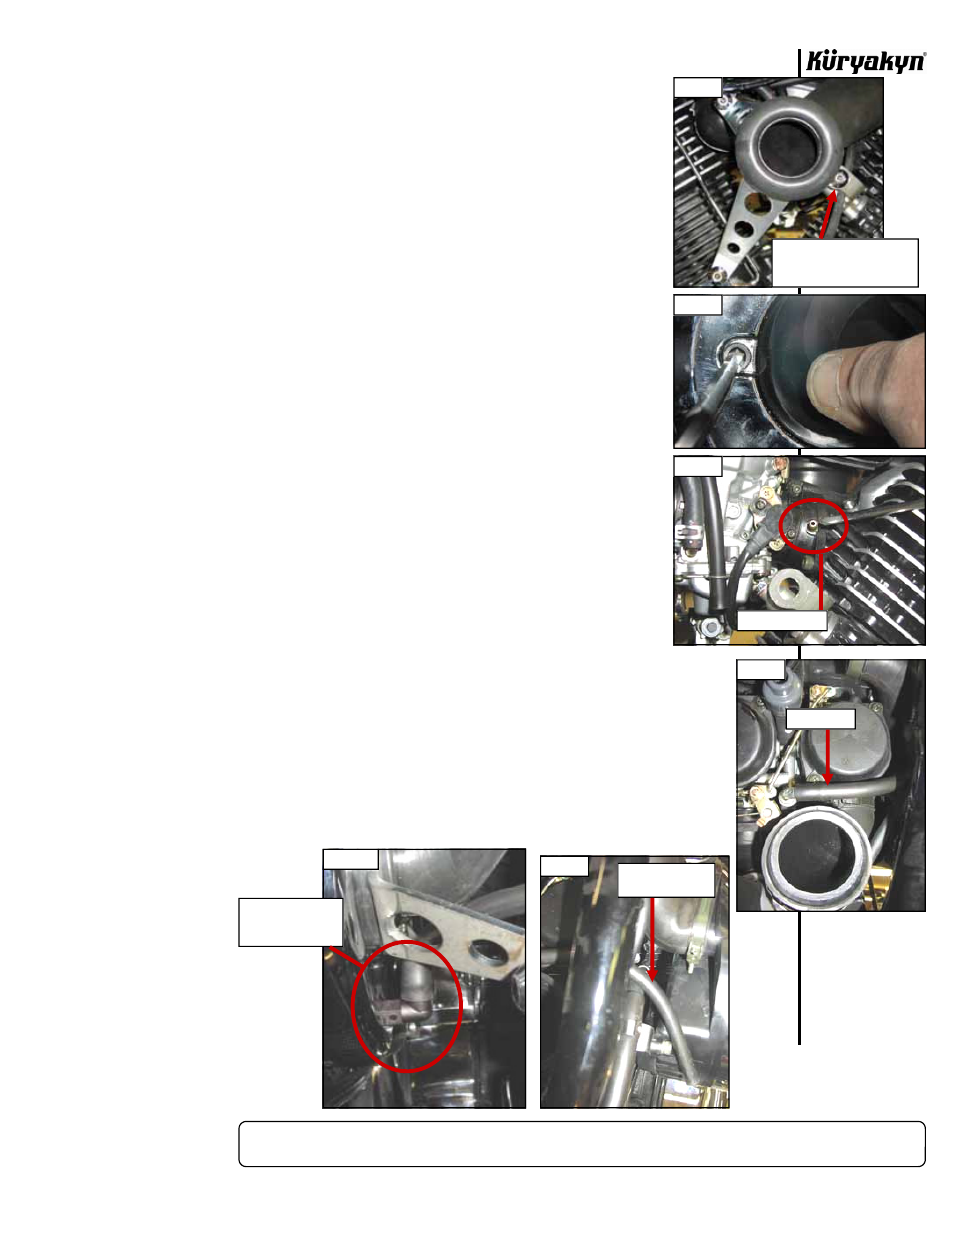
STEP 14
See PIC.7. This is the vacuum nipple in the front carb. Connect the supplied
vacuum hose to this nipple, and connect the remaining end to the vacuum nipple
on the bottom of the Hypercharger.
STEP 15
IMPORTANT
See PIC.8, PIC.9, and PIC.10. This is the float bowl vent hose.
Connect this hose to the black right angle fitting on the back of the Hypercharger.
STEP 16
Replace the fuel tank and re-connect the positive battery cable, re-install seats.
STEP 17
Double check the tightness of all related fasteners, check for hose
clearance and check throttle for correct operation, making sure it returns
properly, before starting the bike.
ATTENTION!
It is the installer’s responsibility to ensure that all of the fasteners
(including
preassembled)
are
tightened before operation of the motorcycle.
Küryakyn will not warranty components lost due to improper installation. Periodic
maintenance
may
be
required.
ATTENTION!
Some of our high performance air cleaners extend beyond the stock/OEM unit to
achieve smoother air flow and better performance. Riding position may be
affected.
Ride On!
PRO
HYPERCHARGER
INSTALLATION
PIC 5
PIC 6
PIC 7
PIC 8
PIC 9
PIC 10
USE REDUCER WASHER
AND M6 HEX NUT BEHIND
THIS FASTENER
VACUUM NIPPLE
VENT HOSE
ROUTE TOWARDS
REAR OF BIKE
ATTACH TO ELBOW
ON THE BACK OF
HYPERCHARGER