Ride on, Retractable passenger cruise pegs for victory, Installation – Kuryakyn 7614 RETRACTABLE PASSENGER CRUISE PEGS for VICTORY User Manual
Page 2
PAGE
2
STEP 2
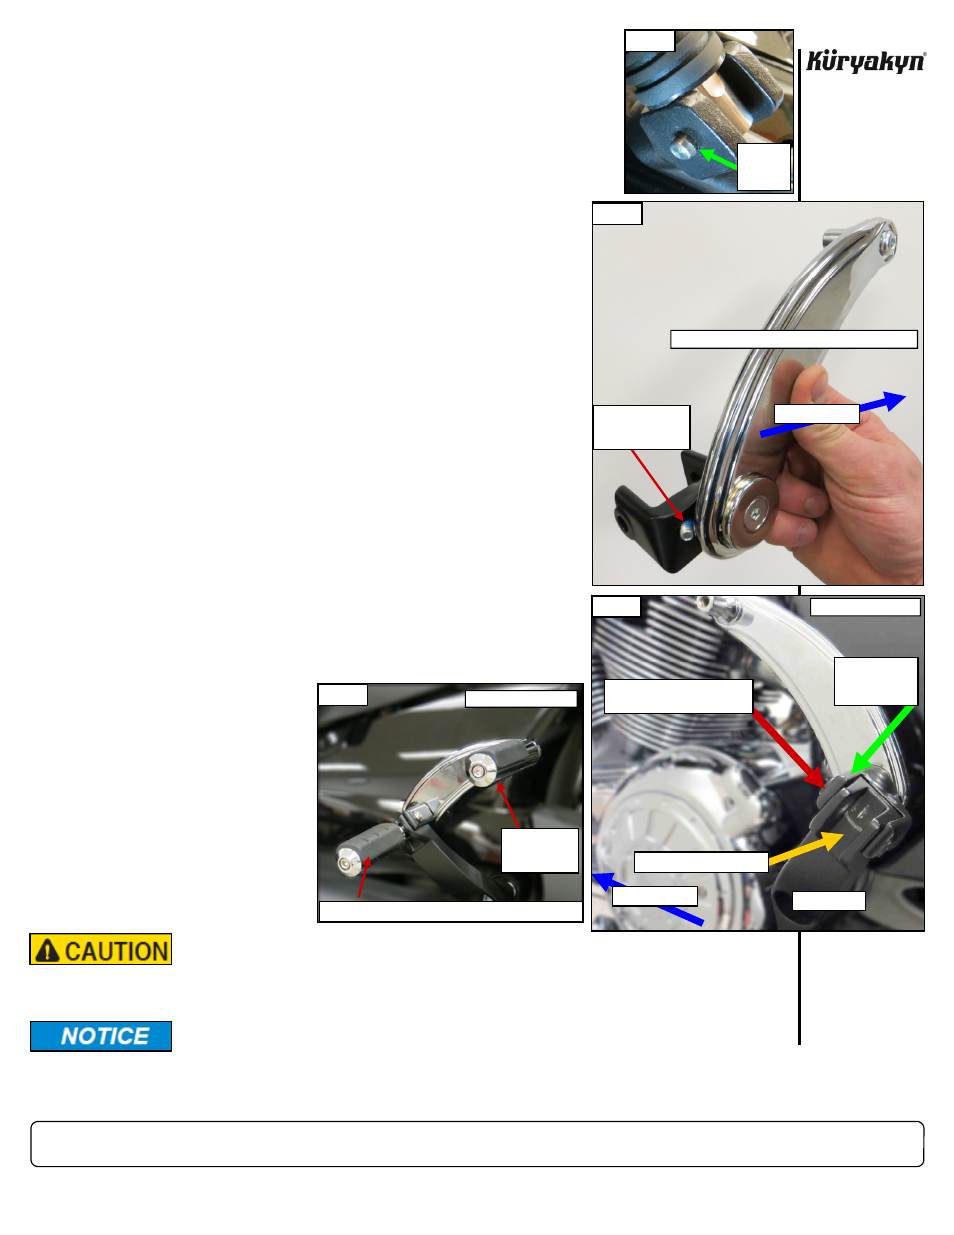
Remove the existing passenger footpegs:
Refer to PIC 1. There is a spiral spring in a groove at the end of the re-
taining pin.
Put on a pair of safety glasses. Use a small pick tool to lift the edge of the
spiral spring out of the groove. Pull the spring off, then remove pin; set
them aside they will not be reused.
Remove the footpeg.
STEP 3
Refer
to
PIC 2. Locate the included clutch-side (left) Passenger Peg
Assembly and Set Screw. Thread the Set Screw into the Peg Assem-
bly as shown.
NOTE:
If you are replacing the existing footpegs, assem-
ble the new pegs at this time; set them within
arms reach of the work area.
STEP 4
Place an included Flat Washer over an included 5/16” Screw; set it
and an included Lock Nut within arms reach of the work area.
STEP 5
Refer
to
PIC 3. Slide the Peg Assembly down over the top of the OEM
mount. Install the passenger footpeg in the OEM mount, align the
holes, then secure the Peg Assembly and passenger peg with the
Screw, Flat Washer and Lock Nut (from
STEP 4
); leave the Lock
Nut loose for now.
STEP 6
Tighten the Set Screw (from
STEP 3
) against the OEM mount to
take up any free play, then tighten the Lock Nut.
STEP 7
Repeat
STEPS 2 through 6
for the other side.
STEP 8
Refer
to
PIC 4. Install the included Extended Trident ISO Pegs on the
Peg Assemblies. Leave the screws loose for now.
NOTE:
The Extended Trident ISO Pegs are NOT side-
specific.
STEP 9
Push the Retractable Arms
all the way forward and
adjust the footpeg-rubber
alignment. Tighten the
screws.
STEP 10
Ensure that the footpegs
do not interfere with the
proper operation of the
bike BEFORE operating.
RETRACTABLE PASSENGER CRUISE PEGS for VICTORY
INSTALLATION
CLUTCH-SIDE (LEFT) PASSENGER PEG ASSEMBLY
FRONT OF BIKE
PIC 2
THREAD THE SET
SCREW INTO THE
PEG ASSEMBLY
PIC 3
FRONT OF BIKE
SLIDE PEG
ASSEMBLY
OVER MOUNT
INSTALL PASSENGER PEG
SECURE WITH INCLUDED
SCREW, WASHER, AND NUT
CLUTCH-SIDE (LEFT)
OEM MOUNT
It is the end user’s responsibility to ensure that all of the fasteners
(including pre-assembled) are tightened before operation of the motorcy-
cle. Küryakyn will not provide warranty coverage on products or compo-
nents lost due to improper installation or lack of maintenance. Periodic in-
spection and maintenance are required on all fasteners.
The RETRACTABLE PASSENGER CRUISE PEGS are intended as a
footrest and are not intended to be used for mounting or dis-
mounting the motorcycle, or to support the full weight of the
passenger.
Ride On!
PIC 1
REMOVE
SPIRAL
SPRING
BRAKE-SIDE (RIGHT)
PIC 4
TRIDENT ISO PASSENGER PEG (SOLD SEPARATELY)
EXTENDED
TRIDENT ISO
PEG